Preface Thank you for your purchase of the HYT TC-500 radio - the choice for professionals. This easy-to-use radio will deliver you secure, instant and reliable communications at peak efficiency. Please read this manual carefully before use. The information presented herein will help you to derive maximum performance from your radio.
Safety and General Information ............................................................................................... 2 Product Inspection ...................................................................................................................... 4 Battery Information ...................................................................................................................... 4 Antenna...............................................................................................
◇ Do not charge your battery in a potentially explosive atmosphere. ◇ Do not use any portable radio that has a damaged antenna. If a damaged antenna comes into contact with your skin, a minor burn can result. ◇ This equipment should be serviced by qualified technicians only. ◇ To avoid possible interference with blasting operations, turn off your radio when you are near electrical blasting caps.
Product Inspection Thank you for your use of HYT portable two-way radio. Before use, you are recommended to inspect the product as follows. First check the shipping carton for any signs of damage. If any damage has occurred, please contact your dealer immediately. Confirm the supplied product against the packing slip to assure accuracy. Available Accessories Item Qty.
Caution: 1. To avoid risk of personal injury, do not dispose of batteries in a fire! 2. Dispose of batteries according to local regulations (e.g. recycling). Do not dispose as household waste. 3. Never attempt to disassemble the battery. 4. All batteries can cause property damage and/or bodily injury such as burns if conductive materials such as jewelry, keys, or beaded chains touch exposed terminals. The conductive material may complete an electrical circuit (short circuit) and become quite hot.
2. Recharge a battery after several months’ storage (Ni-MH batteries: 3 months), to avoid reducing battery capacity due to over-discharge. 3. When storing your battery, keep it in a cool, dry place under room temperature. Charging the Battery Use only the charger specified by the manufacturer. The charger’s LED indicates the charging progress.
1. Plug the power cord into the adapter. 2. Plug the DC connector of the adapter into the DC socket on the back of the charger. 3. Place the radio with the battery attached, or the battery alone, in the charger. 4. Make sure the battery is in well contact with the charging terminals. The charging process initiates when the red LED lights. 5. The greed LED lights about 3 hours later indicating the battery is fully charged. Then remove the radio with the battery attached or the battery alone from the charger.
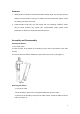
Antenna 1. Stubby antenna is ideal for communication within limited range. Thin and long antenna optimizes communication coverage, its flexible and soft characteristic makes it ideal for wearing your radio on the belt. 2. Communication range may vary with terrain and your operating conditions. Rainy days or forest locations may narrow your communication range, please make preparation in advance to avoid potential inconvenience. Assembly and Disassembly Attaching the Battery 1. Turn off the radio. 2.
Figure 2 Attaching the Antenna 1. Align the threaded end of the antenna with the radio’s antenna connector. 2. Turn the antenna clockwise to tighten. (See figure 3) Removing the Antenna 1. Turn the antenna counter-clockwise until you can remove it. (See figure 3) Remove Attach Figure 3 Attaching the Belt Clip 1. Align the grooves of the belt clip with those of the battery. 2. Press the belt clip down until a click is heard.
Figure 4 Removing the Belt Clip 1. Pull the belt clip tab away from the battery. 2. Slide the belt clip upwards to remove it. (See figure 5) Figure 5 External Earpiece (Optional) Remove the earpiece cover and insert the earpiece into the earpiece jack.
Getting Started 1. Antenna 2. LED indicator The light will glow red during transmission. The light will glow green during receiving. The light flashes red when the battery voltage is low. 3. Channel selector knob 4. Power/Volume control knob Rotate the Power/Volume Knob clockwise until a “click” is heard to turn the radio on, fully counter clockwise until a “click” is heard to turn the radio off. When the radio is on, turn the knob to adjust volume. 5.
Remove the jack cover and insert an accessory plug or programming cable into the jack to programme the radio via programming software. 10. Battery 11. Belt clip Used to clip radio on your belt. 12. Battery latch Used to fasten and remove the battery. 13. Charging connectors Connect the charging connectors with that on the charger to begin charging. Basic Operations 1.
dealer) elapses, even if you have released the PTT key. TOT Rekey Time The feature is used to set the duration until transmission is allowed after returning to receive by TOT. When enabled, transmission will be prohibited until preset time elapses (programmable by your dealer). TOT Alert Time When this feature (programmable by your dealer) is enabled, the radio will sound an alert at the preset time. Transmission will be prohibited by the TOT after this time.
CTCSS & CDCSS CTCSS/CDCSS blocks unwanted calls from other parties using the same channel. When CTCSS/CDCSS is set, the user will only receive the calls from other units on the same channel with the same CTCSS/CDCSS. The dealer can preset CTCSS/CDCSS signaling on all or just certain channels. Note: Although using CTCSS/CDCSS enables you to avoid hearing unwanted calls, it does not mean your calls will be private.
Troubleshooting Guide Symptom Solution a. The battery is run out. Please recharge the battery Cannot power on the radio. or replace it with a fresh one. b. The battery is not properly installed. Please remove and reinstall the battery. The operation time will not increase even though the battery is properly charged. a. The battery life cycle is over, please replace with a new one. b. The battery is not fully charged. Make sure that the battery is removed after LED indicator has indicated green.