QSI6170 Bruksanvisning Spis
Innehåll Tack för att du valt en kvalitetsprodukt från Electrolux. För att säkerställa bästa prestanda hos produkten ber vi dig att noga läsa igenom denna bruksanvisning. Du kan då navigera genom alla procedurer på ett effektivt sätt. Spara bruksanvisningen på en säker plats så att du har den till hands om du behöver studera något avsnitt igen. Se också till att bruksanvisningen medföljer produkten om den lämnas över till en ny ägare. Vi önskar dig lycka till och mycket nöje med din nya hushållsapparat.
Säkerhetsinstruktioner Rengöring av ugnen Katalysemalj Den släta emaljen Ugnsluckan Ugnsluckans glas Tillbehör Non-stick behandlade tillbehör 30 31 31 31 32 33 34 Ugnsstegar Ugnsbelysning Förvaringslåda 3 34 35 36 Vad gör jag om... Tekniska data 36 37 Miljöinformation 38 Med reservation för ändringar Säkerhetsinstruktioner Viktiga säkerhetsinstruktioner! Läs noga igenom denna bruksanvisning och spara den som referens! Elektrisk säkerhet • Denna spis får bara anslutas av en behörig elektriker.
Säkerhetsinstruktioner Säkerhet under användning • Denna spis är avsedd att användas för matlagning, grillning och bakning i hemmet. • Var försiktig när du ansluter elektriska apparater till eluttag i närheten. Se till att spisens kabel inte kommer i kläm när du installerar eller flyttar spisen. • Varning: Risk för brännskador! Spisen blir het när den används. Vidrör inte hällen eller ugnsutrymmet under användning.
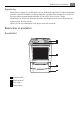
Beskrivning av produkten 5 Uppackning Kontrollera att spisen är i perfekt skick och inte skadad på något sätt. Du måste omedelbart informera din återförsäljare om någon skada har uppstått under transporten. Vid direktleverans måste transportskador anmälas till Electrolux Service inom 7 dagar. Emballaget kan återvinnas. Kontakta de lokala myndigheterna för mer information om ortens system för återvinning. Glöm ej att ta bort emballaget inuti ugnen innan den används.
Beskrivning av produkten Manöverpanel översikt 1 9 1 2 3 4 5 6 7 8 9 8 2 3 4 5 6 7 Lås Indikatorer för kokzoner/Timerfunktion Timerdisplay Display Val av värmeinställning Elektrisk effekt Timer Stopp och Start Strömbrytare På/Av med nätindikator Häll översikt 1 2 3 4 Ø 145 mm Ø 180 mm Ø 145 mm Ø 210 mm 1 2 4 3
Beskrivning av produkten Ugnens utrustning 1 2 3 4 5 6 7 8 9 10 Övre värmeelement Värmeelement Ugnsbelysning Anslutning för matlagningstermometer Fettfilter Ugnsbelysning Ringelement Undervärme Ugnsstegar, löstagbara Ugnsnivåer 1 10 2 3 4 5 6 5 4 3 2 1 7 8 9 Tillbehör Rengör tillbehören innan du använder dem första gången. Rengör plåtar, långpanna och övriga delar med varmt vatten och diskmedel. Skölj och torka torrt.
Beskrivning av produkten För att se den exakta temperaturen vid tillagning av köttstycken. Teleskopstegar Kontrollera att tippskyddet är monterat. Bakplåtsskenorna består av två skenor som är utdragbara. Plåten, långpannan och gallret läggs ovanpå skenorna. För att hålla plåten på plats finns en styrpinne (se bild). Användning av de utdragbara bakplåtsskenorna underlättar matlagningen. När du t.ex. ska ösa en stek eller röra i pommes frites drar du enkelt ut långpannan på skenorna.
Före första användning 9 Före första användning Inställning och ändring av klockan Ugnen fungerar bara med inställd klocka. När strömmen till spisen är ansluten blinkar en klocksymbol till dess du har ställt in tiden på klockan. 1. Tryck på eller för att ställa in rätt tid. 2. För att ändra en redan inställd tid, tryck På/Av . Tryck sedan på tills blinkar. Följ anvisningen i alternativ 1. Efter cirka 5 sekunder slutar klockan att blinka och tiden visas på displayen. Spisen är nu klar att användas.
Användning av induktionshällen 8. Rengör ugnen, luckan och ugnsstegarna med varmt vatten och handdiskmedel. Torka av ugnen. Den första tiden då ugnen används kan det fortfarande förekomma lukt. Det påverkar inte maten på något sätt och är inte hälsovådligt. Luckspärr Luckspärren gör det svårare för barn att öppna luckan. Spärren är aktiverad vid leverans, men den kan avaktiveras vid behov. Att öppna luckan För spärren åt höger när du vill öppna luckan.
Att använda touchpanelen 11 Zonerna delar på värmeeffekten OBSERVERA att när de två vänstra eller de två högra kokzonerna kopplas in samtidigt delar respektive par på uppvärmningseffekten. Det märks genom ett klickljud från hällen samt att kokningen eventuellt ökar och minskar. Orsaken är att de delar på samma energikälla. För att kunna utnyttja den maximala toppeffekten (booster) på en zon, måste effekten på den andra zonen reduceras (sker automatiskt).
Att använda touchpanelen Att stänga av och slå på spisen Manöverpanel Display Indikator Att slå på berör i 2 sekunder / Indikatorn tänds Att stänga av berör i 1 sekund / ingen slocknar Efter påslagning måste ett värmeläge eller en funktion ställas in inom 10 sekunder, annars stängs spisen av automatiskt. Inställning av värmeläge Manöverpanel Indikator Att öka Berör till Att minska Berör till Att stänga av Berör Varmhållningsläget och samtidigt ligger mellan och .
Att använda touchpanelen 13 AUTOMAX approx. minutes 2. Välj sedan önskad inställning för vidarekokning/stekning. Efter cirka 5 sekunder tänds ett A i indikeringsfältet. Kokzonens display visar ett A. Det innebär att vär9 mezonen går på maximal värme under en viss tid 8 beroende på vilket värmeläge som valts. Se diag7 rammet. 6 När tiden löper ut sker en automatisk omkoppling 5 till det inställda värdet och bokstaven A visas inte längre.
Att använda touchpanelen Stekning med Automax Zon Entrecôte Fläskkotletter Köttbullar 2 Pannkakor Potatis, rå Ägg Inställning 2 7-8 4 7-8 2 6 4 6 4 6-7 4 6-7 2 7 4 7 2 6 4 6 2 6-7 4 6-7 Att låsa/låsa upp manöverpanelen Manöverpanelen, med undantag för På/Av sensorfältet, kan när som helst låsas för att förhindra ändring av inställningarna.
Att använda touchpanelen Steg Manöverpanel 2 berör 3. 15 Display/signal Indikatorn tänds i 4 sekunder Slå av spisen. Barnlåset är avaktiverat. Barnlåset kan bara aktiveras/avaktiveras om inget värmeläge är inställt. Koppla från barnlåset under en matlagningssession; det förblir aktiverat efteråt. Koppla från barnlåset tillfälligt Steg Manöverpanel 1. Display / Signal Slå på spisen 2. berör Indikatorn tänds i 4 sekunder Tills spisen stängs av nästa gång kan den användas på normalt sätt.
Att använda touchpanelen Om indikatorn blinkar långsammare kan inställningen göras eller ändras. Om fler timerfunktioner är inställda visas inom några få sekunder den funktion som har den kortaste kvarvarande tiden på displayen och motsvarande indikator blinkar. Att ställa klockan Steg Manöverpanel 1. Välj 2. Berör för kokzonen eller Indikator Den valda kokzonens indikator blinkar 00 till 99 minuter Efter några sekunder blinkar indikatorn långsammare. Tiden är inställd. Tiden räknas ner.
Användning av ugnen 17 Säkerhetsavstängning av kokzonerna Om någon av kokzonerna inte stängs av efter en viss tid, eller om värmeinställningen inte ändras, stängs denna kokzon av automatiskt. Restvärme visas med ("hot") i displayen för den aktuella kokzonen.
Användning av ugnen Praktisk användning VARNING Lägg aldrig aluminiumfolie, en långpanna eller en plåt direkt på ugnens botten. Om undervärmen blockeras kan emaljen skadas på grund av överhettning. Ugnen blir het under användning så håll barn under uppsikt. Principen för varmluft Ett ringelement runt fläkten värmer upp luften som sedan sprids genom luftkanaler i ugnens bakre vägg med hjälp av fläkten. Den varma luften cirkulerar i ugnen innan den åter sugs in genom fläktgallret.
Användning av ugnen Ugnens funktioner Användning 19 Värmeelement/ fläkt Max Grill För grillning av tunna livsmedel Grillelement och övre värmeelesom läggs i mitten på gallret och ment för rostning av bröd. Varmhållningsläge För varmhållning av maträtter. Övre och undre värmeelement. (Förinställt på 80°C) Upptining/Torkläge För upptining av frusna livsmedel.
Användning av ugnen Stäng av ugnsfunktionen eller Innan du stänger av ugnen, tryck på tills ingen ugnsfunktion visas på displayen. Stäng av ugnen Stäng av ugnen genom att trycka på knappen . Värmeindikator Uppvärmning När ugnsfunktion är vald börjar indikatorn blinka hur mycket ugnen är uppvärmd till. Avstängning När ugnsfunktionerna har stängts av tänds indikatorn för att visa att det finns restvärme i ugnen.
Användning av ugnen 21 Signalur Att ställa in en tid. En signal ljuder efter uppnådd tid. Den här funktionen har ingen inverkan på ugnen. 1. Tryck på . Klocksymbolen tänds. 2. Tryck på knappen tills blinkar. 3. Välj önskad tid med eller knapparna. Efter ca 5 sekunder visas tiden som är kvar. Sigtänds. När 90% av tiden gått hörs en naluret signal. Signalen hörs i en minut när den inställda tiden blinkar.
Användning av ugnen Koktiden tänds . När tiden når "00,00" och koktiden blinkar avges en ljudsignal i två minuter. Ugnen stängs av automatiskt. När tiden når Ugnen stängs av automatiskt. Tryck på en av knapparna för att stänga av ljudsignalen och symbolen på displayen. Stopptid Här ställer du in den tid du vill att ugnen ska stängas av. 1. Tryck på . Lampan tänds. 2. Välj ugnsfunktion och temperatur. 3. Tryck på tills Stopptid blinkar. och väljer du stopptid. Med 4. Stopptid displayen.
Användning av ugnen 23 Tryck på en av knapparna för att stänga av ljudsignalen och symbolen på displayen. Koktid och Stopptid Koktid och Stopptid kan användas samtidigt. 1. Tryck på . Lampan tänds. 2. Välj ugnsfunktion och temperatur. 3. Tryck på och välj Koktid och ställ in önskad tillagningstid (till exempel 1 timme). och välj Stopptid för att Tryck på ställa in önskad sluttid när du vill att maten ska vara klar (till exempel 14.05). 4. Koktid och Stopptid tänds på displayen.
Användning av ugnen Att aktivera klockdisplayen 1. Vid behov, stäng av spisen med På/Av knappen. 2. Tryck på Val knappen och knappen samtidigt tills displayen visas igen. Ugnens säkerhetsavstängning Om ugnen inte stängs av eller om temperaturen inte ändras efter en viss tid så stängs ugnen av automatiskt. I temperaturdisplayen visas den senast inställda temperaturen.
Användning av ugnen 25 Displayen växlar till aktuell innertemperatur. Om aktuell innertemperatur redan har visats, innan önskad innertemperatur ställknappen uppdes in, tryck då på Val repade gånger tills funktionen Matlagningstermometer blinkar och genomför inställningen. 30ºC är den lägsta temperaturen som visas på displayen. Välj ugnsfunktion och temperatur. När den önskade innertemperaturen uppnås avges en ljudsignal och ugnen stängs av. 5. Tryck på en av knapparna för att stänga av ljudsignalen. 6.
Tips, tabeller och råd Tips, tabeller och råd Bak/stektiderna är endast riktvärden.
Tips, tabeller och råd Bakresultat Möjlig orsak Åtgärd Mat/vetebrödsdegar har inte Kontrollera jästiden mot recepjäst rätt. För lång jäsning efter tets rekommendation. utkavling kan ge ett platt resultat. Mat/vetebrödsdegar ska jäsa dragfritt vid rumstemperatur. Vid ett lätt tryck på degen ska fördjupningen gå tillbaka. Mat/vetebrödsdegar och sockerkakor blir torra. För lite jäst eller bakpulver. Kontrollera i receptet att du tagit rätt mängd. För varm fett/vätskeblandning förstör jästens verkan.
Tips, tabeller och råd Typ av kött Temperatur oC Konventionell Ugnsnivå Minuter Temperatur oC Varmluft Ugnsnivå oC Fläskkött Skinkstek 170 2 90-105 80 160 2 Fläskkarré 170 2 105 85 160 2 Kotlett, revbensspjäll 175 2 90 - 165 1+4 Köttfärslimpa 170 2 60-70 75-80 160 2 - rosa i mitten 170 2 90 70 160 2 - genomstekt 170 1 105 75 160 2 Kyckling, unghö- 190 na 2 50-60 85 180 2 Kyckling/kalkonfilé 220 3 35-50 75 200 2 Kalkon, unghöna 170 eller kalv
Rengöring och vård 29 Rengöring och vård VARNING Före rengöring, låt alltid kylfläkten kyla av spisen innan den stängs av. Rengöringsprodukter Innan du använder någon rengöringsprodukt till din spis, kontrollera att den är lämplig för användning och rekommenderas av tillverkaren Rengöringsmedel som innehåller blekmedel bör inte användas eftersom dessa kan medföra att spisens ytfinish mattas. Skarpa slipmedel och skurmedel bör också undvikas.
Rengöring och vård Ta bort envisa fläckar 1. Krämbaserade rengöringsmedel kan användas för att ta bort envisa fläckar eller missfärgning. 2. Använd en plastdyna avsedd för Non-stick behandlade kastruller med krämrengöringsmedel för att ta bort envisa fläckar. Ta bort inbränd mat Vi rekommenderar bestämt att du använder en speciell skrapa för keramikhällar (med ett rakblad) för att ta bort spill på hällen, särskilt sockerlösningar, som kan orsaka permanenta skador om de inte avlägsnas. 1.
Rengöring och vård 31 Ugnsstegarna bör tas ut för att underlätta rengöring. Katalysemalj Katalysemaljen på ugnsväggar och tak är porös och har en viss självrengörande effekt. Ugnens botten består däremot av en något hårdare emalj så att du kan skrapa bort spill med t.ex. en stekspade. VARNING Ugnen blir het när den används. Håll barn under uppsikt. Smuts på emaljen bränns delvis bort när ugnen används. Om emaljen blir fläckig bränner du ur ugnen på högsta temperatur med Över/Undervärme i 30-60 minuter.
Rengöring och vård 3. Lyft av luckan Att montera luckan: 1. Ställ gångleden i dess parkeringsläge. 2. För in gångleden i spår på luckan. Tryck ner så att monteringsfjädern snäpper till. 3. Stäng ugnsluckan. Ugnsluckans glas VARNING Använd inte ugnsluckan som fotstöd. Luckan består av två delar med värmereflekterande glas för att reducera yttemperaturen. De inre glasen kan tas bort för rengöring. Rengöring mellan glasskivorna VARNING Var försiktig så att du inte skadar luckglaset.
Rengöring och vård 1. Ta tag i den övre glasskivans nedre kant och skjut mot fjädertrycket i riktning mot ugnsluckans handtag tills den är fri nedtill (1). 2. Lyft upp skivan en aning nertill och dra ut den (2). Demontering av luckans mellersta glas 1. Fatta den mellersta skivan i dess nedre ände och tryck upp mot luckhandtaget tills den är fri i underkant (1). 2 1 2. Lyft upp glasskivan en aning nedtill och dra ut den (2). 3. Rengör glasen. Montering av den mellersta glasskivan i luckan 2 1 1.
Rengöring och vård Rengör plåtar, långpanna och övriga delar med varmt vatten och diskmedel. Skölj och torka torrt. Non-stick behandlade tillbehör Dessa tillbehör har en smutsavvisande beläggning och håller länge om de sköts på rätt sätt Ljusa fläckar i beläggningen betyder inte att ytan är skadad. VARNING Lägg inte Non-stick behandlade tillbehör på en het glaskeramikhäll eftersom de kan skadas. Tillbehören tål en temperatur på upp till 250 °C. Värm dem aldrig utan mat eller bakverk.
Rengöring och vård Observera! Stavarnas avrundade ändar måste peka framåt! För att sätta tillbaks stegen på plats, lås den baktill (1) och för sedan in framkanten och tryck på plats (2). 1 2 Ugnsbelysning VARNING Risk för elektrisk chock! Innan ugnslampan byts: – – – – Stäng av ugnen. Se till att spisen är strömlös. För spisar med sladd, dra ut sladden. För andra spisar, bryt strömmen genom att stänga av den med strömbrytaren. Lägg en trasa på ugnsbotten som skydd för lampan och lampglaset.
Vad gör jag om... 2. Ta bort lampglaset med ett smalt, trubbigt föremål (t.ex. en tesked). 3. Om nödvändigt: Ersätt med ny glödlampa med E14 fattning, märkt 230-240V, 25W och 300°C. Beställ ersättningslampan från ditt lokala servicecenter (se kapitlet "Service/Kundtjänst"). 4. Sätt tillbaks skyddsglaset på plats. 5. Sätt tillbaka ugnsstegarna. Förvaringslåda VARNING Förvara inte kemikalier eller rengöringsmedel i förvaringslådan. Stå inte i förvaringslådan eller på handtaget. 1.
Tekniska data Problem 37 Åtgärd Ugnen fungerar inte Ställ in klockan Det tar lång tid att koka/steka Kontrollera att du har valt ett lämpligt kokkärl med god värmeledningsförmåga Ugnsbelysningen är ur funktion Byt ut glödlampan Luckspärren fungerar inte Aktivera låsfunktionen Matlagningstermometern fungerar inte Kontrollera att matlagningstermometern är rätt ansluten i ugnen; ta ut den och anslut den igen.
Miljöinformation Miljöinformation Symbolen på produkten eller emballaget anger att produkten inte får hanteras som hushållsavfall. Den skall i stället lämnas in på uppsamlingsplats för återvinning av el- och elektronikkomponenter. Genom att säkerställa att produkten hanteras på rätt sätt bidrar du till att förebygga eventuellt negativa miljö- och hälsoeffekter som kan uppstå om produkten kasseras som vanligt avfall.
www.electrolux.com 339615700-B-092008 För att köpa tillbehör, förbrukningsartiklar och reservdelar i vår internetbutik besök oss på: www.husqvarna.