
Operation Manual


1
3
2
4
5
1
3
2
4
5
26 – Utility Sewing
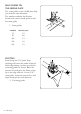
REINFORCED STRAIGHT STITCH
Machine setting
1. Stitch pattern: 1
2. Stitch width: 0 or 5
3. Stitch length: stretch
4. Thread tension: 2 – 5
5. Presser foot: Utility foot A
This stitch is stronger than regular
straight stitch, due to the fact that it is a
triple and elastic stitch.
The reinforced straight stitch can be
used for heavy stretch fabrics, for crotch
seams which are subject to considerable
strain and for topstitching in heavy
fabrics.
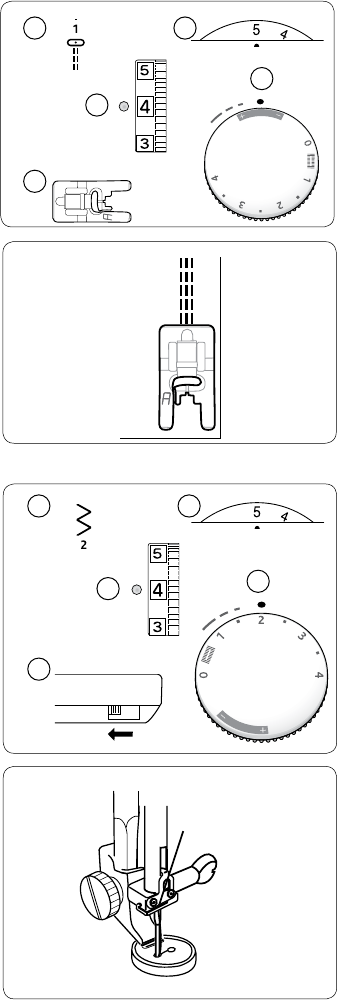
BUTTON SEWING
Machine setting:
1. Stitch: 2
2. Stitch width: Adjust as necessary
3. Stitch length: Any
4. Thread tension: 3 – 7
5. Feed teeth: Lowered
Mark the fabric where the button is to
be located. Lower the feed teeth. Place
the material under the presser foot ankle.
Place the button on marking and lower
the presser bar so that the presser foot
ankle is between the holes of the button.
Hold the thread ends to one side. Turn
the handwheel and check to be sure that
the needle goes into the holes of the
button. Sew 5-6 stitches. Set the stitch
width dial to 0 and lock the threads with
a few stitches.
Note: Do not use this technique if the button is
less than 1 cm (3/8”) in diameter.
Raise the feed teeth after button sewing.