Operator′s manual, Manuel d’utilisation Manual de instrucciones, Instruções para o uso 435 II, 435e II 440 II, 440e II Please read the operator’s manual carefully and make sure you understand the instructions before using the machine. Lire attentivement et bien assimiler le manuel d’utilisation avant d’utiliser la machine. Lea detenidamente el manual de instrucciones y asegúrese de entender su contenido antes de utilizar la máquina.
1 13 2 3 12 11 27 28 29 14 26 4 9 10 8 7 30 15 16 6 3 5 17 31 18 4 32 25 24 23 22 21 20 19 5 6 7 8 9 10 11 12 13 14 16 17 15 2 1155355-39 Rev.
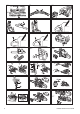
18 19 20 21 23 24 25 22 26 27 28 29 30 31 32 33 34 35 36 37 38 39 40 1155355-39 Rev.
1 42 43 44 45 46 47 48 49 51 56 2 54 50 55 52 53 A 57 58 60 61 1 59 , 62 63 64 65 66 67 4 1155355-39 Rev.
68 70 71 1 2 3 69 72 73 75 74 76 77 79 78 80 81 82 83 84 85 86 87 88 89 90 91 1 3 2 1 1 2 92 1155355-39 Rev.
93 95 96 99 100 101 102 103 104 105 106 94 98 97 107 1 108 2 111 109 110 112 113 115 116 A B 114 117 6 1155355-39 Rev.
KEY TO SYMBOLS Symbols on the machine: WARNING! Chain saws can be dangerous! Careless or incorrect use can result in serious or fatal injury to the operator or others. Please read the operator’s manual carefully and make sure you understand the instructions before using the machine. Always wear: • Approved protective helmet • Approved hearing protection • Protective goggles or a visor This product is in accordance with applicable EC directives.
CONTENTS Contents KEY TO SYMBOLS Symbols on the machine: ...................................... Symbols in the operator’s manual: ........................ CONTENTS Contents ............................................................... INTRODUCTION Dear Customer, ..................................................... WHAT IS WHAT? What is what on the chain saw? ........................... GENERAL SAFETY PRECAUTIONS Before using a new chain saw .............................. Important .......................
INTRODUCTION Dear Customer, Congratulations on your choice to buy a Husqvarna product! Husqvarna is based on a tradition that dates back to 1689, when the Swedish King Karl XI ordered the construction of a factory on the banks of the Husqvarna River, for production of muskets. The location was logical, since water power was harnessed from the Huskvarna River to create the water-powered plant.
GENERAL SAFETY PRECAUTIONS Before using a new chain saw • Please read this manual carefully. • (1) - (117) refer to figures on p. 2-6. • Check that the cutting equipment is correctly fitted and adjusted. See instructions under the heading Assembly. • Refuel and start the chain saw. See the instructions under the headings Fuel Handling and Starting and Stopping. • Do not use the chain saw until sufficient chain oil has reached the chain. See instructions under the heading Cutting equipment.
GENERAL SAFETY PRECAUTIONS Always use common sense (2) It is not possible to cover every conceivable situation you can face when using a chain saw. Always exercise care and use your common sense. Avoid all situations which you consider to be beyond your capability. If you still feel uncertain about operating procedures after reading these instructions, you should consult an expert before continuing. Do not hesitate to contact your dealer or us if you have any questions about the use of the chain saw.
GENERAL SAFETY PRECAUTIONS If you get a violent kickback while the kickback zone of the bar is farthest away from you the chain brake is designed to be activated by the inertia in the kickback direction. (7) If the kickback is less violent or the kickback zone of the bar is closer to you the chain brake will be activated manually by the movement of your left hand. • In the felling position the left hand is in a position that makes manual activation of the chain brake impossible.
GENERAL SAFETY PRECAUTIONS Muffler • The muffler is designed to keep noise levels to a minimum and to direct exhaust fumes away from the user. ! WARNING! The exhaust fumes from the engine are hot and may contain sparks which can start a fire. Never start the machine indoors or near combustible material! Cutting equipment designed to reduce kickback ! In areas with a hot, dry climate there is a high risk of fires.
GENERAL SAFETY PRECAUTIONS Saw chain General advice on adjusting depth gauge setting • • • • Chain pitch (inches) (14) Drive link width (mm/inches) (16) Number of drive links. (17) Sharpening your chain and adjusting depth gauge setting When you sharpen the cutting tooth (A) the depth gauge setting (C) will decrease. To maintain optimal cutting performance the depth gauge (B) has to be filed down to achieve the recommended depth gauge setting.
GENERAL SAFETY PRECAUTIONS 435 II, 440 II Never use waste oil! Using waste oil can be dangerous to you and damage the machine and environment. IMPORTANT! When using vegetable based saw chain oil, dismantle and clean the groove in the bar and saw chain before long-term storage. Otherwise there is a risk of the saw chain oil oxidizing, which will result in the saw chain becoming stiff and the bar tip sprocket jamming. • Loosen the bar nut that holds the clutch cover and chain brake.
GENERAL SAFETY PRECAUTIONS Needle bearing lubrication ! Both versions of sprockets have a needle bearing on the drive shaft, which has to be greased regularly (once a week). CAUTION! Use a high-quality bearing grease or engine oil. See instructions under the heading Maintenance, Needle bearing lubrication. Checking wear on cutting equipment WARNING! Most chain saw accidents happen when the chain touches the operator. Wear personal protective equipment.
ASSEMBLY Fitting the bar and chain ! WARNING! Always wear gloves, when working with the chain. 435 II, 440 II links of the chain fit correctly over the drive sprocket and that the chain is correctly located in the groove in the bar. • Tension the chain by turning the wheel down (+). The chain should be tensioned until it does not sag from the underside of the bar. (32) • The chain is correctly tensioned when it does not sag from the underside of the bar, but can still be turned easily by hand.
FUEL HANDLING Fuel Mixing ratio Note! The machine is equipped with a two-stroke engine and must always be run using a mixture of petrol and twostroke oil. It is important to accurately measure the amount of oil to be mixed to ensure that the correct mixture is obtained. When mixing small amounts of fuel, even small inaccuracies can drastically affect the ratio of the mixture. ! 1:33 (3%) with oils class JASO FB or ISO EGB formulated for air-cooled, two-stroke engines.
FUEL HANDLING Fueling ! WARNING! Taking the following precautions, will lessen the risk of fire: Do not smoke and do not place any hot objects in the vicinity of fuel. Fuel safety • Never refuel the machine while the engine is running. • Make sure there is plenty of ventilation when refuelling or mixing fuel (petrol and 2-stroke oil). • Move the machine at least 3 m from the refuelling point before starting it. • Never start the machine: 1 If you have spilt fuel or chain oil on the machine.
STARTING AND STOPPING Starting and stopping ! will have engaged a high idle, making warm starting easier. WARNING! Note the following before starting: The chain brake must be engaged when the chain saw is started to reduce the chance of contact with the moving chain during starting. Never start a chain saw unless the bar, chain and all covers are fitted correctly. Otherwise the clutch can come loose and cause personal injuries. Place the machine on firm ground.
WORKING TECHNIQUES Before use: (61) 1 Check that the chain brake works correctly and is not damaged. 2 Check that the rear right hand guard is not damaged. 3 Check that the throttle lockout works correctly and is not damaged. 4 Check that the stop switch works correctly and is not damaged. 5 Check that all handles are free from oil. 6 Check that the anti vibration system works and is not damaged. 7 Check that the muffler is securely attached and not damaged.
WORKING TECHNIQUES saw chain and be thrown towards you. Even if this does not need to be a danger, you may be surprised and lose control of the saw. Never saw stacked logs or branches without first separating them. Only saw one log or one piece at a time. Remove the cut pieces to keep your working area safe. (62) Terms 4 Never use the chain saw above shoulder height and try not to cut with the tip of the bar.
WORKING TECHNIQUES The log is lying on the ground. There is little risk of the chain jamming or the object splitting. However there is a risk that the chain will touch the ground when you finish the cut. (73) Cut all the way through the log from above. Avoid letting the chain touch the ground as you finish the cut. Maintain full throttle but be prepared for what might happen. (74) the tree has no damaged or dead branches that might break off and hit you during felling.
WORKING TECHNIQUES Set the spike bumper (if one is fitted) just behind the felling hinge. Use full throttle and advance the chain/bar slowly into the tree. Make sure the tree does not start to move in the opposite direction to your intended felling direction. Drive a wedge or breaking bar into the cut as soon as it is deep enough. Finish the felling cut parallel with the directional cut line so that the distance between them is at least 1/10 of the trunk diameter.
MAINTENANCE General The user must only carry out the maintenance and service work described in this Operator's Manual. More extensive work must be carried out by an authorized service workshop. Carburettor adjustment Your Husqvarna product has been designed and manufactured to specifications that reduce harmful emissions. Checking, maintaining and servicing chain saw safety equipment Note! All service and repair work on the machine demands special training.
MAINTENANCE Throttle lockout Muffler • Make sure the throttle control is locked at the idle setting when the throttle lockout is released. (100) Never use a machine that has a faulty muffler. • Press the throttle lockout and make sure it returns to its original position when you release it. (101) • Check that the throttle trigger and throttle lockout move freely and that the return springs work properly. (102) • Start the chain saw and apply full throttle.
MAINTENANCE Tensioning the recoil spring • Hook the starter cord in the notch in the pulley and turn the starter pulley about 2 turns clockwise. An air filter that has been in use for a long time cannot be cleaned completely. The filter must therefore be replaced with a new one at regular intervals. A damaged air filter must always be replaced. Note! Check that the pulley can be turned at least a further 1/2 turn when the starter cord is pulled all the way out.
MAINTENANCE Clean the cooling system with a brush once a week, more often in demanding conditions. A dirty or blocked cooling system results in the machine overheating which causes damage to the piston and cylinder. ”Air Injection” centrifugal cleaning Centrifugal cleaning means the following: All air to the carburettor passes through the starter. Dirt and dust is centrifuged out by the cooling fan.
MAINTENANCE Maintenance schedule The following is a list of the maintenance steps that must be performed on the machine. Most of the items are described in the Maintenance section. Daily maintenance Weekly maintenance Monthly maintenance Clean the outside of the machine. Check the cooling system weekly. Check the brake band on the chain brake for wear. Replace when less than 0.6 mm (0,024 inch) remains at the most worn point. Check that the components of the throttle control work safely.
TECHNICAL DATA Technical data 435 II 435e II 440 II 440e II 40,9 Engine Cylinder displacement, cm3 40,9 40,9 40,9 Cylinder bore, mm 41 41 41 41 Stroke, mm 31 31 31 31 Idle speed, rpm 2900 2900 2900 2900 Power, kW/ rpm 1,6/9000 1,6/9000 1,8/9000 1,8/9000 Ignition system Spark plug NGK BPMR 7A/ NGK BPMR 7A/ NGK BPMR 7A/ NGK BPMR 7A/ Champion RCJ 7Y Champion RCJ 7Y Champion RCJ 7Y Champion RCJ 7Y Electrode gap, mm 0,5 0,5 0,5 0,5 0,37 0,37 Fuel and lubrication system Fuel t
TECHNICAL DATA Guide bar and saw chain combinations The following cutting attachments are approved for the models Husqvarna 435 II, 435e II, 440 II and 440e II. Guide bar Length, inch Pitch, inch Gauge, mm Saw chain Max. nose radius Type 13 15 16 Length, drive links (no.
EXPLICATION DES SYMBOLES Symboles sur la machine: Symboles dans le manuel: AVERTISSEMENT! Cette tronçonneuse peut être dangereuse! Une utilisation erronée ou négligente peut occasionner des blessures graves, voire mortelles pour l’utilisateur ou une tierce personne. Lire attentivement et bien assimiler le manuel d’utilisation avant d’utiliser la machine. Tout contrôle et/ou entretien doit être effectué avec le moteur à l’arrêt.
SOMMAIRE Sommaire EXPLICATION DES SYMBOLES Symboles sur la machine: .................................... Symboles dans le manuel: ................................... SOMMAIRE Sommaire ............................................................. INTRODUCTION Cher client, ........................................................... QUELS SONT LES COMPOSANTS? Quels sont les composants de la tronçonneuse? . INSTRUCTIONS GÉNÉRALES DE SÉCURITÉ Mesures à prendre avant de mettre en usage une tronçonneuse neuve ....
INTRODUCTION Cher client, Félicitations pour ce choix d’un produit Husqvarna. Husqvarna a vu le jour en 1689 lorsque le roi Karl XI décida de construire un arsenal pour la fabrication des mousquets au bord de la rivière Huskvarna. Le choix de l’emplacement était logique puisque la rivière Huskvarna servait à produire de l’énergie hydraulique et constituait donc une sorte de centrale hydraulique.
INSTRUCTIONS GÉNÉRALES DE SÉCURITÉ Mesures à prendre avant de mettre en usage une tronçonneuse neuve • • • • • • Lisez attentivement ce manuel d’utilisation. (1) - (117) fait référence aux figures des p. 2-6. Vérifier le montage et le réglage de l’outil de coupe. Voir les instructions au chapitre Montage. Remplissez de carburant et démarrez la tronçonneuse. Voir les instructions aux chapitres Manipulation du carburant et Démarrage et arrêt.
INSTRUCTIONS GÉNÉRALES DE SÉCURITÉ Important! Utiliser les équipements de protection personnelle. Voir au chapitre ”Équipement de protection personnelle”. tronçonneuse. Soyez toujours prudent et utilisez votre bon sens. Évitez les situations que vous n’êtes pas sûr de maîtriser. Si, après avoir lu ces instructions, vous n’êtes toujours pas sûr de la procédure à suivre, demandez conseil à un expert avant de poursuivre.
INSTRUCTIONS GÉNÉRALES DE SÉCURITÉ Équipement de sécurité de la machine Cette section traite des équipements de sécurité de la machine et de leur fonction. Pour le contrôle et l’entretien, voir les instructions au chapitre Contrôle, maintenance et entretien des équipements de sécurité de la tronçonneuse. Voir le chapitre Quels sont les composants? pour savoir où se trouvent équipements sur la machine.
INSTRUCTIONS GÉNÉRALES DE SÉCURITÉ Le frein de chaîne me protège-t-il toujours des blessures en cas de rebond? ! Non. Tout d’abord, votre frein doit fonctionner pour assurer la protection souhaitée. Ensuite, il doit être activé comme décrit ci-dessus pour arrêter la chaîne en cas de rebond. Pour finir, le frein de chaîne peut être activé mais si le guide-chaîne est trop près de vous, le frein peut ne pas avoir le temps de ralentir et arrêter la chaîne avant que la tronçonneuse ne vous heurte.
INSTRUCTIONS GÉNÉRALES DE SÉCURITÉ Équipement de coupe Cette section explique comment, grâce à l’utilisation du bon équipement de coupe et grâce à un entretien correct: • Réduire le risque de rebond de la machine. • Réduit le risque de saut ou de rupture de chaîne. • Permet des performances de coupe optimales. • Augmenter la durée de vie de l’équipement de coupe. • Évite l’augmentation du niveau de vibration.
INSTRUCTIONS GÉNÉRALES DE SÉCURITÉ limiteur d’épaisseur de copeau (B). La distance verticale entre ces éléments détermine la profondeur de coupe. (18) Quatre dimensions doivent être prises en compte lors de l’affûtage d’une dent. 1 Angle d’affûtage (19) 2 Angle d’impact (20) 3 Position de la lime (21) 4 Diamètre de la lime ronde Il est très difficile d’affûter correctement une chaîne de tronçonneuse sans outils spéciaux.
INSTRUCTIONS GÉNÉRALES DE SÉCURITÉ • Utiliser la clé universelle pour serrer l’écrou du guidechaîne tout en tenant levé le nez du guide. Contrôler que la chaîne peut tourner manuellement et qu’elle ne pend pas sous le guide. (29) L’emplacement de la vis du tendeur de chaîne varie avec les modèles de tronçonneuses. Voir le chapitre Quels sont les composants? pour savoir où elle se trouvre sur votre modèle.
INSTRUCTIONS GÉNÉRALES DE SÉCURITÉ Graissage du roulement à aiguilles ! L’arbre de sortie de ces deux types de pignons d’entraînement de chaîne est doté d’un roulement à aiguilles qui doit être graissé régulièrement (1 fois par semaine). REMARQUE! Utiliser de la graisse pour paliers de bonne qualité ou de l’huile moteur. Voir les instructions au chapitre Entretien, Braissage du roulement à aiguilles.
MONTAGE Montage du guide-chaîne et de la chaîne ! AVERTISSEMENT! Utiliser des gants pour toute manipulation de la chaîne. • S’assurer que la face tranchante des dents est vers l’avant sur le dessus du guide. • Monter le carter d’embrayage et veillez à placer le goujon de tension de la chaîne dans l’ouverture du guide. S’assurer que les maillons d’entraînement s’engagent dans le pignon et que la chaîne est correctement placée dans la gorge du guide.
MANIPULATION DU CARBURANT Carburant Remarque! La machine est équipée d’un moteur deux temps et doit toujours être alimentée avec un mélange d’essence et d’huile deux temps. Afin d’assurer un rapport de mélange correct, il est important de mesurer avec précision la quantité d’huile à mélanger. Pour le mélange de petites quantités de carburant, même de petites erreurs au niveau de la quantité d’huile affectent sérieusement le rapport du mélange.
MANIPULATION DU CARBURANT Remplissage de carburant • Baissez le levier de relevage. (54) IMPORTANT! Remplacez toujours un bouchon endommagé. ! AVERTISSEMENT! Les mesures de sécurité ci-dessous réduisent le risque d’incendie: Sécurité carburant • Ne jamais effectuer le remplissage de la machine lorsque le moteur tourne. Ne fumez jamais ni ne placez d’objet chaud à proximité du carburant. • Veiller à une bonne aération lors du remplissage et du mélange de carburant (essence et huile 2 temps).
MANIPULATION DU CARBURANT Remisage prolongé Videz les réservoirs de carburant et d’huile dans un endroit bien aéré. Conservez le carburant dans des bidons approuvés dans un endroit sûr. Montez la protection du guide-chaîne. Nettoyez la machine. Voir les instructions au chapitre Schéma d’entretien. Avant de remiser la machine pour une période prolongée, veiller à ce qu'elle soit bien nettoyée et que toutes les mesures d'entretien aient été effectuées. 46 – French 1155355-39 Rev.
DÉMARRAGE ET ARRÊT Démarrage et arrêt ! AVERTISSEMENT! Contrôler les points suivants avant la mise en marche: Le frein de chaîne doit être activé lors du démarrage de la tronçonneuse afin de réduire le risque de contact avec la chaîne en rotation. Ne pas démarrer la tronçonneuse si le guide, la chaîne et tous les capots ne sont pas montés. Sinon, l’embrayage risque de se détacher et de causer des blessures personnelles. Placer la machine sur un support stable.
DÉMARRAGE ET ARRÊT • Ne jamais mettre la machine en marche à l’intérieur. Les gaz d’échappement du moteur sont nocifs. • S’assurer que la zone de travail est bien dégagée et qu’aucune personne et aucun animal ne risquent d’entrer en contact avec l’équipement de coupe. • Tenez toujours la tronçonneuse à deux mains. Tenez la main droite sur la poignée arrière et la main gauche sur la poignée avant. Tous les utilisateurs, droitiers et gauchers, doivent la tenir ainsi.
TECHNIQUES DE TRAVAIL Avant chaque utilisation: (61) 1 Contrôler que le frein de chaîne fonctionne correctement et n’est pas endommagé. 2 Contrôler que la protection arrière de la main droite n’est pas endommagée. 3 Contrôler que le blocage de l’accélération fonctionne correctement et n’est pas endommagé. 4 Contrôlez que l’interrupteur d’arrêt fonctionne correctement et est en bon état. 5 Contrôler que toutes les poignées ne comportent pas d’huile.
TECHNIQUES DE TRAVAIL ou gaucher. Une prise solide aide à maîtriser les rebonds et à mieux contrôler la tronçonneuse. Ne pas lâcher les poignées! 3 Gardez le contrôle de la pièce de travail. Si les pièces que vous sciez sont petites et légères, elles peuvent se coincer dans la chaîne et être projetées sur vous. Même si cela n’est pas dangereux en soi, vous pouvez être surpris et perdre le contrôle de la tronçonneuse. Ne sciez jamais des branches ou des billes empilées sans les séparer.
TECHNIQUES DE TRAVAIL Techniques d’abattage Élagage Lors de l’élagage de branches épaisses, procéder comme pour le sciage ordinaire. IMPORTANT! L’abattage d’un arbre demande beaucoup d’expérience. Un utilisateur non expérimenté ne doit pas effectuer d’abattages. L’utilisateur se doit d’éviter toute utilisation qu’il ne maîtrise par suffisamment! Couper les branches gênantes par étapes, une par une.
TECHNIQUES DE TRAVAIL Émondage des branches basses et voie de retraite Ébranchez le tronc jusqu’à hauteur d’épaule. Pour des raisons de sécurité, il est préférable de travailler de haut en bas avec le tronc entre la tronçonneuse et vous. (82) Dégager les taillis autour du tronc et éviter les obstacles tels que pierres, branches cassées, fondrières, etc. pour s’assurer d’une voie de retraite facile au moment de la chute. La voie de retraite doit être à 135° derrière le sens de chute prévu de l’arbre.
TECHNIQUES DE TRAVAIL Mesures anti-rebond ! AVERTISSEMENT! Un rebond peut-être soudain, rapide et violent et renvoyer la tronçonneuse, le guide-chaîne et la chaîne en direction de l’utilisateur. Si la chaîne est alors en rotation, les blessures encourues sont graves et quelquefois mortelles. Il convient donc de comprendre les raisons d’un rebond afin de pouvoir éviter ce phénomène grâce à une bonne méthode de travail et un comportement prudent.
ENTRETIEN Généralités L’utilisateur ne peut effectuer que les travaux d’entretien et de révision décrits dans ce manuel d’utilisation. Les mesures plus importantes doivent être effectuées dans un atelier d’entretien agréé. Réglage du carburateur Les caractéristiques techniques de cette machine Husqvarna assurent des émissions de gaz nocifs réduites au minimum. Fonctionnement • • Le carburateur détermine le régime du moteur via la commande de l’accélération.
ENTRETIEN Blocage de l’accélération Silencieux • Vérifier d’abord que la commande de l’accélération est bloquée en position de ralenti quand le blocage de l’accélération est en position initiale. (100) Ne jamais utiliser une machine dont le silencieux est défectueux. • Appuyer sur le blocage de l’accélération et vérifier qu’il revient de lui-même en position initiale quand il est relâché.
ENTRETIEN corde dans le trou du boîtier du lanceur et dans la poignée du lanceur. Faire un nœud robuste à l’extrémité de la corde. (108) • Une consommation anormalement élevée de carburant • Pour déposer le filtre à air, commencer par retirer le capot du filtre. Lors du remontage, veiller à assurer une bonne étanchéité entre le filtre à air et son support. Nettoyer le filtre en le tapotant ou à l’aide d’une brosse.
ENTRETIEN Système de refroidissement Température de -5°°C ou moins: La machine est équipée d’un système de refroidissement permettant d’obtenir une température de fonctionnement aussi basse que possible. Un cache spécial à monter sur le boîtier du lanceur est disponible pour l’utilisation par temps froid ou en neige poudreuse. Ce cache réduit la quantité d’air froid admise tout en arrêtant la majeure partie de la neige qui pourrait être aspirée.
ENTRETIEN Schéma d’entretien La liste ci-dessous indique l’entretien à effectuer sur la machine. La plupart des points sont décrits à la section Entretien. Entretien quotidien Entretien hebdomadaire Entretien mensuel Nettoyer l’extérieur de la machine. Contrôlez le système de refroidissement chaque semaine. Inspectez le degré d’usure du ruban de freinage du frein de chaîne. Remplacez-le quand les parties les plus usées sont inférieures à 0,6 mm.
CARACTÉRISTIQUES TECHNIQUES Caractéristiques techniques 435 II 435e II 440 II 440e II Cylindrée, cm3 40,9 40,9 40,9 40,9 Alésage, mm 41 41 41 41 Course, mm 31 31 31 31 Moteur Régime de ralenti, tr/min 2900 2900 2900 2900 Puissance, kW/tr/min 1,6/9000 1,6/9000 1,8/9000 1,8/9000 Système d’allumage Bougie NGK BPMR 7A/ NGK BPMR 7A/ NGK BPMR 7A/ NGK BPMR 7A/ Champion RCJ 7Y Champion RCJ 7Y Champion RCJ 7Y Champion RCJ 7Y Écartement des électrodes, mm 0,5 0,5 0,5 0,5 0,37 0,3
CARACTÉRISTIQUES TECHNIQUES Combinaisons guide-chaîne et chaîne Les équipements de coupe suivants sont homologués pour les modèles Husqvarna 435 II, 435e II, 440 II et 440e II. Guide-chaîne Longueur, pouces Pas, pouces Largeur de rainure, mm Chaîne Lonngueur, maillons entraîneurs (pce) Nombre max.
ACLARACIÓN DE LOS SÍMBOLOS Símbolos en la máquina: ¡ATENCIÓN! ¡Las motosierras pueden ser peligrosas! Su uso descuidado o erróneo puede provocar heridas graves o mortales al operador o terceros. Lea detenidamente el manual de instrucciones y asegúrese de entender su contenido antes de utilizar la máquina. Utilice siempre: • Casco protector homologado • Protectores auriculares homologados • Gafas protectoras o visor Este producto cumple con la directiva CE vigente.
ÍNDICE Índice ACLARACIÓN DE LOS SÍMBOLOS Símbolos en la máquina: ...................................... Símbolos en el manual de instrucciones: ............. ÍNDICE Índice .................................................................... INTRODUCCIÓN Apreciado cliente: ................................................. ¿QUÉ ES QUÉ? ¿Qué es qué en la motosierra? ............................ INSTRUCCIONES GENERALES DE SEGURIDAD Medidas a tomar antes de utilizar una motosierra nueva .........................
INTRODUCCIÓN Apreciado cliente: ¡Felicidades por haber adquirido un producto Husqvarna! La historia de Husqvarna data del año 1689, cuando el Rey Karl XI encargó la construcción de una fábrica en la ribera del río Huskvarna para la fabricación de mosquetes. La ubicación junto al río Huskvarna era lógica dado que el río se utilizaba para generar energía hidráulica.
INSTRUCCIONES GENERALES DE SEGURIDAD Medidas a tomar antes de utilizar una motosierra nueva • Lea detenidamente el manual de instrucciones. • (1) - (117) refiérase a las figuras en p. 2-6. • Compruebe el montaje y ajuste del equipo de corte. Vea las instrucciones bajo el título Montaje. • Ponga combustible y arranque la motosierra. Vea las instrucciones en los capítulos Manipulación del combustible y Arranque y parada.
INSTRUCCIONES GENERALES DE SEGURIDAD Importante ¡IMPORTANTE! Esta motosierra para los servicios forestales está concebida para realizar tareas en el bosque como la tala, la poda y el corte. La utilización de esta máquina podría estar regulada por la legislación nacional. Utilice solamente las combinaciones de espada/cadena de sierra recomendadas en el capítulo Datos técnicos.
INSTRUCCIONES GENERALES DE SEGURIDAD máquina no se hace de forma adecuada y si los trabajos de servicio y/o reparación no se efectúan de forma profesional. Para más información, consulte con el taller de servicio oficial más cercano. ! • ¡ATENCIÓN! No emplee nunca una máquina con equipo de seguridad defectuoso. El equipo de seguridad se debe controlar y mantener. Vea las instrucciones del capítulo Control, mantenimiento y servicio del equipo de seguridad de la motosierra.
INSTRUCCIONES GENERALES DE SEGURIDAD ¿Me protegerá siempre el freno de cadena contra daños si se produce una reculada? ! No. En primer lugar, su freno debe funcionar para proporcionar la protección prevista. En segundo lugar, el freno se debe activar tal como se describe arriba para detener la cadena de sierra en una reculada.
INSTRUCCIONES GENERALES DE SEGURIDAD Equipo de corte Cadena Este capítulo describe cómo Ud., con un mantenimiento correcto y utilizando el equipo de corte adecuado, podrá: Una cadena de sierra consta de distintos eslabones que se presentan en versión estándar y en versión reductora de reculada. • Reducir la propensión a las reculadas de la máquina. • Reduce la ocurrencia de salidas y roturas de la cadena de sierra. • Proporciona un resultado de corte óptimo.
INSTRUCCIONES GENERALES DE SEGURIDAD • La parte cortante de una cadena de sierra se denomina eslabón de corte, formado por un diente de corte (A) y un talón de profundidad (B). La distancia en altura entre ellos determina la profundidad de corte. (18) Hay tres medidas a considerar para el afilado del diente de corte. 1 Ángulo de afilado (19) 2 Ángulo de corte (20) 3 Posición de la lima (21) 4 Diámetro de la lima redonda Es muy difícil afilar correctamente una cadena de sierra sin los accesorios adecuados.
INSTRUCCIONES GENERALES DE SEGURIDAD • Con la llave combinada, apriete la tuerca de la espada sujetando al mismo tiempo la punta de la espada. Compruebe que la cadena de la motosierra pueda girarse a mano con facilidad y que no cuelgue en la parte inferior de la espada. (29) Entre nuestros modelos de motosierra hay diferentes ubicaciones del tornillo del tensor de cadena. Vea el capítulo Componentes de la máquina en lo referente a la ubicación de este tornillo en su modelo.
INSTRUCCIONES GENERALES DE SEGURIDAD Lubricación del cojinete de agujas ! Ambos tipos de piñón de accionamiento de cadena tienen en el eje saliente un cojinete de agujas que debe lubricarse a intervalos regulares (1 vez por semana). ¡NOTA! Utilice grasa para cojinetes de buena calidad o aceite para motor. Vea las instrucciones del apartado ”Mantenimiento, Lubricación de cojinetes de agujas”.
MONTAJE Montaje de la espada y la cadena ! ¡ATENCIÓN! Para manipular la cadena deben utilizarse guantes protectores. 435 II, 440 II • Compruebe que no esté activado el freno de cadena empujando la protección contra reculadas del freno de cadena hacia el mango delantero. (39) • Desenrosque la tuerca de la espada y desmonte la carcasa del embrague (el freno de cadena). Saque la protección de transporte (A). (40) • Monte la espada sobre el perno de la espada.
MANIPULACION DEL COMBUSTIBLE Carburante Aclaración! La máquina tiene motor de dos tiempos, por lo que debe utilizarse siempre una mezcla de gasolina con aceite para motores de 2 tiempos. Es importante medir con precisión la cantidad de aceite que se mezcla para conseguir la proporción de mezcla adecuada. Al mezclar pequeñas cantidades de combustible, incluso los pequeños errores en la cantidad de aceite tienen una gran incidencia en la proporción de mezcla.
MANIPULACION DEL COMBUSTIBLE Repostaje ! Seguridad en el uso del combustible • No reposte nunca la máquina con el motor en marcha. • ¡ATENCIÓN! Las siguientes medidas preventivas reducen el riesgo de incendio: Procure que haya buena ventilación durante el repostaje y la mezcla de combustible (gasolina y aceite para motores de 2 tiempos). • Antes de arrancar, aparte la máquina a 3 m como mínimo del lugar de repostaje. No fume ni ponga objetos calientes cerca del combustible.
ARRANQUE Y PARADA Arranque y parada ! Motor caliente ¡ATENCIÓN! Antes de arrancar, observe lo siguiente: Posición de arranque, 1: Para la función combinada de estrangulamiento/aceleración de arranque en caliente, mueva el estrangulador tirando del mando rojo hacia fuera y hacia arriba. (56) El freno de cadena debe estar aplicado cuando se arranca la motosierra, para reducir el riesgo de contacto con la cadena en movimiento al ponerse en marcha.
ARRANQUE Y PARADA capítulo Arranque y parada. No arranque nunca la motosierra agarrando el cordón de arranque y soltando la máquina. Este método es muy peligroso porque se pierde fácilmente el control de la motosierra. (55) • No ponga nunca en marcha la máquina en interiores. Tenga en cuenta el riesgo de inhalación de los gases de escape del motor. • Observe el entorno y asegúrese de que no haya riesgo de tocar a personas o animales con el equipo de corte.
TÉCNICA DE TRABAJO Antes de utilizar la máquina: (61) 1 Compruebe que el freno de cadena funcione correctamente y no esté dañado. 2 Compruebe que la protección trasera de la mano derecha no esté dañada. 3 Compruebe que el fiador contra aceleraciones involuntarias funcione correctamente y no esté dañado. 4 Compruebe que el botón de parada funciona bien y está en buen estado. 5 Compruebe que todos los mangos estén libres de aceite.
TÉCNICA DE TRABAJO 3 La mayoría de los accidentes por reculada se producen al desramar. Procure trabajar con una postura estable y que en el suelo no hayan objetos que puedan hacerle tropezar y perder el equilibrio. Técnica básica de corte ! Si se trabaja con negligencia, el sector de riesgo de reculada de la espada puede tocar involuntariamente una rama, un árbol u otro objeto y producir una reculada. Controle la pieza de trabajo.
TÉCNICA DE TRABAJO A continuación, se indica un listado teórico de la forma de tratar las situaciones más comunes con que puede enfrentarse un usuario de motosierra. Técnica de tala ¡IMPORTANTE! La tala de árboles requiere mucha experiencia. Un usuario de motosierra inexperto no debe talar árboles. ¡Evite los trabajos para los que no se considere suficientemente capacitado! Desramado Para cortar ramas gruesas deben aplicarse los mismos principios que para el tronzado. Corte las ramas difíciles por partes.
TÉCNICA DE TRABAJO Corte de ramas bajas y camino de retirada Desrame el ronco hasta la altura del hombro. Es más seguro trabajar de arriba a abajo y tener el tronco entre usted y la motosierra. (82) Limpie la vegetación que hay alrededor del árbol y elimine los eventuales obstáculos (piedras, ramas, huecos, etc.) para tener preparado un camino de retirada cuando empiece a caer el árbol. El camino de retirada debe estar a unos 135°, oblicuamente hacia atrás, de la dirección de derribo prevista.
TÉCNICA DE TRABAJO Si necesita cortar a través del árbol/rama, haga dos o tres cortes con una separación de 3 cm y una profundidad de 3 a 5 cm. (94) Tronzado del tronco Vea las instrucciones bajo el título Técnica básica de corte. Continúe serrando a más profundidad hasta que soltar la fuerza y la tensión del árbol/rama. (95) Sierre el árbol/rama desde el lado opuesto después de soltar la tensión.
MANTENIMIENTO Generalidades El usuario sólo puede efectuar los trabajos de mantenimiento y servicio descritos en este manual. Los trabajos de mayor envergadura debe efectuarlos un taller de servicio oficial. Ajuste del carburador Su producto Husqvarna ha sido construido y fabricado conforme a especificaciones que reducen los gases de escape tóxicos. Funcionamiento • • El régimen del motor se controla mediante el acelerador y el carburador.
MANTENIMIENTO Fiador del acelerador Silenciador • Nunca utilice una máquina que tenga un silenciador defectuoso. • • • Compruebe que el acelerador esté bloqueado en la posición de ralentí cuando el fiador está en su posición inicial. (100) Apriete el fiador del acelerador y compruebe que vuelva a su posición de partida al soltarlo. (101) Compruebe que el acelerador y el fiador se muevan con facilidad y que funcionen sus muelles de retorno. (102) Arranque la motosierra y acelere al máximo.
MANTENIMIENTO cordón de arranque en el agujero de la caja del mecanismo de arranque y en la empuñadura de arranque. A continuación haga un nudo resistente en el cordón de arranque. (108) Tensado del muelle de retorno • Saque el cordón de arranque de la guía de la polea y gire ésta en el sentido de las agujas del reloj unas 2 vueltas. Aclaración! Compruebe que sea posible girar la polea como mínimo 1/2 vuelta más con el cordón totalmente extraído. (109) Estire el cordón con la empuñadura.
MANTENIMIENTO Sistema refrigerante Temperaturas de -5°°C o inferiores: Para lograr una temperatura de funcionamiento lo más baja posible, la máquina incorpora un sistema refrigerante. Para utilizar la máquina en climas fríos o con polvillo de nieve, hay una cubierta especial que se coloca sobre el cuerpo del mecanismo de arranque. Se reduce así la entrada de aire frío y se impide la aspiración de grandes cantidades de nieve.
MANTENIMIENTO Programa de mantenimiento A continuación incluimos una lista con los puntos de mantenimiento a efectuar en la máquina. La mayoría de los puntos se describen en el capítulo “Mantenimiento”. Mantenimiento diario Mantenimiento semanal Mantenimiento mensual Limpie la parte exterior de la máquina. Compruebe el sistema de refrigeración cada semana. Compruebe si está desgastada la cinta del freno de cadena. Cámbiela cuando quede menos de 0,6 mm en el punto más gastado.
DATOS TECNICOS Datos técnicos 435 II 435e II 440 II 440e II Cilindrada, cm3 40,9 40,9 40,9 40,9 Diámetro del cilindro, mm 41 41 41 41 Carrera, mm 31 31 31 31 Motor Régimen de ralentí, r.p.m. 2900 2900 2900 2900 Potencia, kW/r.p.m.
DATOS TECNICOS Combinaciones de espada y cadena Los siguientes equipos de corte están homologados para los modelos Husqvarna 435 II, 435e II, 440 II y 440e II.
EXPLICAÇÃO DOS SÍMBOLOS Símbolos na máquina: ATENÇÃO! Moto-serras podem ser perigosas! O uso indevido ou incorrecto poderá causar sérios ferimentos ou até mesmo a morte do utilizador ou outras pessoas. Leia as instruções para o uso com toda a atenção e compreenda o seu conteúdo antes de fazer uso da máquina. Use sempre: • Capacete protector aprovado • Protectores acústicos aprovados • Óculos ou viseira de protecção Este produto está conforme as directivas em validade da CE.
ÍNDICE Índice EXPLICAÇÃO DOS SÍMBOLOS Símbolos na máquina: .......................................... Símbolos nas instruções para o uso: .................... ÍNDICE Índice .................................................................... INTRODUÇÃO Prezado cliente! .................................................... COMO SE CHAMA? Como se chama, na moto-serra? ......................... INSTRUÇÕES GERAIS DE SEGURANÇA Precauções antes de usar a nova moto-serra ...... Importante ..........................
INTRODUÇÃO Prezado cliente! Parabéns pela sua prefência na compra de um produto Husqvarna ! A história da Husqvarna recua no tempo até 1689, quando o rei Karl XI mandou construir uma fábrica na margem da ribeira Huskvarna para fabricar mosquetes. A localização junto à ribeira Huskvarna era lógica, dado que as água da ribeira eram usadas para gerar energia e desta forma se tinha acesso a uma hidrogeradora de energia.
INSTRUÇÕES GERAIS DE SEGURANÇA Precauções antes de usar a nova moto-serra • Leia atentamente as instruções para o uso. • (1) - (117) refere a ilustrações na página 2-6. • Controle a montagem e o ajuste do equipamento de corte. Ver as instruções na secção Montagem, • Abastecer combustível e pôr a motosserra a funcionar. Ver instruções nas secções Manuseamento de combustível e Arranque e paragem. • Não use a moto-serra antes de haver penetrado suficiente óleo lubrificante na corrente.
INSTRUÇÕES GERAIS DE SEGURANÇA Importante IMPORTANTE! Esta moto-serra para silvicultura foi concebida para trabalhos na floresta, tais como abate de árvores, desramação e corte. A legislação nacional poderá restringir a utilização desta máquina. Só deverão ser usadas as combinações de lâmina/ corrente por nós recomendadas no capítulo Especificações técnicas.
INSTRUÇÕES GERAIS DE SEGURANÇA chama?, para localizar esses componentes na sua máquina. A duração da máquina pode ser afectada e o perigo de acidentes pode aumentar se a manutenção da máquina não for correcta e se as revisões e reparações não forem executadas de forma profissional. Se necessitar de mais esclarecimentos, entre em contacto com uma oficina sutorizada. ! ATENÇÃO! Nunca use uma máquina com equipamento de segurança defeituoso.
INSTRUÇÕES GERAIS DE SEGURANÇA O travão da corrente proteger-me-á sempre de ferimentos na ocorrência de um retrocesso? ! Não. Em primeiro lugar o travão tem que estar em bom estado de funcionamento para proporcionar a protecção prevista. Em segundo lugar tem que ser activado como descrito acima para parar a corrente na ocorrência de um retrocesso.
INSTRUÇÕES GERAIS DE SEGURANÇA Equipamento de corte Esta secção mostra como você, através de uma correcta manutenção e uso do equipamento de corte correcto, poderá: • Reduzir as tendências da máquina a retrocesso. • Reduz a ocorrência de saltos e ruptura da corrente. • Obtém o melhor rendimento de corte. • Aumentar a vida útil do equipamento de corte. • Evita o aumento de níveis de vibração.
INSTRUÇÕES GERAIS DE SEGURANÇA corte (A) e dum salto de abertura de corte (B). A distância em altura entre os dois determina a profundidade de corte. (18) Ao afiar o dente de corte, há quatro medidas a considerar. 1 Ângulo de afiação (19) 2 Ângulo de ataque (20) 3 Posição da lima (21) 4 Diâmetro da lima redonda É muito difícil afiar correctamente uma corrente de serra sem os instrumentos auxiliares apropriados. Por isso aconselhamos que use o nosso calibrador de lima.
INSTRUÇÕES GERAIS DE SEGURANÇA esta deixe de estar frouxa na parte inferior da lâmina. (28) • Usando a chave universal, aperte a porca da lâmina ao mesmo tempo que segura na ponta da lâmina. Verifique se a corrente pode ser facilmente girada com a mão e se não está a pender na parte inferior da lâmina. (29) Abastecimento do óleo de corrente • Todos os nossos modelos de moto-serra possuem lubrificação de corrente automática. Alguns deles podem até ser fornecidos com fluxo de óleo regulável.
INSTRUÇÕES GERAIS DE SEGURANÇA Lubrificação do rolamento de agulhas ! Ambos os tipos de pinhão da corrente têm rolamento de agulhas no eixo de saída, o qual deve ser lubrificado regularmente (1 vez por semana). NOTA! Use massa de rolamentos de boa qualidade ou oleo do motor. Veja instruções na secção Manutenção, Lubrificação do rolamento de agulhas. Controlo de desgaste no equipamento de corte Controle diariamente a corrente, verificando se: • Há rachaduras visíveis em rebites e elos.
MONTAGEM Montagem da lâmina e corrente ! • Verifique se o fio dos elos de corte está voltado para a frente, na parte superior da lâmina. • Monte a cobertura da embraiagem e lembre-se de ajustar o pino do esticador da corrente no encaixe da lâmina. Verifique se os elos de condução da corrente passam pelo pinhão da corrente e se a corrente está em posição correcta na ranhura da lâmina. • Estique a corrente rodando a roda para baixo (+).
MANEJO DE COMBUSTÍVEL Combustível Observe! A máquina está equipada com um motor de dois tempos e deve sempre funcionar com uma mistura de gasolina e óleo para motores de dois tempos. Para garantir a mistura correcta, é importante que se meça cuidadosamente a quantidade de óleo a misturar. Ao misturar pequenas quantidades de combustível, até mesmo pequenos erros na quantidade de óleo podem afectar fortemente a proporção da mistura.
MANEJO DE COMBUSTÍVEL Abastecimento Segurança no manejo de combustível • • ! ATENÇÃO! As medidas de precaução abaixo diminuem os riscos de incêndio: • Não fume nem ponha objectos quentes na proximidade de combustível. • 1 Pare o motor e deixe arrefecer alguns minutos antes de abastecer. Abra a tampa do depósito devagar, ao abastecer, para dar saída lenta aos gases se houver um excesso de pressão. Aperte bem a tampa do depósito após abastecer.
ARRANQUE E PARAGEM Arranque e paragem ! ATENÇÃO! Antes de arrancar, observe o seguinte: Bomba de combustível (2): Carregue repetidas vezes na bolha da bomba de combustível até o combustível encher a bolha (pelo menos 6 vezes). Não é necessário encher totalmente a bolha de combustível. (56) O travão da corrente deve estar aplicado quando se dá o arranque à motosserra, para evitar o perigo de contacto com a corrente em rotação durante o arranque.
ARRANQUE E PARAGEM • Nunca ponha a máquina a trabalhar dentro de casa. Conscientize-se do perigo que representa inspirar os gases de escape do motor. • Observe a vizinhança e certifique-se de que não há risco de pessoas ou animais entrarem em contacto com o equipamento de corte. • Segure sempre a motosserra com as duas mãos. Mantenha a mão direita no punho traseiro e a mão esquerda no punho dianteiro.
TÉCNICA DE TRABALHO Sempre, antes de usar: (61) 1 Verifique se o travão da corrente funciona devidamente e se está em bom estado. 2 Verifique se a protecção traseira da mão direita está em bom estado. 3 Verifique se o bloqueio do acelerador funciona devidamente e se está em bom estado. 4 Verifique se o contacto de paragem funciona e está em bom estado. 5 Verifique se todos os punhos estão isentos de óleo. 6 Verifique se o sistema anti-vibração funciona devidamente e se está em bom estado.
TÉCNICA DE TRABALHO facilmente o efeito de retrocesso e simultaneamente manter o controlo sobre a moto-serra. Não solte os punhos! 3 Mantenha a peça de trabalho sob controlo. Se os pedaços que está a serrar forem pequenos e leves, podem prender-se na corrente da serra e ser atirados contra si. Mesmo que isso não seja necessariamente perigoso, você pode assustar-se e perder o controlo sobre a motosserra. Não serre nunca toras ou ramos empilhados sem primeiro os separar.
TÉCNICA DE TRABALHO A listagem a seguir é uma exposição teórica de como proceder nas situações mais comuns que podem ocorrer a um utilizador de moto-serras. Técnica de abate de árvores IMPORTANTE! Muita experiência é exigida para abater uma árvore. Um utilizador de moto-serra inexperiente não deverá abater árvores. Evite qualquer forma de uso para a qual não se sinta suficientemente qualificado! Desrama Na desrama de galhos mais grossos, serão aplicados os mesmos princípios da traçagem.
TÉCNICA DE TRABALHO Desrama da parte inferior e caminho de fuga Desrame o tronco até à altura dos ombros. O mais seguro é trabalhar de cima para baixo e ter o tronco entre si e a motosserra. (82) Remova a vegetação do solo em volta da árvore e prepare-se para eventuais obstáculos (pedras, galhos, buracos, etc.) de modo que possa fugir facilmente quando a árvore começar a cair. O caminho de fuga deve estar situada a cerca de 135° diagonalmente para trás da direcção de abate planeada para a árvore.
TÉCNICA DE TRABALHO Aplica-se em geral: Posicione-se de modo tal que não se arrisque a ser atingido pela árvore/galho quando se desfizer o entesamento. (92) Faça um ou vários cortes no ponto de ruptura ou nas suas proximidades. Serre com profundidade suficiente e com tantos cortes quantos forem necessários para que o entesamento da árvore/galho se dissipe, e em proporções suficientes para que a árvore/galho ”se rompam” no ponto de ruptura.
MANUTENÇÃO Noções gerais O utente só pode efectuar trabalhos de manutenção e assistência do tipo descrito nestas instruções. Intervenções maiores devem ser efectuadas por uma oficina autorizada. Afinação do carburador O seu produto Husqvarna foi construído e fabricado seguindo especificações que reduzem a emissão de gases prejudiciais. Funcionamento • • Através do acelerador, o carburador comanda a rotação do motor. No carburador mistura-se ar/ combustível. Esta mistura ar/combustível é ajustável.
MANUTENÇÃO Bloqueio do acelerador Silenciador • Nunca use uma máquina com silenciador defeituoso. • • • Verifique se o acelerador está fixo na posição marcha em vazio quando o bloqueio de acelerador estiver na sua posição original. (100) Comprima o bloqueio do acelerador e verifique se este retorna à sua posição original quando libertado. (101) Verifique se o acelerador e o bloqueio do acelerador funcionam com facilidade e se os seus respectivos sistemas de mola de retorno funcionam.
MANUTENÇÃO Dar tensão à mola de retorno • • Levante a corda de arranque no encaixe do carretel e gire este cerca de 2 voltas no sentido horário. Observe! Verifique se o carretel pode ser girado ainda mais, um mínimo de 1/2 volta, quando a corda de arranque estiver totalmente puxada. (109) Estique a corda com o punho de arranque. Tire o polegar e solte a corda. Ver a figura abaixo.
MANUTENÇÃO Sistema de arrefecimento Temperaturas de -5°°C ou mais frio: Para obter uma temperatura de funcionamento tão baixa quanto possível, a máquina está equipada com um sistema de arrefecimento. Para operações com a máquina em clima frio ou neve solta, está disponível uma cobertura especial que se monta no compartimento do dispositivo de arranque. Assim reduz-se a entrada de ar frio e impede a sucção de grandes quantidades de neve.
MANUTENÇÃO Esquema de manutenção Abaixo segue uma lista dos cuidados a ter com a máquina. A maioria dos pontos encontram-se descritos na secção Manutenção. Controle diário Controle semanal Controle mensal Limpe a máquina externamente. Verifique o sistema de arrefecimento semanalmente. Verificar a lona de freio do travão da corrente com vista a desgaste. Substituir quando a espessura for inferior a 0,6 mm no sítio mais gasto. Verifique se todos os componentes do acelerador funcionam em segurança.
ESPECIFICAÇÕES TÉCNICAS Especificações técnicas 435 II 435e II 440 II 440e II Cilindrada, cm3 40,9 40,9 40,9 40,9 Diâmetro do cilindro, mm 41 41 41 41 Curso do pistão, mm 31 31 31 31 Motor Rotação em vazio, r/min. 2900 2900 2900 2900 Potência, kW/ r/min.
ESPECIFICAÇÕES TÉCNICAS Combinações de lâmina e corrente O equipamento de corte seguinte foi aprovado para os modelos Husqvarna 435 II, 435e II, 440 II e 440e II. Lâmina Compriment o, pol Passo, pol Largura do sulco, mm Corrente N.º máx. de dentes no rolete da ponta da lâmina Comprimento, elementos de accionamento (qtd.) Tipo 13 15 16 56 0,325 1,3 10T Husqvarna H30 18 64 66 72 Limagem e calibradores de lima da corrente da serra.
Original instructions Instructions d'origine Instrucciones originales Instruções originais 1155355-39 2013-05-08, Rev.