
- Hewlett-Packard LaserJet Owner's Manual


ENWW Troubleshooting print-quality problems 105
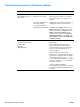
Toner smear
If toner smears appear on the leading edge of the media, the paper guides are dirty. See
“Cleaning the paper path and print-cartridge areas” on page 78 and “Cleaning the fuser” on
page 79.
Check the media type and quality. See “Media specifications” on page 134.
Try installing a new HP print cartridge.
Loose toner
Clean the inside of the printer. See “Cleaning the paper path and print-cartridge areas” on
page 78 and “Cleaning the fuser” on page 79.
Check the media type and quality. See “Media specifications” on page 134.
Try installing a new HP print cartridge.
In the printer driver, change the type to match the type of paper you are printing. See
“Printing by type and size of media” on page 53. Print speed might be slower if you are using
heavy media.
Vertical repetitive defects
If marks repeatedly appear on the printed side of the page at even intervals:
The print cartridge might be damaged. The circumference of the print cartridge drum is
94 mm (3.7 inches). If a repetitive mark occurs every 94 mm (3.7 inches) on the page, install
a new HP print cartridge.
Internal parts might have toner on them. If the defects occur on the back of the page, the
problem will likely correct itself after a few more pages.
In the printer driver, change the type setting to match the type of media you are printing. See
“Printing by type and size of media” on page 53.
The fusing assembly might be damaged. Contact an HP-approved service technician. See
“Contacting HP” on page 123.
Misformed characters
If characters are improperly formed, producing hollow images, the paper might be too slick.
Try a different media type. See “Media specifications” on page 134.
If characters are improperly formed, producing a wavy effect, the laser scanner might need
service. If you need service, contact an HP-authorized dealer or service representative
“Contacting HP” on page 123. See “Hewlett-Packard limited warranty statement” on
page 129.
Page skew
Check the media type and quality. See “Media specifications” on page 134.
Make sure that the media is loaded correctly and that the guides are not too tight or too loose
against the stack. See “Loading trays” on page 31, “Loading tray 2 (250-sheet tray) or
optional 250-sheet tray in tray 3 position” on page 32, or “Loading tray 3 (500-sheet tray)” on
page 34.