
HP LaserJet 9000 Series Printer - Getting Started Guide


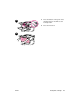


Table Of Contents
- Printer Setup
- Contents
- Introduction
- Installation checklist
- Step 1 Prepare printer location
- Step 2 Check package contents
- Step 3 Locate printer parts
- Step 4 Remove internal packaging
- Step 5 Install accessories
- Step 6 Install print cartridge
- Step 7 Load Trays 2 and 3
- Step 8 Connect printer cables
- Step 9 Connect power cord
- Step 10 Change the control panel overlay
- Step 11 Configure the control panel display language
- Step 12 Print a configuration page
- Step 13 Install printing software
- Step 14 Verify printer setup
- Customer support options worldwide
- Warranty and regulatory information
- Declaration of Conformity

12 Printer Setup ENWW
Step 6 Install print cartridge
Use this procedure to install the print cartridge. If toner gets on your
clothing, wipe it off with a dry cloth and wash the clothing in cold
water. Hot water sets toner into fabric.
To install the print cartridge
1 Before removing the print cartridge
from its packaging, set the print
cartridge on a sturdy surface. Gently
slide the print cartridge out of the
packaging.
CAUTION
To prevent damage to the print cartridge,
use two hands when removing it from its
packaging.
Note
The print cartridge does not have a pull
tab.
2 Open the front door on the printer.
3 Rotate the lever downward to the
unlock position.
4 Position the cartridge as shown with
the arrow on the left side pointing
into the printer and align it with the
printer guides. Slide the cartridge
into the printer as far as it will go.
1
4
2
3