
Brocade Fabric OS Encryption Administrator's Guide Supporting Fabric OS v6.2.0 (53-1001201-04, May 2009)

126 Encryption Administrator’s Guide
53-1001201-04
Key vault configuration
3
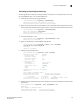
The Certificate and CA Configuration page is displayed.
5. Under Local Certificate Authority List, select the CA Name for the CA created in “Setting up the
local certificate authority”.
6. Select Sign Request.
The Sign Certificate Request page is displayed.
7. Sel ec t Sign with Certificate Authority using the CA name with maximum of 3649 days option.
8. Select Client as Certificate Purpose.
9. Allow Certificate Duration to default to 3649.
10. Paste the file contents that you copied in step 2 in the Certificate Request Copy area.
11. Select Sign Request.
Upon success, you are presented with the option of downloading the signed certificate.
12. Download the signed certificate to your local system as signed_kac_skm_cert.pem.
This file is then ready to be downloaded to the encryption switch or blade.
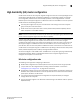
Importing SKM files to the encryption switch or blade
In the process of setting up the SKM key vault, you stored two files on your local system. One is the
local CA file, hpskm_cal.pem. This was done in the “Downloading the local CA certificate file”
procedure. The other is signed_kac_skm_cert.pem. This was down in the “Signing the KAC
certificate” procedure. These files must be imported to the encryption switch or blade.
1. Import the local CA file.
cryptocfg --import -scp hpskm_ca1.pem <host IP> <host user> <host file path>
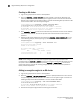
2. Import the signed KAC certificate.
cryptocfg --import -scp <signed_kac_skm_cert.pem> <host IP> <host user> <host
file path>
3. Register the signed KAC certificate.
cryptocfg --reg -KACcert <signed_kac_skm_cert.pem>
4. Register the SKM key vault using the hpskm_cal1.pem file.
cryptocfg --reg -keyvault skmcert hpskm_ca1.pem <SKM keyvault IP> primary
Allow some time for the key vault to be fully configured and connected with the switch.
5. Check the configuration.
cryptocfg --show -groupcfg