
User Guide

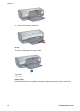


Table Of Contents
- Contents
- Welcome
- Special features
- Get started
- Connect to the printer
- Print photos
- Print photos from a digital camera
- Print other documents
- Printing tips
- Printing shortcuts
- Fast/economical printing
- General everyday printing
- Presentation printing
- Print in grayscale
- Set default settings for the printer
- Select a print quality
- Set the page order
- Print multiple pages on a single sheet of paper
- Print preview
- Set a custom paper size
- Select a paper type
- Print task quick sets
- Two-sided printing
- Resize a document
- Watermarks
- Printer software
- Maintenance
- Install print cartridges
- Set the auto-off feature
- Align the print cartridges
- Calibrate color
- Calibrate print quality
- Automatically clean print cartridges
- Print a test page
- View estimated ink levels
- Maintain the printer body
- Remove ink from your skin and clothing
- Manually clean print cartridges
- Maintain print cartridges
- Printer Toolbox
- Troubleshooting
- Printer does not print
- Paper jam
- Paper problems
- Printer is stalled
- Print cartridge problems
- Photos do not print correctly
- PictBridge problems
- Print quality is poor
- Document is misprinted
- Problems with borderless documents
- Error messages
- Printer lights are on or flashing
- Document prints slowly
- If you continue to have problems
- Supplies
- Specifications
- Environmental information
- Index

1 Small photos
2 Large photos
Note Some panoramic paper sizes might extend beyond the edge of the
In tray.
6. Lower the Out tray.
Print
Note If your software program includes a photo printing feature, follow the
instructions that are provided with the software program. Otherwise, follow
these instructions.
1. Open the photo in an application that allows editing, such as HP Image Zone or
Adobe Photoshop.
2. Open the Printer Properties dialog box.
3. Click the Printing Shortcuts tab.
4. In the What do you want to do? drop-down list, click Photo Printing-
borderless, and then select the following options:
– Print Quality: Normal or Best
Note For maximum dpi quality, go to the Paper/Quality tab, and
then click Maximum dpi in the Print Quality drop-down list.
– Paper Type: An appropriate photo paper type
– Paper Size: An appropriate borderless photo paper size
– Orientation: Portrait or Landscape
5. Set the HP Real Life technologies as appropriate.
6. Click OK to print the photo.
User's guide 17