
DisplayMaker Legacy 72S and 72SR - User Manual


Color Calibration 6-23
1. Make sure the printer is connected to the server, plugged
in, turned on, and displays the “Ready” message on the
control panel.
Make sure that the ColorMark Calibrator or Spectrolino
device is connected to the server and powered on.
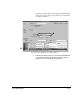
2. Position the cursor on the printer icon.
3. Press and hold either mouse button to display the printer
menu.
4. Select Control from the printer menu.
5. Set the Margin to 10 inches, and Justify to Left.
This will print the calibration pattern approximately 10
inches from the left edge of the media. This will preserve the
integrity of the web enough to allow it to continue to used
in the printer.
6. Click the Close button.
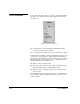
7. Press and hold either mouse button to display the printer
menu.
8. Select Calibrate from the printer menu.
The Color Profile selection dialog box appears.
Note If the printer is currently printing or if the ColorMark CMS
software is not installed, the Calibrate option is grayed
out.
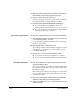
9. Select a profile to calibrate.
10. Click the OK button.
This causes the calibrator to be initialized.
A dialog box appears that gives you the option of printing
the Calibration Page or taking calibration readings.
11. Click the button marked Print Calibration Page.
The printer prints a series of color swatches.
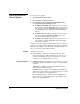
12. Open the Control dialog box, and advance the media for-
ward to the dryer and allow the pattern to dry.
13. From the Control dialog box, reset the margin to its previ-
ous setting.
14. Cut out the test pattern with a scissors or sharp knife.