
DisplayMaker X-12+ - Print Server and Driver Setup Guide


1-16 Calibrating ColorMark Software
Calibrating ColorMark
Software
1. Make sure the printer is connected to the server, plugged
in, turned on, and displays the “Ready” message on the
control panel.
If you will be using the ColorMark Calibrator or an X-Rite
DTP41 device rather than the printer’s camera (photodiode)
to take the readings, make sure the device is connected to
the server and powered on. Calibrate the DTP41 according to
the instructions in its Operator’s Manual.
2. Make sure the ink installed is the type you want to cali-
brate.
To calibrate for a different ink type, load it into the printer
before you continue this procedure.
3. Position the cursor on the printer icon.
4. Press and hold either mouse button to display the printer
menu.
5. Select Calibrate from the printer menu.
The Color Profile selection dialog box appears. Only den-
sity-linearized color profiles, identified with the following
icon, can be calibrated with the ColorMark Calibrator or
DTP41 device:
Note If the printer is currently printing or if the ColorMark CMS
software is not installed, the Calibrate option is grayed
out.
6. Select a profile to calibrate.
7. Click the OK button.
If you selected a density-linearized profile, a dialog box
appears, giving you the option of using the printer’s
onboard camera or manual reader (ColorMark Calibrator or
DTP41 device).
8. Click the button marked Printer’s Camera or the one
marked Manual Swatch Reader.
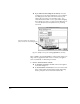
9. A dialog box appears that gives you the option of printing
the Calibration Page or taking calibration readings.
10. Click the button marked Print Calibration Page.