
- Hewlett-Packard Color LaserJet Printer Owner's Manual

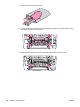


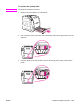


Table Of Contents
- Printer basics
- Control panel
- I/O configuration
- Printing tasks
- Managing the printer
- Color
- Maintenance
- Managing supplies
- Supplies life
- Approximate replacement intervals for supplies for the hp color LaserJet 3500 series printer
- Approximate replacement intervals for supplies for the hp color LaserJet 3700 series printer
- Checking the print cartridge life
- Print cartridge storage
- HP print cartridges
- Non-hp print cartridges
- Print cartridge authentication
- HP fraud hotline
- Replacing supplies and parts
- Cleaning the printer
- Configuring e-mail alerts
- Managing supplies
- Problemsolving
- Basic troubleshooting checklist
- Control panel message types
- Control panel messages
- Paper jams
- Common causes of paper jams
- Clearing paper jams
- Paper handling problems
- Troubleshooting information pages
- Printer response problems
- Printer control panel problems
- Color printing problems
- Incorrect printer output
- Software application problems
- Print quality troubleshooting
- Print quality problems associated with paper
- Overhead transparency defects
- Print quality problems associated with the environment
- Print quality problems associated with paper jams
- Print quality problems associated with toner buildup inside the printer
- Print quality troubleshooting pages
- Calibrating the printer
- Supplies and accessories
- Service and support
- Printer specifications
- Regulatory information
- Working with memory and print server cards
- Glossary
- Index
4. Remove the new pickup roller from the bag.
Note
For information on how to properly dispose of the used pickup roller, go to
http://www.hp.com/recylce.
5. Hold the blue side of the pickup roller, and insert the left peg into the round hole in the
printer.
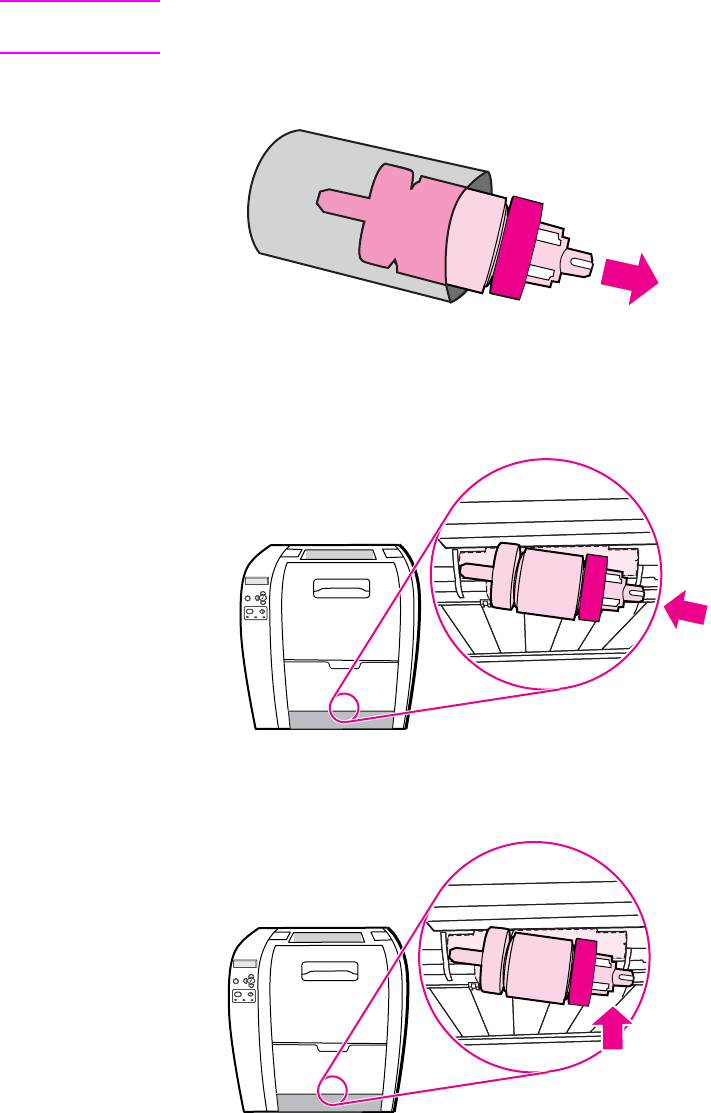
6. Push in on the pickup roller while lifting up on the right side of the pickup roller, so the pin
goes into the hole and clicks into place.
124 Chapter 7 Maintenance ENWW