
user manual


T7350 COMMERCIAL PROGRAMMABLE THERMOSTAT
63-2605—5 12
INSTALLER SETUP
For most applications, the thermostat factory settings do not
need to be changed. Review the factory settings in Table 10.
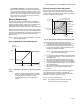
NOTE: When power is first applied to the thermostat, the
display will show all segments (see Fig. 10).
Table 10. Keypad Configurable Installer Setup Options
a
.
a
With the exception of Temporary Not Occupied, functions not keypad configurable require a Palm OS Configuration Tool.
b
Lockouts do not allow adjustments on dehumidification high limit. Special keypresses are never locked out.
c
Displays only when heat pump is selected.
d
Values vary depending on the model.
Fig. 10. LCD display of all segments.
Setup Using Keypad
The installer uses the Installer Setup to customize the
thermostat to specific systems. (See Table 10.) The table
includes all the configuration options available. For basic
setup functions, the thermostat can be configured using the
keypad.
NOTE: The T7350 has serial communications to facilitate
use of an installer configuration tool. More advanced
features are available using this tool. (See the
Appendix for details.)
A combination of key presses are required to use the Installer
Setup feature:
1. To enter the Installer Setup, press and hold both the
Run Schedule and the Copy keys until DEG F (or
DEG C) displays.
2. To advance to the next Setup item, press .
NOTE: Pressing Run/Copy again while in this mode
displays the T7350 firmware version number.
3. To return to a Setup item, cycle through the options.
4. To change a setting, use the up S or down T key.
5. To exit the Installer Setup, press Run Schedule.
6. The display prompts SAV CFG (save configuration).
a. If you want to save the new configuration, use the
up S or down T key to change NO to YES before
pressing Run Schedule.
b. If you want the configuration to remain as it was
before starting this change, ensure the display
indicates SAV CFG NO and press Run Schedule.
NOTE: Installer Setup is automatically exited after five
minutes with no key pressed. Upon this auto-
matic exit, all changes are lost.
Setting Keypad Lockout
Proper keypad sequences activate the lockout features. To
change the keypad lockout state:
1. Enter the Installer Setup: press and hold both the Run
Schedule and the Copy keys until DEG F (or DEG C)
displays.
2. Press until KYLCK displays.
3. Use the up S or down T key to change the setting.
Options are:
• 0: No lockout.
• 1: Lockout all keys except Temporary Occupied,
Temporary Not Occupied, up S, down T and .
• 2: Lockout all keys except .
NOTES:
— Options 1 and 2 do not allow adjustments on
dehumidification high limit.
Configuration Option Factory Default Description
Degree temperature display DEG F Temperature display: °F or °C
Remote room temperature sensor LOC SEN LOC: Use Local temperature sensor.
REM: Use Remote temperature sensor.
Clock format 12HRCLK 12HR: 12-hour clock format
24HR: 24-hour clock format
Keypad lockout level KYLCK 0 Keypad lockout enable/disable through special keypad sequence.
0: No lockout.
1: Lockout all keys except Temporary Occupied, Temporary Not Occupied, S, T and
b
.
2: Lockout all keys except
b
.
Conventional / heat pump selection CONV CONV: Conventional equipment.
HT PUMP: Heat Pump.
Heat Pump Reversing Valve
c
RVON HT RVON HT: Heat pump, energize O/B on call for heat.
RVON CL: Heat pump, energize O/B on call for cool.
Configuration Variables
(C1,C2,C3,C4,C5,C6,C7,C8)
d
Hexadecimal configuration code values.
The code defines only Installer Configuration.
It sets neither Parameters (gains and setpoints) nor Schedules.
Temporary Standby
StartTime
M19611
Not Occupied12
System
EmHeat Off Cool Auto
MonTueWedThuFri
AM
PM
SatSunHol
Dehumid OnAuto
MinsDays
Room
Fan
%
Set ScheduleSet