
Operating Instruction C 4/36 -90/-350/-DC (01)
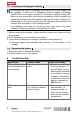

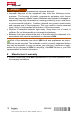


Table Of Contents
- Original operating instructions
- Mode d'emploi original
- Manual de instrucciones original
- Manual de instruções original

8 English 2024462
*2024462*
5.3 Inserting and charging the battery 3
The battery will suffer no damage even when left in the charger for
long periods. In this case it is necessary that the charger is operating
(green LED on the charger must be lit). The battery state of charge LED
goes out after some time, even though the battery is fully charged, and
cannot be subsequently reactivated to indicate the state of charge. For
safety reasons, it is recommended that the battery is removed from the
charger after completion of the charging cycle.
Liion batteries are ready for use at any time, even when only partly
charged. Charging progress is indicated by the LEDs.
1. Before inserting the battery, check that the contacts are clean and free
from grease.
2. Push the battery into the interface provided.
3. Check that the battery and charger interfaces match (keyed fit).
➥ Charging begins automatically after insertion of the battery in the
charger.
5.4 Removing the battery 4
1. Press the catch to release the battery.
2. Pull the battery out of the charger.
6 Troubleshooting
Malfunction Possible cause Action to be taken
LEDs on the battery
don’t light, battery is
in the charger.
The battery may be de-
fective.
▶ Remove the battery
from the charger. If
no LED lights on the
battery after activation
of the state of charge
indicator, the battery
is defective. Have the
battery checked by
Hilti Service.
LEDs on the charger
blink.
The battery is too hot
or too cold: the battery
doesn’t charge.
▶ The charger switches
automatically to
charging mode as
soon as the battery
reaches the required
temperature.
Printed: 03.01.2019 | Doc-Nr: PUB / 5069441 / 000 / 12