
User's Manual
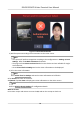


Table Of Contents
- Legal Information
- Regulatory Information
- Safety Instruction
- Available Model
- Chapter 1 Overview
- Chapter 2 Appearance
- Chapter 3 Installation
- Chapter 4 Wiring
- Chapter 5 Activation
- Chapter 6 Quick Operation
- Chapter 7 Basic Operation
- Chapter 8 Operation via Web Browser
- 8.1 Login
- 8.2 Person Management
- 8.3 Configuration
- 8.3.1 View Device Information
- 8.3.2 Set Time
- 8.3.3 Set DST
- 8.3.4 View Open Source Software License
- 8.3.5 Upgrade and Maintenance
- 8.3.6 Security Mode Settings
- 8.3.7 Change Administrator's Password
- 8.3.8 View Device Arming/Disarming Information
- 8.3.9 Network Settings
- 8.3.10 Set Audio Parameters
- 8.3.11 Set Image Parameters
- 8.3.12 Set Authentication Parameters
- 8.3.13 Temperature Measurement Settings
- 8.3.14 Set Biometric Parameters
- 8.3.15 Visitor Settings
- 8.3.16 Set Screen Saver Picture
- Appendix A. Tips When Collecting/Comparing Face Picture
- Appendix B. Tips for Installation Environment
- Appendix C. Dimension
- Appendix D. Communication Matrix and Device Command

Tap in the top right corner of the home page. Tap Basic Sengs → Visitor Parameters Sengs
to enter the page.
Figure 7-15 Visitor Parameters Sengs
Tap to enable the funcons.
Manually Enter Visitor Informaon
When the funcon is enabled, the sta can input visitor informaon manually.
Person and ID Comparison
When the funcon is enabled, the device will be able to process person and ID comparison.
Skip Person and ID Comparison
Note
You need to enable Person and ID Comparison before you can skip the step.
When the funcon is enabled, you can choose to skip person and ID comparison.
Credenal Type
You can select QR code, card, QR code & card or none for credenal.
Non-reserved Visitor Check In
When the funcon is enabled, unreserved visitors can check in on the device.
DS-K5032-3XFD Visitor Terminal User Manual
30