
Installation Guide


10
36" GAS RANGE INSTALLATION INSTRUCTIONS
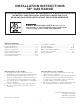
Figure 7: Factory connected power supply cord
4
Fuel Supply Requirements
This unit is designed to operate on 4"(10.16 cm)
water column (1.0 kPa) natural gas manifold
pressure.
A convertible pressure regulator is supplied with
the unit. It must be connected in series with the
gas supply line using instructions from section 4.1
The intended location for the regulator is shown in
Figure 8.
Figure 8: Regulator location
For proper operation, the maximum inlet pressure
to the regulator should be no more than 14" (35.56
cm) of water column pressure (3.5 kPa).
The inlet pressure to the regulator must be at least
1"(0.25 kPa) greater than the regulator manifold
pressure setting. The regulator is set for 4" (10.16
cm) water column (1.0 kPa) Natural gas manifold
pressure; the inlet pressure must be at least 5"
(12.60 cm) water column (1.25 kPa) Natural gas.
For operation at 2000 ft. above sea level,
appliance rating is reduced by 4 percent for each
additional 1000 ft.
Regulator location
4.1
Regulator installation
There are 2 dierent types of installation for
regulators. Please check the regulator assembly
kit provided with the unit to identify which of the
following installations applies to your range.
Installation using Brass elbow
If you have a brass elbow provided in the kit then
this installation applies to your range.
1. Apply the pipe-joint sealant (not supplied) on
the threaded end of the gas rail inlet then attach
the brass elbow on the gas rail by rotating the
hex nut using the adjustable wrench.
2. Apply the pipe-joint sealant (not supplied) on
the other end of the brass elbow. Attach the
regulator to it by rotating the hex on it using a
wrench. Use the hex nut on the brass elbow to
hold the gas rail when tightening the hex nut on
the regulator.
3. Make sure connections are leakproof. Do not
over tighten.
Do not, under any
circumstances, cut,
remove, or bypass
the grounding
prong.
For personal safety, the appliance must be
properly grounded. For maximum safety, the
power cord must be plugged into an electrical
outlet that is correctly polarized and properly
grounded.
If a 2-prong wall receptacle is the only available
outlet, it is the personal responsibility of the
consumer to have it replaced with a properly
grounded 3-prong wall receptacle, installed by a
qualified technician.
3
Power Supply Cord
Electrical Shock Hazard –Do not attempt to
install the appliance directly to a junction box,
modify the factory-installed cord, or connect
a dierent power cord to the appliance. If
the wall outlet is not sucient to support
the requirements of this appliance, it is the
responsibility of the consumer to have the
appropriate outlet installed by an electrician.
Improper installation and electrical connections
can result in electric shock, damage to the
appliance, personal injury, fire, or death.
This appliance is equipped with a 3-prong
grounding plug for your protection against shock
hazard and should be plugged directly into a
properly grounded receptacle. Do not cut or
remove the grounding prong from this plug.