
Instruction Manual


9
SPOUTS" is displayed. As well as heating the boiler, this
also heats the internal circuits by circulating hot water.
Please note! Using for the rst time:
3. "GET READY TO EXPERIENCE YOUR NEW ESPRESSO MA-
CHINE. ENJOY THE VIDEO!": press "OK" to watch a short
video on the homepage;
4. "MACHINE READY. ENJOY YOUR COFFEE!": Press "OK" to
go to the homepage (main screen) (or press "Repeat" to
watch the video again).
The appliance is at temperature when the main "CHOOSE YOUR
FAVOURITE" screen appears.
5. TURNING THE APPLIANCE OFF
Whenever the coee machine is turned o after being used to
make coee, it performs an automatic rinse cycle.
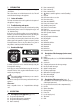
1. To turn the appliance o, press the button (A8) (g.
10).
2.
"TURNING OFF UNDERWAY": if envisaged, the appliance
performs a rinse cycle, delivering hot water from the coee
spouts (A17), then goes o (stand-by).
Please note!
If you will not be using the appliance for some time, unplug
from the mains socket:
1. First turn the appliance o by pressing the button
(g. 10);
2. Release the main switch (A12) at the back of the appliance
(g. 2).
Important!
Never press the main switch while the appliance is on.
6. MENU SETTINGS
6.1 Rinsing
Use this function to deliver hot water from the coee spouts
(A17) and hot water/steam spout (F), if inserted, to clean and
heat the appliance’s internal circuit.
Place a container with a minimum capacity of 100ml under the
coee and hot water spouts (g. 8).
To enable the function, proceed as follows:
1. Press the settings menu (B6);
2. Select "Rinsing";
3. "Position 0.5l container under spouts. Press OK to start".
Press OK to start delivery. After a few seconds, hot water is
delivered rst from the coee spouts, then the hot water/
steam spout (if inserted) to clean and heat the internal
circuit of the appliance (g. 11). "Rinsing underway. Hot
water from spouts" appears on the display (B1);
4. To stop rinsing, press "Cancel" or wait for rinsing to stop
automatically.
Please note!
• If the appliance is not used for more than 3-4 days, when
you turn it on again, we strongly recommend performing
2-3 rinses before use;
• After cleaning, it is normal for the grounds container (A18)
to contain water.
6.2 Descaling
For instructions on descaling, see section “18. Descaling”.
6.3 Clean milk container
This function can be used to clean the milk container (D) before
putting it in the refrigerator. To clean, proceed as follows:
1. Attach the milk container to the connection nozzles (A11)
and push as far as it will go (g. 22). The machine emits a
beep (if the beep function is enabled);
2. Adjust the milk spout (D6) by turning it anticlockwise (g.
23);
3. Place a recipient under the milk spout (g. 26);
4. Press the settings menu;
5. Select "Clean milk container";
6. "Place recipient under milk spout. Press OK to start milk
container cleaning";
7. Press "OK" to start cleaning: "CLEANING MILK CONTAINER
UNDERWAY. PLACE A RECIPIENT UNDER MILK SPOUT" (g.
26): hot water is delivered from the milk spout and stops
automatically when cleaning is complete.
8. Before extracting the milk container, place the milk spout
in the not-in-use position by turning it clockwise.
Please note!
• Never extract the milk container by pulling the milk spout.
• To interrupt the cleaning cycle at any moment, press
"Stop";
• In some cases, to clean you must wait for the appliance to
heat up;
• The milk container can be kept in the refrigerator.
6.4 Adjust mill
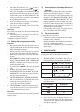
The appliance has two coee mills corresponding to beans con-
tainers (I) (A4) and (II) (A6). The coee mills are set by default
to prepare coee correctly and should not require regulating
initially.
However, if after making the rst few coees you nd that the
coee is either too weak and not creamy enough or delivery is
too slow (a drop at a time), they can be adjusted.
Proceed as follows:
1. Press the settings menu (B6);
2. Select "Adjust mill". A tutorial is displayed with suggestions
on the grinding level; if you want to skip this presentation,
press "Skip" or "Next" to continue with the tutorial;
3. "Select mill [I] or [II] and adjust coarseness within the
available range":