
Users Guide


58 | Wireless Network Dell PowerConnect W-Series Instant Access Point 6.1.3.1-3.0.0.0 | User Guide
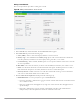
8. Use the Access Rules page to specify optional access rules for this network.
Network-based— Set the slider to Network-based if you want the same rules to apply to all users. The
Allow any to all destinations access rule is enabled by default. This rule allows traffic to all destinations.
Instant Firewall treats packets based on the first rule matched. For more information, see Chapter 12,
“Instant Firewall” .
To edit the default rule, perform the following steps:
a. Select the rule and then click Edit.
b. Select appropriate options in the Edit Rule window and click OK.
To define an access rule, perform the following steps:
a. Click New.
b. Select appropriate options in the New Rule window.
c. Click OK.
Role-based— Select Role-based if you want to specify per-user access rules. See “Creating a New User
Role” on page119 for more information.
Unrestricted— Select this to set no restrictions on access based on destination or type of traffic.
You select the Open security level 1. Select the required MAC authentication from the MAC authentication
drop-down list. Available options are— Enabled and Disabled
When Enabled, user must configure at least one RADIUS server for
authentication server. See “MAC Authentication” on page 109 for further
details.
2. Authentication server 1— Select the required Authentication server
option from the drop-down list. Available options are:
New— If you select this option, then an external radius server has to be
configured to authenticate the users. For information on configuring an
external RADIUS server, see Chapter 8, “Authentication” .
InternalServer— If you select this option, then users who are required to
authenticate with the internal RADIUS server must be added. Click the
Users link to add the users.
For information on adding a user, see “Adding a User” on page 203.
3. Reauth interval— When set to a value greater than zero, the Access
Points will periodically reauthenticate all associated and authenticated
clients.
4. Blacklisting— Select Enabled if you want clients to be blacklisted after a
certain number of authentication failures.
5. Max authentication failures— Users who fail to authenticate the number
of times specified here will be dynamically blacklisted. The maximum
value for this entry is 10.
NOTE: Navigate to PEF > Blacklisting in the WebUI to specify the duration of
the blacklisting on the Blacklisting tab of the PEF window.
6. For Internal users— Click Users to populate the system’s internal
authentication server with users. For information about adding a user, see
“Adding a User” on page 203.
7. Click Upload Certificate and browse to upload a certificate file for the
internal server. See “Certificates” on page 111 for more information.
Table 8 Conditions for Adding a Voice Network— Security Tab (Continued)
If then,