
Install Guide


Installing, and configuring OMIMSSC
Topics:
• Downloading OMIMSSC from web
•
Setting up OMIMSSC Appliance
• Enrolling multiple Microsoft consoles
• Launching OMIMSSC admin portal to download OMIMSSC components
• Enrolling Microsoft console in OMIMSSC
• Launching OMIMSSC from enrolled Microsoft console
Downloading OMIMSSC from web
To download OMIMSSC, from https://www.dell.com/support perform the following steps:
1. Click Browse all products > Software > Enterprise Systems Management > OpenManage Integration for
Microsoft System.
2. Select the required version of OMIMSSC.
3. Click Drivers & downloads tab.
4. Download OMIMSSC vhd file.
5. Extract the vhd file and then Set up OMIMSSC Appliance.
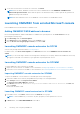
Setting up OMIMSSC Appliance
Ensure that the following requirements are met on the Hyper-V where you are setting up OMIMSSC Appliance:
● Virtual switch is configured and available.
● Allocate memory for OMIMSSC Appliance VM based on number of Microsoft consoles you plan to enroll. For more
information, see the Common requirements.
To set up OMIMSSC Appliance:
1. Deploy the OMIMSSC Appliance VM by performing the following steps:
a. In Windows Server, in Hyper-V Manager, from the Actions menu, select New and click Virtual Machine Manager.
The New Virtual Machine Wizard is displayed.
b. In Before You Begin, click Next.
c. In Specify Name and Location, provide a name for the virtual machine.
If you want to store the VM in a different location, and then select Store the virtual machine in a different location,
click Browse, and traverse to the new location.
d. In Specify Generation, select Generation 1, and then click Next.
e. In Assign Memory, assign the memory capacity that is mentioned in the prerequisite.
f. In Configure Networking, in Connection, select the network that you want to use, and then click Next.
g. In Connect Virtual Hard Disk, select Use an existing virtual hard disk, traverse to the location where the
OMIMSSC_v7.2.0_for_VMM_and_ConfigMgr VHD file is present, and select the file.
h. In Summary, confirm the details that you have provided and click Finish.
i. Set the Number of virtual processors count value to 4, since by default the processor count is set to 1.
To set the processor count:
i. Right-click OMIMSSC Appliance, and select Settings.
ii. In Settings, select Processor, and set Number of virtual processors to 4.
2. Start the OMIMSSC Appliance VM and perform the following tasks:
3. Perform the following tasks once OMIMSSC Appliance starts:
5
Installing, and configuring OMIMSSC 11