
Users Guide


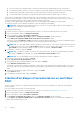


Table Of Contents
- Guide de l’utilisateur de Dell Lifecycle Controller
- Introduction
- Avantages de l’utilisation de l’outil Lifecycle Controller
- Avantages de l'utilisation d'iDRAC avec Lifecycle Controller
- Nouveautés de cette version
- Principales fonctionnalités
- Fonctionnalités sous licence du Lifecycle Controller
- Affichage des informations de licence iDRAC
- Autres documents utiles
- Accessing documents from Dell support site
- Contacter Dell
- Utilisation du Lifecycle Controller
- Démarrage du Lifecycle Controller
- Première utilisation de Lifecycle Controller
- Configuration du Lifecycle Controller à l'aide de l'Assistant Configuration initiale
- Spécification de la langue et du type de clavier
- Affichage de la présentation du produit
- Configuration des paramètres réseau de Lifecycle Controller
- Configuration du réseau et des références iDRAC
- Caractères recommandés pour les noms d'utilisateur et mots de passe
- Affichage du résumé des paramètres réseau
- Accès à l’aide
- Affichage des notes de mise à jour
- Configuration de Lifecycle Controller à partir de la page d'accueil
- Configuration du Lifecycle Controller à l'aide de l'Assistant Configuration initiale
- Fonctions du Lifecycle Controller
- Déploiement des systèmes d’exploitation
- Installation d'un système d'exploitation
- Utilisation de la configuration RAID optionnelle
- Configuration de RAID à l'aide de l'assistant de déploiement du système d'exploitation
- Installation automatique
- Démarrage sécurisé UEFI
- Accès aux pilotes
- Installation d'un système d'exploitation sur un LUN iSCSI et un LUN FCoE
- Scénarios post-redémarrage
- Surveillance
- Affichage et exportation de l'inventaire matériel
- À propos d'afficher/exporter l'inventaire actuel
- À propos d'afficher/exporter l'inventaire installé en usine
- Affichage de l'inventaire matériel (actuel ou installé en usine)
- Exportation de l'inventaire matériel (actuel ou installé en usine)
- Affichage ou exportation de l'inventaire matériel après le remplacement d'une pièce
- Affichage ou exportation de l'inventaire actuel après réinitialisation du Lifecycle Controller
- Lifecycle Controller log
- mise à jour de firmware
- Configure
- Options d'accès au panneau de configuration du système
- Configuration de l'iDRAC
- Configuration de la date et de l'heure système
- Configuration du RAID
- Configuration de RAID à l’aide de RAID logiciel
- Création d'un disque virtuel sécurisé sur un contrôleur RAID
- Chiffrement par clé
- Mode de cryptage par clé locale
- Briser les lecteurs en miroir
- Configuration du système – configuration matérielle avancée
- Collecte de l'inventaire système au redémarrage
- Configuration d'un lecteur USB local
- Configuration des serveurs NFS et CIFS
- Conditions relatives à la configuration d'un serveur HTTP ou HTTPS
- Maintenance
- Noms conviviaux des composants du système
- Utilisation de la configuration du système et du Gestionnaire d'amorçage
- Choix du mode d’amorçage du système
- Accès au programme de configuration du système
- Réponse aux messages d'erreur
- Utilisation des touches de navigation de la configuration du système
- Options du programme de configuration du système
- Écran System Setup Main (Menu principal de la configuration du système)
- Écran System BIOS (BIOS du système)
- Écran Informations sur le système
- Écran Memory Settings (Paramètres de la mémoire)
- Écran Paramètres du processeur
- Écran Paramètres SATA
- Écran Boot Settings (Paramètres d’amorçage)
- Écran Périphériques intégrés
- Écran Communications série
- Écran Paramètres du profil du système
- Écran Sécurité du système
- Paramètres divers
- Fonctionnalités de mot de passe du système et de configuration
- Accès au UEFI Boot Manager (Gestionnaire d'amorçage UEFI)
- Gestion des systèmes intégrés
- Utilitaire de configuration d'iDRAC
- Dépannage et questions fréquemment posées

Tableau 11. Niveau de RAID et nombre de disques
Adresse RAID Nombre minimal de disques
5 3
6 4
10 4
50 6
60 8
* Au moins deux disques durs sont requis pour les contrôleurs RAID PERC S140/S150.
Selecting physical disks
Use the Select Physical Disks screen to select the physical disks to be used for the virtual drive and select the physical disk
drive-related properties.
The number of physical disks required for the virtual disk varies depending on the RAID level. The minimum and maximum numbers of
physical disks required for the RAID level are displayed on the screen.
● Protocol — Select the protocol for the disk pool: Serial Attached SCSI (SAS), Serial ATA (SATA), or NVM Express (NVMe).
SAS drives are used for high performance, while SATA drives are used for a more cost-effective solution. A disk pool is a logical
grouping of physical disk drives on which one or more virtual drives can be created. The protocol is the type of technology used to
implement RAID.
● Media Type — Select the media type for the disk pool: Hard Disk Drives (HDD) or Solid State Disks (SSD). HDDs use traditional
rotational magnetic media for data storage and SSDs implement flash memory for data storage.
● Disk Boot Size — Select one of the following disk block sizes:
○ 512 — indicates that the 512 bytes block size hard drives (HDD) are selected.
○ 4K — indicates that the 4K block size hard disk drives (HDD) are selected. 4K block HDDs allow the faster data transfer with
fewer commands.
● T10 Protection Information (T10 PI) Capability— It is known as DIF (Data Integrity Fields) and the supporting HDDs are referred
to DIF drives. The T10 enabled HDDs validates and stores the data integrity fields for each block. It performs this action when you
write the data on the disk and return these values on a read request. When you read or write the data from the HDD, the data is
checked for the errors. Select one of the following types of T10 protection information capabilities:
○ All — indicates that both the T10 PI capable and non-capable HDDs are selected.
○ T10 PI Capable — indicates that only T10 PI capable HDDs are selected.
○ Non-T10 Capable — indicates that only non-T10 capable HDDs are selected.
NOTE: PERC 9 with version 9.3.2 and above doesn’t support T10 PI capabilities.
● Encryption Capability — Select Yes to enable encryption capability.
● Encryption Protocol — Select the type of encryption protocol. Select one of the following types of encryption protocol type:
○ TCG Enterprise SSC — indicates only TCG Enterprise SSC Capable drives are selected.
○ TCG Opal SSC — indicates only TCG Opal SSC Capable drives are selected.
○ Non-Encryption Capable — indicates only non-encryption capable drives are selected.
● Select Span Length — Select the span length. The span length value refers to the number of physical disk drives included in each
span. Span length applies only to RAID 10, RAID 50, and RAID 60. The Select Span Length — Setting span length is only supported
in RAID 10, RAID 50, and RAID 60. And in a RAID 10 configuration, the default value is set to 2 and the option Span Length is not
available is the storage controller supports Uneven span.
● Select the physical disk-drives using the check boxes at the bottom of the screen. The physical disk-drive selection must meet the
requirements of the RAID level and span length. To select all the physical disk-drives, click Select All. After you select the option, the
option changes to Deselect.
Définition des attributs de disque virtuel
Utilisez cette page pour spécifier les valeurs des attributs de disque virtuel suivants :
● Taille : indiquez la taille du disque virtuel.
44
Configure