
User guide


CHAPTER 6: USING THE RMS SOFTWARE
38
CAUTION: If you are prompted with a message
stating “The object was not found,” your net-
work interface is not connected to a loudspeaker.
Click OK and check your cable connections between
the network interface and loudspeakers.
About the Network Server and Manager
The RMS Network Server and Manager is the communica-
tion layer between the RMS program and your loudspeak-
ers. It runs minimized in the background and is accessible
from the Windows taskbar. The RMS Network Server and
Manager has options for removing and importing databases,
as well as options for working with loudspeakers on the net-
work (such as getting info, winking, setting offline, and
removing). The RMS Network Server and Manager automat-
ically closes when the RMS program is closed.
Removing Network Databases
You can use the RMS Network Server and Manager to
remove a database from the RMS network to deactivate it,
or so it can be moved to another computer.
To remove an RMS network database:
1. Launch RMS and open the RMS Network Server and
Manager.
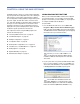
2. Choose Tools > Network Manager.
3. In the RMS Network Manager dialog box, select the
database you want to remove and click Remove.
4. When prompted to confirm the removal of the database
from the network, click Yes .
5. When prompted with the RMS Network Remove Service
dialog, click Yes. The database is removed from the net-
work and renamed with a date and time stamp. The
renamed database resides in the C:\meyer\rms folder
on your hard drive.
Importing RMS Network Databases
If you are upgrading to a new version of RMS, or if you have
moved your database files to a new host computer, you can
import the RMS database.
To import an RMS network database:
1. If RMS is currently running, choose Panel > Exit to quit.
2. Locate the RMSNET folder you want to import and copy
it to the C:\meyer\rms folder.
3. Launch RMS and open the RMS Network Server and
Manager.
4. Choose Tools > Network Manager.
5. In the RMS Network Manager dialog box, click Add.
6. In the Add RMS/LNS Network dialog, select one of the
following options:
■ Default network (RMSNET): Imports a database for one
of the network interface cards.
■ Remote network (RMSNETx): Imports a database for
an i.LON 10.
7. If you are importing an i.LON 10 database, enter the
Assigned Network Number for the i.LON 10. For exam-
ple, for an i.LON 10 named “ilon-1” with an IP address of
192.168.1.101, enter a value of 1.
8. Click Add Network only (for Import).
9. When prompted to confirm the import, click OK and then
Yes. The loudspeaker nodes are imported with the net-
work database.