
Setup Guide


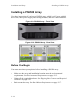


Installation and Setup Installing a PS6500 Array
2–17
Optionally, you can also use an uninterruptible power supply system (UPS) to
provide a highly available source of power to an array. Each UPS (not included)
should be on a different circuit and must provide the correct type of voltage for an
adequate amount of time.
Rack Mount Requirements
You must mount an array in a standard, 19 inch rack. The Rack Mount Instructions
are included in the shipping box. The instructions include rack requirements and
steps for mounting an array in a rack, installing the disk drives and other
components, and installing the cable management system.
Installing the Hardware
Make sure you complete the preliminary tasks described in Before You Begin on
page 2-14. Then, follow these steps to install a PS6500 array:
1. Connect the power cables. Do not turn on power to the array at this time. See
Step 1: Connect the Array to Power on page 2-18.
Documentation The following documentation is included in the shipping box:
• Unpacking Instructions
• Rack Mount Instructions
• Setup poster
• Installation and Setup manual (this document)
• License, regulatory, and warranty information
Table 2-8: Required Hardware – Not Supplied
Component Description
Standard 19 in. four-
pole rack
Provides easy access to arrays and other hardware in your
computing environment.
Two to eight network
cables
Connects an array to a network switch. Use Category 5E or
Category 6 cables with RJ45 connectors. Use Category 5 cables
only if they adhere to the TIA/EIA TSB95 standard.
Network switch Connects devices to a network. Multiple switches are
recommended for high availability.
Table 2-7: PS6500 Shipping Box Contents (Continued)
Component Description