
Administrator Guide


Définition d'une planification de nettoyage
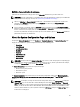
Pour définir une planification de nettoyage dans la page Schedules (Planifications), procédez comme suit :
REMARQUE : Pour plus d'informations sur la définition d'une nouvelle planification de nettoyage ou la modification
d'une planification de nettoyage existante, voir Création d'une planification de nettoyage.
1. Cliquez sur Schedules→ Cleaner Schedule (Planifications → Planification d'un nettoyage) dans le panneau de
navigation ou sur Cleaner (Nettoyage) dans la page Schedules pour afficher la page Cleaner Schedule
(Planification d'un nettoyage
2. Si aucun nettoyage n'est planifié, cliquez sur Schedule (Planifier) pour afficher la fenêtre Set Cleaner Schedule
(Définir une planification de nettoyage) et entrez l'heure de début et l'heure de fin (en utilisant les listes déroulantes
d'heures et de minutes) de chaque jour de la semaine à planifier.
S'il existe une planification de nettoyage existante que vous voulez modifier, cliquez sur Edit Schedule (Modifier la
planification) et effectuez les modifications.
About the System Configuration Page and Options
To display the System Configuration page, click Dashboard → System Configuration . The System Configuration page
displays the current DR Series system configuration information in the following panes:
• Networking
• Active Directory
• Local Workgroup Users
• Email Alerts
• Password
• Admin Contact Info
• Email Relay Host
• Date and Time
REMARQUE : Each pane title in the System Configuration page serves as a link. To display the corresponding page
that provides more detailed information and the related options you can use, click the pane title link. For example,
to display the Date and Time page, click the Date and Time pane title link.
The System Configuration page provides three options that let you:
• Edit the current system password
• Shut down the system
• Reboot the system
The System Configuration page provides the means for managing configuration settings for the Networking, Active
Directory, Local Workgroup Users, Email Alerts, Admin Contact Info, Email Relay Host, and Date and Time pages in the
system.
REMARQUE : For example, to manage the date and time configuration settings, click Date and Time to display the
Date and Time page. You can then add or edit the following date and settings: Mode, Time Zone, and Date and
Time. If the DR Series system is part of a workgroup and not joined to a Microsoft Active Directory Services (ADS)
domain, you will also be able to add or edit the Network Time Protocol (NTP) servers associated with the system.
However, when the DR Series system is joined to a domain, the NTP Servers setting on the Date and Time page is
disabled and is not displayed.
67