
Installation manual


3-9
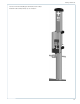
Installing a Wall Mount
Step 8: Connect Wiring
IMPORTANT: To power a dual-port station using a single 40A circuit, use the Power Share option provided in the
Power Management Kit. Instead of following the instructions below, see Appendix B to properly install Power Share jumpers
and relabel the station. After the station powers up, as described in Chapter 4, the on-screen Installation Wizard steps you
through the process of configuring the station.
If you are not installing a power sharing kit, connect the wiring as follows:
• Strip wires ½” (13 mm).
1/2” (13 mm)
• Push the black tab on the terminal block to release the
terminal block cover, then slide the cover up until it locks
into the raised position:
• Lift the corresponding white lever on the terminal block,
insert the ground wire into the center connector, then
push the lever down until it clicks into its fully closed
position.
• Lift the corresponding white levers, insert the 240 VAC
L1 and L2 wires, then push the levers down until they
click into their fully closed position.
WARNINGS:
• Use copper conductors only.
• Do NOT provide GFCI protection at panel. The CT4000
has built-in GFCI protection.
• In areas with frequent thunder storms, add surge
protection at the service panel for all circuits.
• Use new circuit breakers only. Used breakers can
damage equipment and introduce the potential for an
electrical fire.
• Ensure all power and ground connections, especially
those at the breaker and buss bar, are clean and tight.
Remove all oxide from all conductors and terminals before connecting wiring.
LEFT
L1
RIGHT
L1
GND
LEFT
L2
RIGHT
L2
For single port stations, use the connectors indicated for “RIGHT” side only.
For dual port stations: