
Specifications


R-117
QT-6000 Reference Manual
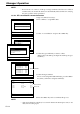
3-7-2. Auto-program operation and CF card utilities
The procedures of auto program function
1. Sign on a clerk (if necessary)
2. Press the <Auto PGM> key to assign “AUTO PGM.”
3. Select the appropriate menu you want by following the
guidance. The hierarchy of the AUTO PGM menus are
described below.
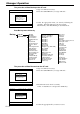
Auto-program menu hierarchy
Send / Receive
Copy All
Unit Price only
Range
(Send only)
Individual Files
All Data
All PGM
PLU
PLU 2nd@
PLU
PLU 2nd@
Fixed Totalizer
Free Function
Sub Department
PLU
Department
Group Character
Cashier / Clerk
Void
Scanning PLU link
Table Analysis
GT Character
General Feature
Special Character
Report Header
Tax Table
Pulldown Group
Set Menu Table
Clerk key ID
Batch X / Z
Clerk Detail
Receipt / SLIP Msg
Endorse Message
ARG GP1
ARG GP2
ARG GP3
ARG GP4
ARG GP5
Text Recall
Check Print
Graphic Logo (EXT PRN)
PLU 2nd@
Shift PLU
Scheduler
Order Char Link
Keyboard
Character Keyboard
System Connection
I / O Parameter
Printer Connection
Hourly/Item Link
Mix & match
Time Zone
Employee
Job Code
Schedule
IDC Link
Euro (Sub Currency) Pres
e
Auto Pgm control
LCD color
Customer
Customer GP
Customer Title
Menu Title
CF X/Z Conv
CHK Window
Clerk Window
Sound (1)
Sound (2)
:
Sound (10)
Color Definition
Color Theme
BMP Picture
Wireless LAN
(future use)
X/Z
C
01 10-10-01 12:34 000000
AUTO PGM
1.Send
2.Receive
0.00