PUB.
Introduction Important Usage Instructions WARNING TO REDUCE THE RISK OF FIRE OR ELECTRIC SHOCK, DO NOT EXPOSE THIS PRODUCT TO RAIN OR MOISTURE. COPYRIGHT WARNING: Unauthorized recording of copyrighted materials may infringe on the rights of copyright owners and be contrary to copyright laws. The Mains plug is used as the disconnect device. The Mains plug shall remain readily operable to disconnect the plug in case of an accident. CAUTION: • Danger of explosion if the wrong type of batteries are attached.
FCC/IC NOTICE HD Camcorder, VIXIA HF R32 / VIXIA HF R30 / VIXIA HF R300 systems This device complies with Part 15 of the FCC Rules. Operation is subject to the following two conditions: (1) This device may not cause harmful interference, and (2) this device must accept any interference received, including interference that may cause undesired operation. Note: This equipment has been tested and found to comply with the limits for class B digital device, pursuant to Part 15 of the FCC Rules.
IMPORTANT SAFETY INSTRUCTIONS In these safety instructions the word “apparatus” refers to the Canon HD Camcorder VIXIA HF R32 / VIXIA HF R30 / VIXIA HF R300 and all its accessories. 1 2 3 4 5 6 7 8 9 10 11 Read these instructions. Keep these instructions. Heed all warnings. Follow all instructions. Do not use this apparatus near water. Clean only with dry cloth. Do not install near any heat sources such as radiators, heat registers, stoves, or other apparatus (including amplifiers) that produce heat.
Trademark Acknowledgements • SD, SDHC and SDXC Logos are trademarks of SD-3C, LLC. • Microsoft and Windows are trademarks or registered trademarks of Microsoft Corporation in the United States and/or other countries. • App Store, iPhone, iTunes, Mac OS and Macintosh are trademarks of Apple Inc., registered in the U.S. and other countries. • “x.v.Color” and the “x.v.Color” logo are trademarks.
Exciting Features and New Functions &/% Story Creator (A 67) Wi-Fi Functions (A 149) Enjoy the freedom of Wi-Fi functions by making your camcorder an active part of your Wi-Fi home network or by conveniently accessing Wi-Fi hotspots to upload your videos wherever you may be. • You can save your recordings wirelessly to a computer in your home network using the supplied software Network Utility (A 156).
Smart AUTO (A 46) Smart AUTO automatically selects the best scene mode for the scene you want to shoot. You get spectacular recordings every time without worrying about settings. Video Snapshot Face Detection (A 72) (A 99) Shoot or capture short scenes and arrange them into a video clip set to your favorite background music. &/% C Memory Save (A 136) The camcorder automatically detects people’s faces and adjusts the focus and other settings accordingly for beautiful results.
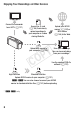
Enjoying Your Recordings on Other Devices Eye-Fi Connect the camcorder to an HDTV (A 127) Use an Eye-Fi card (A 146) to wirelessly upload recordings to your computer or a video sharing Web site. Upload your AVCHD movies* (A 142) or MP4 movies (A 148) to the Web. MP4 Y P O Upload MP4 movies to your computer (A 133). C AVCHD High Definition Save your recordings. You can also create discs from your recordings.* Use the supplied PIXELA’s software (A 131).
&/% Enjoying Your Recordings Using the Camcorder's Wi-Fi Functions Play video wirelessly directly from the memory on AVCHD- and DLNA-compatible HDTVs and other devices connected to the network (A 164). LAN cable C Y P O Join a Wi-Fi network by first connecting to an access point (A 151). Wirelessly connect to a Wi-Fi-enabled iOS device like an iPhone to upload your recordings (A 161).
Table of contents Introduction 6 14 16 16 18 Exciting Features and New Functions About this Manual Getting to Know the Camcorder Supplied Accessories and CD-ROMs Names of Parts Preparations 20 20 23 24 26 26 27 31 34 34 35 36 37 37 39 40 41 42 Getting Started Y P O Charging the Battery Pack Using the Grip Belt Opening the Lens Cover and Adjusting the LCD Screen Basic Operation of the Camcorder C Using the Touch Screen Using the Menus Operating Modes First Time Settings Setting the Date and
AUTO Mode 44 Basic Recording 44 46 48 49 51 Shooting Video and Taking Photos in AUTO Mode About the Smart AUTO function Intelligent IS Zooming Quick Start Video 53 53 57 58 60 64 66 67 67 70 72 73 79 81 82 85 86 87 89 89 91 94 95 97 98 98 99 Basic Playback Playing Back Video 3D Flip View The [Index Selection] Screen: Selecting the Content to Play Back Deleting Scenes and Stories Selecting the Playback Starting Point Onscreen Displays and Data Code Y P O Video Stories and Cinema Style Using Stor
101 102 103 104 106 107 108 109 111 112 113 114 116 Touch & Track Faders Manual Exposure Adjustment Manual Focus Adjustment Tele Macro White Balance Self Timer Audio Recording Level Using Headphones Using an External Microphone Audio Mix Capturing Video Snapshot Scenes and Photos from a Movie Dividing Scenes Photos 118 120 122 Viewing Photos Deleting Photos Slideshow C External Connections Y P O 123 Terminals on the Camcorder 124 Connection Diagrams 127 Playback on a TV Screen 128 Saving and Sh
&/% Wi-Fi Functions 149 151 156 160 161 164 Introduction to Wi-Fi Connecting to a Wi-Fi Network Transferring Files to a Computer or FTP Server Uploading Recordings to YouTube and Facebook Uploading Videos Using an iOS Device Wireless Playback on a DLNA-Compatible Device Additional Information 168 Appendix: Menu Options Lists 168 172 [Main Functions] Panel [Other Settings] Menus 182 Appendix: Onscreen Icons and Displays 187 Trouble? 187 194 Troubleshooting List of Messages 205 Do’s and Don’ts 205 2
About this Manual Thank you for purchasing the Canon VIXIA HF R32 / VIXIA HF R30 / VIXIA HF R300. Please read this manual carefully before you use the camcorder and retain it for future reference. Should your camcorder fail to operate correctly, refer to Troubleshooting (A 187). Conventions Used in this Manual • • • • • • • IMPORTANT: Precautions related to the camcorder’s operation. NOTES: Additional topics that complement the basic operating procedures.
indicates that a function is available in the operating mode indicated and indicates that the function is not available. The operating mode icons are divided into three groups: the first three icons represent the camera mode, the second three icons represent the recording standard, and the last two represent playback modes. For a detailed explanation refer to Operating Modes (A 31).
Getting to Know the Camcorder Supplied Accessories and CD-ROMs The following accessories are supplied with the camcorder: XCA-110 Compact Power Adapter* BP-709 Battery PackW XIFC-300PCU/S USB Cable HTC-100/S HDMI CableW XQuick Guide XWi-Fi Basic Setup Guide** Y P O Stylus PenW C * CA-110E including power cord, in Asia. ** &/% only.
The following CD-ROMs and software are supplied with the camcorder: • PIXELA CD-ROM - &/% You can use VideoBrowser for managing, editing, and playing back AVCHD movies, and Network Utility when transferring recordings wirelessly to a computer. - ' Use Transfer Utility for saving and transferring AVCHD movies and music files you can use as background music. - A printed Startup Guide for PIXELA's software is also supplied. Refer to this Startup Guide for details about the supplied software.
Names of Parts Left side view 1 23 6 78 9 A q Right side view A a 1 U (camera/play) button (A 33) 2 HOME button (A 27) 4 5 3 VIDEO SNAP (video snapshot) button (A 72) 4 ACCESS indicator (A 44) 5 Memory card slot cover 6 MIC terminal (A 112) 7 AV OUT terminal (A 123, 125)/ × (headphones) terminal (A 111) 8 HDMI OUT terminal (A 123, 124) 9 USB terminal (A 123, 125, 136, 140) q Memory card slot (A 39) A a START/STOP button (A 44) A s DC IN terminal (A 20) A d Grip belt (A 23) A f Wi-Fi antenna (&/% only) A
Speaker (A 55) Zoom lever (A 49) LCD touch screen (A 24, 26) POWER button ON/OFF (CHG) (charge) indicator: Green – On Orange – Standby (A 51) Red – Charging (A 20) s Battery attachment unit (A 20) S d Serial number S A j k A l A q S a S Top view A j A k LCD panel A l Y P O S Tripod socket (A 206) f g BATTERY RELEASE switch (A 21) S Back view S q S a C S s Bottom view S dS f S g Introduction 19
Preparations This chapter describes basic operations, such as using the touch panel, navigating the menus, and first time settings to help you learn more about your camcorder. Getting Started Charging the Battery Pack The camcorder can be powered with a battery pack or directly using the compact power adapter. For approximate charging times and recording/playback times with a fully charged battery pack, refer to Charging, Recording and Playback Times (A 213).
4 Charging will start when the camcorder is turned off. • If the camcorder was on, the green ON/OFF (CHG) indicator will go out when you turn off the camcorder. After a moment, the ON/OFF (CHG) indicator will turn on in red (battery pack charging). The red ON/OFF (CHG) indicator will go out when the battery pack is fully charged. • If the indicator flashes, refer to Troubleshooting (A 190).
• To prevent equipment breakdowns and excessive heating, do not connect the supplied compact power adapter to voltage converters for overseas travels or special power sources such as those on aircraft and ships, DC-AC inverters, etc. NOTES • We recommend charging the battery pack in temperatures between 10 °C and 30 °C (50 °F and 86 °F). If either the ambient temperature or the battery pack’s temperature is outside the range of approx. 0 °C to 40 °C (32 °F to 104 °F), charging will not start.
Using the Grip Belt Fasten the grip belt. Adjust the grip belt so that you can reach the zoom lever with your index finger, and the Y button with your thumb. You can attach the supplied stylus pen to the grip belt. To remove the grip belt Y P O 1 Lift the padded handgrip’s flap and detach the strap from the Velcro pad. 2 Pull the strap to remove it first from the front bracket on the camcorder, then to unthread it from the handgrip and finally to remove it from the rear bracket on the camcorder.
Opening the Lens Cover and Adjusting the LCD Screen Before you start recording, open the lens cover. Move the lens cover switch down to to open the lens cover. Rotating the LCD Panel Y P O Open the LCD panel 90 degrees. • You can rotate the panel 90 degrees downward. • You can rotate the panel 180 degrees toward the lens. Rotating the LCD panel 180 degrees can be useful to allow the camcorder to include yourself in the picture when recording with the self timer.
NOTES • About the LCD screen: The screen is produced using extremely high-precision manufacturing techniques, with more than 99.99% of the pixels operating to specification. Less than 0.01% of the pixels may occasionally misfire or appear as black, red, blue or green dots. This has no effect on the recorded image and does not constitute a malfunction. • For details about how to take care of the touch screen, refer to Handling Precautions (A 205), Cleaning (A 209).
Basic Operation of the Camcorder Using the Touch Screen The control buttons and menu items that appear on the touch screen change dynamically depending on the operating mode and the task you are performing. With the intuitive touch screen interface you have all the controls at your fingertips. You can also use the supplied stylus pen for a more precise operation. Touch Press firmly on an element displayed on the touch screen.
Using the Menus Many of the camcorder's functions can be adjusted from the [ Main Functions] panel and [ Other Settings] menus in the HOME menu. For details about the available menu options and settings, refer to the appendix Menu Options Lists (A 168). HOME Menu Operating modes: The HOME menu is the gateway to most of the camcorder's functions and settings. After you press , the HOME menu will appear and you can select from the following control buttons.
•[ Camera Mode] - From the [ Camera Mode] menu, you will be able to change whether you record movies in mode (camcorder automatically takes care of many settings), mode (you can manually change settings), or mode (using the cinema-look filters, you can make movies with a cinematic feel). Available only in recording mode. For details on how to set the camera mode, refer to Recording (A 31). •[ Recording Standard] - This camcorder can record movies in either the AVCHD or MP4 recording standard.
In mode Drag your finger up and down along the scroll bar to display the rest of the panel Touch to scroll up or down Touch the control button of the desired function You may need to drag your finger up and down along the scroll bar or touch [ ] and [ ] to find the control button of the desired function. [Edit] Panel Operating modes: Y P O Touch [Edit] to display a panel showing available operations (copying, deleting, etc.), and then touch the operation you want to perform.
[Other Settings] Menus Operating modes: * * In mode, access to functions is limited. 1 Press menu. to open the HOME 2 Touch [ Other Settings] to open the [ Other Settings] menus. 3 Touch the tab of the desired menu. 4 Drag your finger up and down to bring the setting you want to change into the orange selection bar. • You can also use the [ ] and [ ] icons for scrolling. • Menu items not available appear grayed out.
Operating Modes Recording When recording, the camcorder's operating mode is determined by the [ Camera Mode] and [ Recording Standard] menus in the HOME menu. First, set the camera mode. 1 Press to open the HOME menu. 2 Touch [ Camera Mode] and then touch the desired camera mode. 3 Touch [OK]. Camera mode (AUTO mode) (Manual mode) (Cinema mode) Y P O Operation Let the camcorder take care of most of the settings while you concentrate on recording (A 44).
Recording standard Control button Operation v Movies are recorded in AVCHD, which is designed for playback on HDTVs. Select this recording standard if you plan to show off your movies and you want to impress your audience with fantastic picture quality. é Movies are recorded in AVCHD using Story Creator (A 67), which allows you to create compelling video stories. Because Story Creator mode records in AVCHD, your movies will look amazing when played back on an HDTV.
Playback Press the camera/play button T to switch the camcorder between camera (recording) mode and playback mode. You can press T when the camcorder is off to turn it on directly in playback mode. Playback mode Operation Playing back movies (A 53). Viewing photos (A 118). NOTES Y P O • &/% When switching to a playback mode, the memory selected for playback will be the same currently used for recording.
First Time Settings Setting the Date and Time You will need to set the date and time of the camcorder before you can start using it. The [Date/Time] screen will appear automatically when the camcorder’s clock is not set. When the [Date/Time] screen appears, the year will be selected. 1 Touch a field you want to change (year, month, day, hours or minutes). 2 Touch [Í] or [Î] to change the field as necessary. 3 Set the correct date and time by changing all the fields in the same way. Y P O 4 Touch [Y.M.
Changing the Language The default language of the camcorder is English. You can set it to one of 27 languages. Operating modes: 1 Press . 2 Select the desired language. [ Other Settings] > q > [Language !] > Desired language > [OK] > [X] NOTES C Y P O • Some control buttons, such as [ZOOM] or [PHOTO], will appear in English regardless of the language selected.
Changing the Time Zone Change the time zone to match your location. The default setting is New York. Operating modes: 1 Press . 2 Open the [Time Zone/DST] screen. [ Other Settings] > q > [Time Zone/DST] 3 Touch ["] to set the home time zone, or [#] to set the time zone of your destination when you are traveling. 4 Touch [Í] or [Î] to set the desired time zone. If necessary, touch [$] to adjust for daylight saving time. 5 Touch [X] to close the menu.
Using a Memory Card Memory Cards Compatible for Use with the Camcorder You can use the following types of commercially available Secure Digital (SD) cards with this camcorder. As of December 2011, the movie recording function has been tested using SD/SDHC/SDXC memory cards made by Panasonic, Toshiba and SanDisk. For the latest information on cards that can be used, visit your local Canon Web site. Memory card type: .
SDXC Memory Cards You can use SDXC memory cards with this camcorder. When using memory cards with other devices, such as digital recorders, computers and card readers, make sure that the external device is compatible with SDXC cards. The table below summarizes compatibility by computer operating system, as of December 2011. For the latest information, however, contact the computer, operating system or memory card manufacturer.
Inserting and Removing a Memory Card Make sure to initialize (A 42) all memory cards before using them with this camcorder. 1 Turn off the camcorder. Make sure the ON/OFF (CHG) indicator is off. 2 Open the memory card slot cover. 3 Insert the memory card at a slight angle, with the label facing toward the lens, all the way into the memory card slot until it clicks. • The memory card slot is at a slight angle toward the lens so be careful not to damage the memory card when inserting it.
IMPORTANT • Memory cards have front and back sides that are not interchangeable. Inserting a memory card facing the wrong direction can cause a malfunction of the camcorder. Be sure to insert the memory card as described in step 3. &/% Selecting the Memory (Built-in Memory/Memory Card) for the Recordings You can select to record your movies and photos in the built-in memory or on a memory card. The default memory for recording both is the built-in memory.
&/% Relay Recording You can activate the relay recording so if the built-in memory becomes full while recording movies, the recording will continue uninterrupted on the memory card. Operating modes: 1 Insert a memory card that contains no video recordings into the memory card slot. 2 Press . 3 Activate the relay recording.
Initializing the Memory Initialize memory cards when you use them with this camcorder for the first time. You can also initialize a memory card or the built-in memory (&/% only) to permanently delete all the recordings it contains. &/% At the time of purchase, the built-in memory comes preinitialized and contains music files for use as background music and images for use with the image mix function (image mix frames). Operating modes: 1 Power the camcorder using the compact power adapter.
IMPORTANT • Initializing the memory will permanently erase all recordings. Lost original recordings cannot be recovered. Make sure you save important recordings in advance using an external device (A 128). • Initializing a memory card will permanently erase any music files and images you may have transferred to the card. (&/% The music files and image mix frames that come pre-installed in the built-in memory will be restored after it is initialized.
AUTO Mode This chapter covers how to easily record video and photos in mode, and how to use basic shooting functions like zoom and Quick Start. To enjoy full access to menus and more advanced functions, refer to Recording in Manual Mode (A 89). Basic Recording Shooting Video and Taking Photos in AUTO Mode With mode, you can take great-looking videos and photos by letting the camcorder automatically adjust settings based on the recording situation.
1 Press P to turn on the camcorder. • &/% By default, movies and photos are recorded in the built-in memory. You can select the memory that will be used to record movies and photos (A 40). • Please read the IMPORTANT section (A 48) before using an Eye-Fi card. 2 Open the lens cover switch. 3 Press . To change the recording standard, refer to Recording (A 31). 4 Set the camcorder to [ C Y P O mode. Camera Mode] > [N] > [OK] To record video Press Y to begin recording.
To take photos Touch [PHOTO]. • You can record photos simultaneously while recording a movie. • A green icon ( ) will appear momentarily on the screen and the ACCESS indicator will flash as the photo is recorded. However, if you record a photo while recording a movie, the green icon will not appear. Instead, a icon will appear in the upper right of the screen. When you have finished recording 1 Make sure that the ACCESS indicator is off. 2 Turn off the camcorder. 3 Close the LCD panel.
Smart AUTO icons Background → (color of the icon) Bright* (gray) Subject ↓ Blue skies* (light blue) Vivid colors* (green/red) Sunsets (orange) People (stationary) ( ) ( ) ( ) — People (moving) ( ) ( ) ( ) — Subjects other than people, such as landscapes ( Close objects ) ( / Background → (color of the icon) People (stationary) People (moving) Close objects ) ( ) / ) ( / / ) ( / ) — Dark (dark blue) Subject ↓ Subjects other than people, such as landscapes ( / C /
Intelligent IS Intelligent IS allows the camcorder to select the best image stabilization option based on your shooting method. The Intelligent IS icon will change to one of the following icons. In and modes, you can set the image stabilization manually (A 97).
• When recording in bright places, it may be difficult to use the LCD screen. In such cases, you can adjust the LCD backlight with the q > [LCD Backlight] setting or adjust the brightness of the LCD screen with the q > [LCD Brightness] setting. • Under certain conditions, the Smart AUTO icon that appears on the screen may not match the actual scene. Especially when shooting against orange or blue backgrounds, the Sunset or one of the Blue Skies icons may appear and the colors may not look natural.
Using the Touch Screen’s Zoom Controls 1 Display the zoom controls on the touch screen. [FUNC.] > [ZOOM] • The zoom controls appear on the left side of the screen. 2 Touch the zoom controls to operate the zoom. Touch anywhere within the T area to zoom out or anywhere within the S area to zoom in. Touch closer to the center for a slow zoom; touch closer to the V/U icons for faster zooms. 3 Touch [X] to hide the zoom controls.
Options [ Optical] For optical zoom, the camcorder uses the optical magnification ratio of the lens. [ Advanced] For advanced zoom, the camcorder processes the image beyond the range of the optical zoom to obtain a larger zoom without any deterioration in image quality. At full wide angle, the angle of view with advanced zoom is wider than the angle of view with optical zoom.
1 With the camcorder on and in a recording mode, close the LCD panel. A beep will sound and the green ON/OFF (CHG) indicator will change to orange to indicate the camcorder entered standby mode. 2 When you wish to resume recording, open the LCD panel. The ON/OFF (CHG) indicator turns back green and the camcorder is ready to record. IMPORTANT • Do not disconnect the power source during standby mode (while the ON/OFF (CHG) indicator is lit in orange).
Video This chapter covers functions related to movies, including playback, advanced shooting, using Story Creator and other advanced functions. For details about basic video shooting, refer to AUTO Mode (A 44). Basic Playback Playing Back Video You can use the s > [Data Code] setting to choose whether to display the recording date (and other information, for AVCHD movies) when you play back videos (A 66). Operating modes: 1 Press T.
3 Look for the scene you want to play back. Move the zoom lever toward T to show 15 scenes per page; move it toward S to show 6 scenes per page. ! Open the index selection screen. " Memory being read. # Recording date**. $ Division line between recording dates. % Drag your finger left/right for the next/previous index page*. & Display the next/previous index page. ' Scene's timeline (A 64)**. ( 3D Flip View (A 57)**.
During playback: AVCHD movies MP4 movies ! Jump to the beginning of the scene. Double-tap to jump to the previous scene*. " Jump to the beginning of the next scene*. # Pause the playback. $ Fast playback** backward/forward. % Display the volume (A 55) and background music mix balance (A 82) controls. & Stop the playback. ' Decoration (A 73). ( Volume. ) Recording date. Use the s > [Data Code] setting to turn this on and off. C Y P O * Not available for MP4 movies.
Adjusting the volume for MP4 movies 1 During playback, touch the screen to display the playback controls. 2 Drag your finger across the volume bar to adjust the volume. During playback pause: ! Resume playback. " Slow playback* backward/forward. # Capture the displayed frame as a photo (A 115)**. $ Decoration (A 73)**. Y P O * Touch several times to increase the playback speed 1/8 → 1/4 the normal speed. ** Not available for MP4 movies.
3D Flip View Operating modes: Touch [ ] in the [ Movies] index screen to switch to 3D Flip View. This fun way of displaying scenes grouped by recording date in a 3D layout can be useful to flip through a large number of recordings. Y P O ! Recording date. " Drag your finger left to go to the next date with recordings. # Drag your finger up and down to browse through the scenes recorded in the displayed date. $ Drag your finger right to go to the previous date with recordings.
The [Index Selection] Screen: Selecting the Content to Play Back From the [G Index Selection] screen you can select the content you want to play back (original scenes by date or by story, or photos, for example). &/% You can also select the memory from which you want to play back your recordings. Operating modes: In any index screen: Touch [G]. During single photo view, touch the screen once to display the controls then touch [f] to open the [ Photos] index screen.
Options [y Movies] Scenes recorded in AVCHD organized by recording date. [ê Gallery] Scenes recorded in AVCHD organized by story (A 79). [ Movies] Scenes recorded in MP4. [ Photos] Photos’ index screen. [z SD Movies] (&/% only when a memory card is selected) Scenes that were converted to standard definition to upload them to the Web (A 142). NOTES • &/% Fast/slow playback modes are not available for scenes converted to standard definition.
Deleting Scenes and Stories You can delete those scenes and stories that you are not interested in keeping. Deleting scenes allows you also to free up space on the memory. Deleting a Single Scene Operating modes: 1 Play back the scene you wish to delete. When playing back a scene in the gallery, pause the scene you wish to delete and then continue to step 2. 2 Touch the screen to display the playback controls. 3 Delete the scene.
To select individual scenes 1 Touch on the individual scenes you want to delete. • A checkmark ! will appear on the scenes you touch. The total number of selected scenes will appear next to the " icon. • Touch a selected scene to remove the checkmark. To remove all checkmarks at once, touch [Remove All] > [Yes]. 2 After selecting all the desired scenes, touch [OK]. Options [date] Delete all the scenes recorded on the date shown in the control button. For AVCHD movies only.
Deleting Scenes from a Story by Rating Operating modes: 1 Open the information screen of the story that contains the scenes you want to delete. [G] > [ Gallery] > Bring the desired story to the front > [Story Details] 2 Open the rating selection screen. [Edit Story] > [Delete] 3 Touch one or more of the rating buttons to select all the applicable scenes. • A grayed out rating button indicates that no scenes in the story have been given that particular rating.
Deleting Stories Operating modes: Deleting a story permanently deletes all the scenes it contains. The two preexisting stories, [Unsorted] and [Video Snapshot], cannot be deleted. 1 Open the gallery. [G] > [ Gallery] 2 Select the story you want to delete. Drag your finger right/left to bring the desired story to the front. 3 Delete the story. Y P O [Story Details] > [Edit Story] > [Delete Story] > [Yes]* > [OK] * Touch [Stop] to interrupt the operation while it is in progress.
NOTES • To delete all movies and make all recordable space available again you may prefer to initialize the memory (A 42). Selecting the Playback Starting Point If you have a very long scene, you may want to start playing back the scene from a certain point. You can use the movie timeline to break the scene to segments at fixed time intervals ranging from 6 seconds to 6 minutes. Operating modes: 1 Open the [ Movies] index screen. 2 Open the scene’s [Timeline] screen.
! Touch twice to return to the index screen. " Previous/next scene. # Drag your finger left along the ruler to display the next 5 frames. $ Scene’s recording mode and length. % Recording date and time. & Drag your finger right along the ruler to display the previous 5 frames. ' Current scene / Total number of scenes. ( Currently selected interval between frames.
Onscreen Displays and Data Code With every scene or photo recorded, the camcorder keeps a data code. For AVCHD movies, the data code includes date/time of recording, information about the camera setup, etc. For MP4 movies, the data code is the date of recording. You can choose the information to be displayed. Operating modes: 1 Press . 2 Select the information to be displayed.
Video Stories and Cinema Style Using Story Creator to Create Compelling Stories Story Creator is a helpful function that offers suggestions for typical scenes in a number of situations. With Story Creator, creating interesting video stories is as easy as selecting one of the story themes, such as [Travel], [Party] or [Kids & Pets], and following the suggested categories to record video.
6 Touch [OK]. • A new story will be created and the camcorder will enter record pause mode. The selected story scene category will appear at the bottom of the screen. • If you touch [?], a screen showing the selected theme, story scene (category), shooting advice and the recommended shooting length will appear. Recording a Scene within a Story Press Y to record movies within the selected story scene (category). • Use the displayed recommended length as a reference when recording scenes.
To exit Story Creator mode 1 Press . 2 Touch [ Recording Standard] and then select a different recording standard. NOTES • When recording video snapshot scenes, you can have the camcorder automatically link the length of video snapshot scenes to the recommended length of story scenes with the r > [Video Snapshot Length] setting. • Relay recording is not available during Story Creator mode. Recording Additional Scenes within an Existing Story 1 Press . 2 Start Story Creator mode.
Cinema Mode and Cinema-Look Filters In (cinema) mode, the camcorder will adjust the frame rate and several other picture-related settings to give your recordings a cinematic look. In this mode you can also use a variety of professional cinema-look filters to create unique movies with a distinctive appearance. Operating modes: 1 Press . 2 Set the camera mode to [ . Camera Mode] > [ ] > [OK] 3 Select the desired cinema-look filter.
Options ( Default value) The camcorder offers 7 cinemalook filters. Select the desired filter while previewing the effect on the screen. [1: Cinema Standard] [2: Vivid] [3: Cool] [4: Nostalgic] [5: Sepia] [6: Old Movies] [7: Dramatic B&W] NOTES ! Filter number (will appear on the control button) " Filter name # Preview the effect on the screen $ Brief description (onscreen guidance) Y P O • Photos cannot be recorded while the camcorder is set to C mode.
Video Snapshot Record a series of short scenes. Then, play back your video snapshot scenes set to your favorite music (A 82) to create your own fun music video. You will be surprised how by changing the background music, you can give your scenes an entirely new feel. The default length of a video snapshot scene is 4 seconds but you can change it to 2 or 8 seconds, or to the length recommended for the selected story scene (category) in Story Creator, with the r > [Video Snapshot Length] setting.
Decoration: Adding a Personal Touch Add a new level of enjoyment to your scenes by decorating them. You can add animated graphics, stamps and even your own freehand drawings. The supplied stylus pen will be especially useful for decorating scenes. You can decorate scenes as they are being recorded, during playback or just before converting them to standard definition (&/% only; A 142). Decorating Scenes while Recording Operating modes: C Y P O 1 Open the decoration screen. [FUNC.
! Canvas - The area where you will draw and see your decorations in action. " Toolbar. # [Ó Pens and Stamps] Select the type of pen or stamp and its color. You can also save a canvas or load a previously saved canvas. $ [× Animated Stamps] Select animated stamps to add to your decoration. % [Ø Captions] Add the date, date and time, story title* or story theme* as a caption that will be included in the recording. & [Ü]** (Image Mix) Choose one of 27 different frames to add onto the canvas.
To use [Pens and Stamps] 1 Touch [Ó]. The [Pens and Stamps] screen will appear. 2 Select the desired pen or stamp from [Tools]. 3 Select white or black from [Colors]. Alternatively, you can touch [Ö] and select a color from the color palette. 4 Draw freely on the canvas. Touch [Ó] > [Clear] > [Yes] to clear the canvas and start again. 5 When you finish drawing, save the canvas.
To use [Captions] 1 Touch [Ø]. The [Captions] screen will appear. 2 Touch [Date] or [Time]. When recording a scene using Story Creator, you can also select [Title] (the story’s title) or [Story Scene] (the story scene category). 3 Select the desired text settings and touch [K]. • Touch [ ] (white text on dark background), [ ] (white text) or [ (black text). ] 4 Touch the caption and drag it to the desired location. To use image mix Operating modes: Y P O 1 Touch [Ü] to open the [Select Image] screen.
Mixing Your Own Images with Live Video You can use images you make on your computer for the image mix (Chroma Key) function. Make sure that the image you want to use has a blue or green area, which will be replaced by the live video using Chroma Key mixing. Refer to About the image files for the Image Mix function (A 219) for details about the types of image files that can be used and where to transfer them.
Decorating Scenes during Playback Operating modes: 1 From the [ Movies] index screen or gallery, play back the scene you want to decorate. 2 Touch the screen to display the playback controls. 3 Touch [Ò] to open the decoration screen. 4 Decorate the scene using the tools from the toolbar as explained in the previous section. In playback mode, the decorations will not be saved with the original recording.
Playing Back Stories from the Gallery You can play back recordings made using Story Creator to play them back as a single compelling video story following the order of the story’s script. Regular scenes and video snapshot scenes recorded without using Story Creator, will appear in the gallery under the [Unsorted] or [Video Snapshot] stories. When playing back stories from the gallery, you can choose to play back only scenes with a certain rating. Operating modes: 1 Open the gallery.
3 Select the rating of the scenes you want to play back. [Story Details] > [Select by Rating] > Desired rating > [K] > [K] 4 Touch the story’s thumbnail to start the playback. • The complete story will be played back from the first scene to the last. When playback ends, the camcorder will return to the gallery. • During the playback of a story other than [Unsorted] or [Video Snapshot], touch the screen and then touch [ë] to display the scene’s category during playback.
Rating Scenes You can rate story scenes immediately after recording them or during playback. You can then select multiple scenes with the same rating, for example, in order to play back or copy only your favorite scenes. Rating Scenes Immediately After Recording Operating modes: 1 Press . 2 Activate the scene rating function.
2 Open the list of scenes of the story that contains the scenes you want to rate. [G] > [ Gallery] > Bring the desired story to the front > [Scene List] 3 In the [Scene List] screen, drag your finger up/down to select the scene you want to rate. 4 Touch the orange [ screen. ] icon on the left to open the [Edit Scene] 5 Touch the control button of the desired rating and touch [K] twice to return to the gallery.
The supplied VIXIA CD-ROM contains 3 music tracks you can use as background music. &/%: The music files come pre-installed in the built-in memory. You can mix the original audio and the background music and adjust the background music mix balance to your preference. POINTS TO CHECK • To play back scenes or a slideshow of photos recorded on the memory card, you will need to transfer the music tracks to the memory card in advance. See the NOTES section (A 85). 1 Press .
5 Adjust the mix balance between the original sound and the background music. Touch [y] (more of the original sound) or [Û] (more of the background music) or drag your finger along the [Music Balance] bar to adjust the background music balance as desired. 6 Touch [X] and then touch a story or scene to start the playback with the selected background music. To adjust the background music balance during playback 1 During playback, touch the screen to display the playback controls.
NOTES • Initializing a memory card will permanently erase any music files you may have transferred to the card. (&/% The music files that come pre-installed in the built-in memory will be restored after it is initialized.) To transfer music files from the supplied VIXIA CD-ROM to the memory card: - Windows users: Use the supplied software VideoBrowser (&/ % only) or Transfer Utility (' only). For details, refer to the Software Guide (PDF file) of the supplied PIXELA’s software.
4 Select the destination. Drag your finger right/left to select the desired story and touch its thumbnail. Then, drag your finger up/down to select the desired category and touch the orange [ ] icon on the left. And last, drag your finger up/down to move the orange bar within the category to select the position of the scene. 5 Copy or move the scene. [Set]1 > [Yes]2 > [OK]3 > [K] 1 2 3 This step is not necessary when copying/moving a scene into a story scene category that contains no other scenes.
3 Open the [Story Thumbnail] screen. [Story Details] > [Edit Story] > [Story Thumbnail] 4 Locate the frame you want to use as the story’s thumbnail. Playback controls will appear on the screen (A 55). Use any special playback modes (fast/slow playback, frame reverse/advance) as necessary to locate the desired image. 5 Touch [Set] to change the story’s thumbnail. 6 Touch [K] to return to the gallery.
! Switch between letters and numbers/special characters. " Change the position of the cursor. # Delete the character to the cursor’s left (backspace). $ Caps Lock. When the numerical keyboard is displayed, [#%?] switches between set 1 and set 2 of special characters. NOTES Y P O • We recommend using the supplied stylus pen to enter characters.
Advanced Functions Recording in Manual Mode When the camcorder is set to mode, you can enjoy full access to the menus and manually adjust the exposure, focus, white balance and many more of the camcorder’s settings to your preference. Even in this mode, though, the camcorder can help you with the settings. For example, by using Special Scene recording programs (A 95). Operating modes: 1 Press P to turn on the camcorder. • &/% By default, movies and photos are recorded in the built-in memory.
IMPORTANT • To protect the lens, keep the lens cover closed when you are not recording movies and when you are not using the camcorder. • Observe the following precautions while the ACCESS indicator is on or flashing. Failing to do so may result in permanent data loss or damage to the memory. - Do not open the memory card slot cover. - Do not disconnect the power source or turn off the camcorder. - Do not change the camcorder’s operating mode.
NOTES • For MP4 movies, you cannot review the last movie recorded if, after you recorded the movie, you performed another operation such as opening a menu. Selecting the Video Quality (Recording Mode) The camcorder offers 5 recording modes for recording AVCHD movies and 2 for MP4 movies. Changing the recording mode will change the recording time available on the memory. For AVCHD movies, select MXP or FXP mode for better movie quality; select LP mode for longer recording times.
NOTES • Movies recorded in MXP mode cannot be saved on AVCHD discs. Use an external Blu-ray Disc recorder to copy MXP movies onto Blu-ray discs. &/% Alternatively, you can use the supplied software VideoBrowser to create AVCHD discs*. • The camcorder uses a variable bit rate (VBR) to encode video so the actual recording times will vary depending on the content of the scenes. • You cannot create a video disc of MP4 movies that is playable on commercially available players.
Approximate recording times Default value AVCHD movies in MXP mode are recorded in 1,920 x 1,080 resolution. AVCHD movies recorded using other recording modes are recorded in 1,440 x 1,080 resolution. MP4 movies are recorded in 1,280 x 720 resolution. For AVCHD movies: Recording mode → MXP FXP XP+ SP LP 4 GB Memory card 20 min. 30 min. 40 min. 1 hr. 10 min. 1 hr. 30 min. 8 GB Memory card/ % Built-in memory 1 40 min. 1 hr. 1 hr. 25 min. 2 hr. 20 min. 3 hr. 16 GB Memory card 1 hr.
Selecting the Frame Rate You can change the frame rate (the number of frames recorded per second) to change the look of your movies. Operating modes: 1 Press . 2 Select the frame rate. [ Other Settings] > r > [Frame Rate] > Desired frame rate > [X] ( Default value) Options for AVCHD movies [´ 60i (Standard)] 60 fields per second, interlaced. Standard frame rate of NTSC analog TV signals. [· PF30] Y P O Shooting at 30 frames per second, progressive*.
Special Scene Recording Programs and Programmed AE Recording in a very bright ski resort or capturing the full colors of a sunset or a fireworks display becomes as easy as selecting a Special Scene recording program. On the other hand, you can select the Programmed AE (AE: auto exposure) recording program. With this recording program, the camcorder automatically adjusts the shutter speed and aperture while you are able to adjust the other settings. Operating modes: [FUNC.] > [Rec.
[þ SCN: Beach] To record on a sunny beach without the subject being underexposed. [ÿ SCN: Sunset] To record sunsets in vibrant colors. [Œ SCN: Low Light] To record in low-light situa- tions. [œ SCN: Spotlight] [Š SCN: Fireworks] NOTES To record spotlit scenes. Y P O To record fireworks. C • [ú SCN: Portrait]/[û SCN: Sports]/[ý SCN: Snow]/[þ SCN: Beach]: The picture may not appear smooth during playback. • [ú SCN: Portrait]: The blur effect of the background increases the more you zoom in (S).
• [Š SCN: Fireworks]: - To avoid camcorder blur (blur due to the camcorder moving) we recommend using a tripod. Advanced Image Stabilization The image stabilizer reduces camcorder blur (blur due to the camcorder moving) so you can get nice, stable shots. Select the image stabilization mode according to the shooting conditions. Operating modes: 1 Press . 2 Select the IS mode.
Powered IS You can use Powered IS to make the image stabilization even more powerful. Powered IS is most effective when you are stationary and zooming in on far subjects using high zoom ratios (the more you approach the telephoto end). Holding the LCD panel with your left hand will add to the stability of the shot. [FUNC.] > [È Powered IS] > [ON] > [X] • By default, the custom control button (A 180) is set to [È Powered IS].
2 Press Y. The scene recorded in the memory will start 3 seconds before Y was pressed. NOTES • The camcorder will not record the full 3 seconds prior to pressing Y if the button was pressed within 3 seconds of having turned on pre-recording or having finished the previous recording. • Any of the following actions will deactivate the pre-recording function. - Leaving the camcorder without any operation for 5 minutes. - Changing the operating mode. - Pressing V. - Opening the decoration screen.
2 Activate face detection. [ Other Settings] > p > [Face Detection & Tracking] > [i On }] > [X] To select the main subject If there is more than one person in the picture, the camcorder will automatically select one person it determines is the main subject. The main subject is indicated by a white face detection frame and the camcorder will optimize the settings for that person. Other faces will have gray frames.
Touch & Track When recording a group of people using face detection, the camcorder will automatically detect one person as the main subject. You can use Touch & Track to tell the camcorder to track and optimize settings for a different person. You can also use Touch & Track to always keep in focus other moving subjects, such as pets or moving vehicles. Operating modes: 1 Make sure face detection is activated (A 99). Face detection is always activated in mode.
Faders The camcorder offers two professional looking transition effects to fade-in or fade-out scenes. You have the option to activate the fader only one time or every time you start or stop recording. Operating modes: [FUNC.] > [R Faders] > Desired fader* > [X] * You can preview the transition effect on the screen. • The icon of the selected fader appears in green. To fade in/out Press Y in record pause mode (Û) to start recording with a fade in.
Manual Exposure Adjustment At times, backlit subjects may appear too dark (underexposed) or subjects under very strong lights may appear too bright or glaring (overexposed). To correct this, you can adjust the exposure manually or use the Touch AE function to automatically set the optimal exposure for the subject you select. This is convenient when the brightness of the subject you want to shoot is noticeably brighter/darker than the general brightness of the image.
NOTES • If the recording program is changed during exposure lock, the camcorder will return to automatic exposure. • When shooting subjects with a strong light source behind them, the camcorder automatically corrects for the backlight*. You can turn off the automatic backlight correction with the p > [Auto Backlight Correction] setting. Note that the automatic backlight correction is not available in the following cases. - In mode, when using a cinema-look filter other than [Cinema Standard].
2 Touch a subject that appears inside the < frame. • The Touch AF mark (I) will flash and the focusing distance will be adjusted automatically. You have the option to further adjust the focus manually as necessary. • You can touch [D] instead to adjust the focus manually without activating the Touch AF function. • The manual focus controls appear. • Touch [D] again to return the camcorder to autofocus. 3 Touch and hold [F] or [E] to adjust the focus.
Tele Macro Using tele macro, the camcorder can focus at a shorter distance (up to 50 cm (1.6 ft.) from the subject at full telephoto), allowing you get closer shots of small subjects like flowers and insects. This function also adds a soft focus to the background, so the subject not only looks larger but it also stands out more. Operating modes: * * In mode, tele macro will be activated automatically when you zoom in to full telephoto and bring the camcorder up close to the subject.
White Balance The white balance function helps you to accurately reproduce colors under different lighting conditions so that white objects will always look truly white in your recordings. Operating modes: POINTS TO CHECK • Set the recording program to [’ Programmed AE]. [FUNC.] > [Ä White Balance] > Desired option* > [X] * When you select [Å Custom WB], set the custom white balance with the following procedure before touching [X].
NOTES • When you select the custom white balance: - Set [Zoom Type] (A 50) to [ Optical]. - Reset the white balance when you change locations or the lighting or other conditions change. - Depending on the light source, Å may keep flashing. The result will still be better than with [Ã Automatic].
NOTES • Once the countdown has begun, any of the following actions will cancel the self timer. - Pressing Y, when recording movies. - Touching [PHOTO], when recording photos. - Turning off the camcorder. - Changing the camcorder’s operating mode. - Closing the LCD panel to set the camcorder to standby mode. Audio Recording Level You can adjust the audio recording level of the built-in or an external microphone. You can display the audio level indicator while recording.
2 Touch and hold [Ï] or [Ð] to adjust the audio recording level as necessary. As a guideline, adjust the audio recording level so that the audio level meter will go to the right of the -12 dB mark (yellow area) only occasionally. 3 Touch [X] to lock the audio recording level at the current level. To display the audio level indicator Usually, the audio level indicator will be displayed only after activating the manual adjustment of the audio recording level.
Using Headphones Use headphones for playback or to check the audio level while recording. The headphones are connected to the AV OUT/× terminal, which is used for both the headphones and the audio/video output. Before connecting the headphones, follow the procedure below to change the function of the terminal from AV output to × (headphones) output. Operating modes: 1 Press . 2 Change the function of the terminal to headphones output.
To adjust the volume during playback In mode, and in mode during slideshow playback, adjust the headphones volume the same way you adjust the speaker’s volume (A 55, 122). IMPORTANT • When using headphones, make sure to lower the volume to an appropriate level. • Do not connect the headphones to the AV OUT/× terminal if the Ó icon does not appear on the screen. The noise output in such case may be harmful to your hearing. NOTES • Use commercially available headphones with a ∅ 3.5 mm minijack.
Using Commercially Available Microphones You can also use commercially available condenser microphones with their own power supply. You can connect almost any stereo microphone with a ∅ 3.5 mm plug but audio recording levels may vary. Connect the external microphone to the MIC terminal. NOTES Y P O • When you are using a microphone connected to the MIC terminal, the audio level indicator will be displayed automatically.
3 Activate the audio mix. [ Other Settings] > p > [Audio Mix] > [i On] 4 Adjust the audio mix balance as necessary. Touch [INT] (more of the sound from the built-in microphone) or [EXT] (more of the sound from the external microphone) or drag your finger along the audio mix bar to adjust the mix balance as desired. 5 Touch [X] to set the audio mix and close the menu. Capturing Video Snapshot Scenes and Photos from a Movie You can capture video snapshot scenes or photos from a previously recorded scene.
NOTES • A video snapshot scene can be captured only during playback; it cannot be captured during playback pause mode. • The captured video snapshot scene is saved to the same memory that contains the source scene. • Video snapshot scenes cannot be captured from any of the following types of scenes. - Scenes shorter than 1 second - &/% Scenes that were edited using the supplied software VideoBrowser and were then transferred back to the camcorder.
NOTES • The data code of the photos will reflect the date and time of recording of the original scene. • Photos captured from a scene with a lot of fast movement may be blurred. • Photos will be recorded on the memory selected for recording photos. Dividing Scenes You can divide scenes in order to leave out the best parts and later cut out the rest. Operating modes: 1 Play back the scene you want to divide. Y P O 2 Pause the playback at the point where you want to divide the scene.
NOTES • When advancing/reversing frames while dividing the scenes, the interval between frames is about 0.5 seconds. • If the scene cannot be divided at the point where you paused the playback, advance/reverse a frame and then divide the scene. • During the playback of a scene that was divided, you may notice some anomalies in the picture/sound at the point where the scene was cut. • The following scenes cannot be divided: - Video snapshot scenes and other scenes that are too short (less than 3 seconds).
Photos Refer to this chapter for details on viewing photos and other photo-related operations. Viewing Photos Operating modes: 1 Press T. C 2 Open the [ Y P O Photos] index screen, if it is not displayed. [G] > [ Photos] 3 Look for the photo you want to play back. Move the zoom lever toward T to show 15 photos per page; move it toward S to show 6 photos per page.
! Open the [G Index Selection] screen (A 58). " Memory being read. # Drag your finger left/right for the next/previous index page*. $ Display the next/previous index page. * While browsing through index pages, a larger scroll bar will appear at the bottom of the screen for a few seconds. When you have a large number of photos it may be more convenient to drag your finger along the scroll bar. 4 Touch the photo you wish to view. • The photo is displayed in single photo view.
IMPORTANT • Observe the following precautions while the ACCESS indicator is on or flashing. Failing to do so may result in permanent data loss. - Do not open the memory card slot cover. - Do not disconnect the power source or turn off the camcorder. - Do not change the camcorder’s operating mode. • The following image files may not be displayed correctly. - Images not recorded with this camcorder. - Images edited on a computer. - Images whose file names have been changed.
Deleting Photos from the Index Screen 1 Open the [ Photos] index screen. [G] > [ Photos] 2 Delete the photos. [Edit] > [Delete] > Desired option* > [Yes]** > [OK] * When you select [Select], perform the following procedure to select the individual photos you want to delete before touching [Yes]. ** Touch [Stop] to interrupt the operation while it is in progress. Some photos will be deleted nevertheless. To select individual photos 1 Touch on the individual photos you want to delete.
Slideshow You can play a slideshow of all the photos and even set it to music. Operating modes: 1 Open the [ Photos] index screen. [G] > [ Photos] 2 Select the music track to use during the photo slideshow. Refer to steps 3 and 4 of Playback with Background Music (A 83). 3 Touch the photo that will open the slideshow to display it in single photo view. 4 Touch the screen to display the playback controls, then touch [Ð] to play back the slideshow set to the selected music track.
External Connections This chapter explains how to connect your camcorder to an external device such as a TV, VCR, or computer. &/% You can also use the camcorder's convenient Wi-Fi functions (A 149). Terminals on the Camcorder Open the LCD panel to access the terminals on the camcorder. C Y P O (cable connector shown upside-down) 1 AV OUT/× Terminal 2 HDMI OUT Terminal* The HDMI OUT terminal offers a high-quality digital connection that combines audio and video in a single convenient cable.
Connection Diagrams In the following connection diagrams, the left side shows the terminals on the camcorder and the right side shows (for reference only) an example of terminals on a connected device. Connection ! HDMI Type: Digital Quality: High definition Output only Connect to a high-definition TV (HDTV) with an HDMI input terminal. If your HDTV supports HDMI-CEC, you can activate this with the q > [Control for HDMI] setting.
Connection " Composite Video Type: Analog Quality: Standard definition Output only Connect to a standard TV or a VCR with audio/video input terminals.
NOTES • Power the camcorder using the compact power adapter and only then connect it to the computer using the supplied USB cable in the following cases. - To write back scenes recorded with this camcorder that were previously saved on a computer. For details, refer to the Software Guide (PDF file) of the supplied PIXELA’s software. - To transfer music files from the supplied VIXIA Disc to a memory card in the camcorder in order to use them as background music.
Playback on a TV Screen Connect the camcorder to a TV to enjoy your recordings with family and friends. Playback on an HDTV using the HDMI OUT terminal will ensure the best playback quality. Operating modes: 1 Turn off the camcorder and the TV. 2 Connect the camcorder to the TV. Refer to Connection Diagrams (A 124) and select the most appropriate connection for your TV. 3 Turn on the connected TV. On the TV, select as the video input the same terminal to which you connected the camcorder.
Saving and Sharing Your Recordings &/% Copying Movies and Photos to a Memory Card You can copy your recordings from the built-in memory to a memory card. Scenes and photos will be copied from the index screen or from a story in the gallery in the built-in memory to the same index screen or story on the memory card. Please read the IMPORTANT section (A 131) before using an Eye-Fi card.
Options [date] Copy all the scenes recorded on the date shown in the control button. For AVCHD movies only. [Select] Select individual scenes to copy. [All Scenes] Copy all the scenes. Copying Scenes from a Story by Rating Operating modes: 1 Open the gallery and bring the desired story to the front. [G] > [ Gallery] > Desired story • Check that you have selected the & (built-in memory) tab. Y P O 2 Select the rating of the stories you want to copy.
3 Copy the photo. [Edit] > [Copy (&'*)] > [¨ Proceed] > [Yes] 4 Drag your finger left/right to select another photo to copy or touch [X]. Copying Photos from the Index Screen Operating modes: 1 Open the [ Photos] index screen. Check that you have selected the & (built-in memory) tab. 2 Copy the photos. Y P O [Edit] > [Copy (&'*)] > Desired option* > [Yes]** > [OK] * When you select [Select], perform the following procedure to select the individual photos you want to copy before touching [Yes].
IMPORTANT • Observe the following precautions while the ACCESS indicator is on or flashing. Failing to do so may result in permanent data loss. - Do not open the memory card slot cover. - Do not disconnect the power source or turn off the camcorder. - Do not change the camcorder’s operating mode. • When copying photos onto an Eye-Fi card, photos will be uploaded automatically if you are within the range of a configured network. Always verify that Eye-Fi cards have been approved in the country/region of use.
Saving AVCHD Movies (Windows only) With the supplied software VideoBrowser (&/% only) or Transfer Utility (' only), you can save to your computer the scenes you have recorded. Installation Install the software before you connect the camcorder to the computer for the first time. Refer to the Startup Guide (supplied leaflet) and follow the instructions in the Software Guide (PDF file) to install the supplied PIXELA’s software.
Saving MP4 Movies and Photos (Windows/Mac OS) With the supplied software ImageBrowser EX you can save MP4 movies and photos to your computer and easily organize them. The main system requirements are as follows. OS Windows 7 (SP1, 32/64-bit) CPU Memory Intel® Core™ 2 Duo, 1.66 GHz 1 GB (for 32-bit) 2 GB (for 64-bit) Windows Vista (SP2, 32/64-bit) 1 GB Windows XP (SP3, 32-bit only) 1 GB Mac OS X v10.6 Intel® Core™ Duo, 2.
6 Follow the onscreen instructions. For Windows users, the User Account Control window appears, follow the instructions to continue. To check that the software was installed correctly You can check that the software was installed correctly by looking for the ImageBrowser EX icon in the following location. Windows: From the Start Menu, All Programs > Canon Utilities > ImageBrowser EX Mac OS: In the Dock, on the Desktop.
IMPORTANT • When the camcorder is connected to a computer: - Do not open the memory card slot cover and do not remove the memory card. - Do not access, change or delete any of the camcorder’s folders or files directly from the computer as this may result in permanent data loss. Always use only the supplied software to save your recordings on the computer and, if necessary, to transfer back previously saved video files to the camcorder.
• If you connect the camcorder to the computer while it is set to mode, the process of creating scene thumbnails will start automatically. If your intention was to save photos to the computer, you can touch [Skip] to stop the process and use the computer’s Safely Remove Hardware function (Windows) or Eject function (Mac OS) to end the connection to the camcorder. Disconnect the USB cable, set the camcorder to mode and restore the connection.
• After selecting the memory, you can check the name of the folder that will be created on the hard drive. Every memory save operation will create a separate memory save folder with the date (in numerical form) used as the folder name; up to 10 memory save folders can be created for any given date and up to 300 memory save folders can be saved on a single hard drive.
Playing Back Previously Saved Recordings from the External Hard Drive 1 Power the camcorder using the compact power adapter. 2 Press T to set the camcorder to playback mode. 3 Connect the camcorder to the external hard drive using the optional UA-100 USB Adapter. Connection #-2. Refer to Connection Diagrams (A 125). 4 Touch [Play Back from Hard Drive] and select the memory save folder you wish to play back.
4 Safely end the connection to the external hard drive before physically disconnecting it. • Be careful when deleting recordings. Once deleted, recordings cannot be recovered. • Observe the following precautions while the external hard drive's access indicator is on or flashing. - Do not disconnect the USB cable. - Do not disconnect the camcorder or the external hard drive. - Do not change the camcorder's operating mode.
IMPORTANT • Initializing the external hard drive will permanently erase all the data on the hard drive (including your recordings, previous data not saved with the camcorder, and partitioned drives). Make sure to copy in advance important data to a computer or other device.
In Standard Definition You can copy your movies by connecting the camcorder to a VCR or a digital video recorder with analog audio/video inputs. Video output will be in standard definition, although the original scenes are in high definition. Connecting Connect the camcorder to the VCR using Connection ". Refer to Connection Diagrams (A 125). Recording 1 External recorder: Load a blank cassette or disc and set the recorder to record pause mode. 2 Turn on the camcorder and set it to mode.
&/% Uploading AVCHD Movies to the Web In order to share your AVCHD movies on YouTube and Facebook, you need to convert them. This conversion can be completed in the camcorder itself or on a computer using the supplied software VideoBrowser. MP4 movies do not need to be converted as such in the camcorder or computer. You can share your MP4 movies (and photos) from a computer using the supplied software ImageBrowser EX (A 148).
5 Review the conversion settings and touch [Next]. • If a copyright notice appears, read it carefully and touch [OK] if you agree. • Before touching [Next], you can touch [w] to change the conversion settings as described below. 6 Touch [START] to convert the scenes. • Before touching [START], you can touch [Ò] to decorate the converted SD movies (A 73), or touch [Ý] to adjust the volume (A 55) and background music balance (A 84). • You can also decorate the scenes as they are being converted.
To automatically divide scenes (step 5) If you are converting a long scene, you can have the camcorder divide it into 10-minute SD movies to make uploading easier. [w] > [Auto Divide] > [On] > [K] > [K] Converting Scenes into Standard Definition from a Story by Rating Operating modes: 1 Open the gallery and bring the desired story to the front. [G] > [ Gallery] > Desired story • Check that you have selected the & (built-in memory) tab. Y P O 2 Select the rating of the stories you want to convert.
Connecting to the Computer and Uploading your Videos Operating modes: 1 Connect the camcorder to the computer using the supplied USB cable. Connection #-1. Refer to Connection Diagrams (A 125). 2 Select [All (for PC only)]. 3 VideoBrowser will start up automatically. Click the YouTube icon in the menu panel and follow the software's instructions to upload your SD movies to the Web. For details about using the software, click to open the Software Guide (PDF file).
Uploading your Videos Using an Eye-Fi Card If you are using an Eye-Fi card, you can automatically upload movies to your favorite video sharing Web site. You will need to have installed the software supplied with your Eye-Fi card and completed all the required configuration setup in advance. Refer to the instruction manual of the Eye-Fi card. Also, note that not all Eye-Fi cards can upload AVCHD movies. Check compatibility in advance. Please read the IMPORTANT section before using an Eye-Fi card.
• Do not use Eye-Fi cards on airplanes and in other places where wireless communication is forbidden. Remove the Eye-Fi card from the camcorder beforehand. NOTES • Depending on the amount of data to be uploaded and the network’s wireless connection conditions, it can take some time to upload video files. If the wireless connection is too weak, the wireless upload may fail and the video files will be registered as incomplete uploads.
Uploading MP4 Movies and Photos to the Web With the supplied software ImageBrowser EX, you can upload your MP4 movies to YouTube and photos to Facebook from your computer. Additionally, you can use CANON iMAGE GATEWAY* to make photo albums and more. * This service may not be available in all countries/regions. Installation Install the software before you connect the camcorder to the computer for the first time. The software is compatible with computers running Windows or Mac OS operating systems.
&/% Wi-Fi Functions This chapter contains information about how to operate the Wi-Fi functions of your camcorder, starting with the Wi-Fi network setup needed to add your camcorder to an existing Wi-Fi network. Introduction to Wi-Fi The camcorder's Wi-Fi functions allow you to send files wirelessly, which means that you will not need to fuss with cables.
Wi-Fi connection Ad hoc mode Connect the camcorder to an iOS device (A 161). Use this connection type if you plan to upload videos to YouTube and Facebook on the go (A 160). iOS device Wi-Fi connection Infrastructure mode Connect the camcorder to an access point on a Wi-Fi network (A 151). Use this connection if you plan to play back videos on a DLNA-compatible TV (A 164) connected to the network using a LAN cable.
Connecting to a Wi-Fi Network Wirelessly connecting to a Wi-Fi network via an access point (wireless router) is commonly referred to as infrastructure mode. If your wireless router supports Wi-Fi Protected Setup (WPS), setup will be easy and require minimal configuring. Refer to Wi-Fi Protected Setup below. If your wireless router does not support WPS or you wish to manually configure settings, refer to Manual Setup (A 153).
Operating modes: Wi-Fi Protected Setup (WPS) To use WPS to make a connection using infrastructure mode, make sure your wireless router has the WPS logo. If your wireless router has a WPS button, setup will be easy and all automatic. Some wireless routers that support WPS do not have a dedicated button but use a PIN code instead. Both cases are explained in the following procedure. For setup using a PIN code, you will need to know in advance how to activate the wireless router's WPS function.
4 Within 2 minutes, touch [OK] on the camcorder's screen. You can touch [Stop] and then [OK] to interrupt the Wi-Fi Protected Setup while it is in progress. 5 Touch [Automatic] to automatically obtain an IP address. • To assign the IP address manually, touch [Manual] and perform the procedure in To manually assign an IP address below. • A screen to test the settings will appear. 6 Select whether to test the settings. • You can touch [Check Current Configuration] to review the network settings.
To enter text for the various settings, use the virtual keyboard (A 88). POINTS TO CHECK • You may need to know in advance the encryption key and other settings of the wireless router. Refer to the wireless router's setup screen or ask the network administrator. 1 Set the camcorder to playback mode and then press . 2 Set up a new connection point.
5 Touch [Automatic] to automatically obtain an IP address. • To assign the IP address manually, touch [Manual] and perform the procedure in To manually assign an IP address (A 153). • A screen to test the settings will appear. 6 Select whether to test the settings. • You can touch [Check Current Configuration] to review the network settings. • If you touched [Yes], a test of the settings will be performed and a confirmation screen will appear. Touch [OK]. 7 Save the settings of the connection point.
Transferring Files to a Computer or FTP Server You can wirelessly transfer recordings directly to a computer running the supplied software Network Utility (Windows only) or an FTP server. First, set where the files will be transferred to (file transfer destination) and then transfer the files. If you are transferring files to a computer running Network Utility, you also have the option of uploading the files to YouTube and Facebook (A 160).
File Transfer Destination Setup for Windows Computers 1 Power the camcorder using the compact power adapter. 2 Set the camcorder to playback mode and then press . 3 Connect the camcorder to the Wi-Fi network. [ Wi-Fi] > [Wi-Fi Setup] > [Transfer Destination Setup] > [Computer (Network Utility)] > [w]* > Desired connection point** > [OK]** * This step is not necessary when the file transfer destination is not configured. ** This step is not necessary when only one connection point is detected.
3 Enter the details of the FTP server. [w] > Enter* the IP address for [FTP Server] and [21] for [Port] > [OK] > Enter the user name and password > [OK] > Enter [/] for [Destination Folder] > [OK] * An interface similar to the virtual keyboard for text fields (A 88) will appear except it will contain only the keys necessary for this step. • The destination folder may differ depending on the FTP server. Check the FTP server's settings. • A confirmation screen will appear.
IMPORTANT • Do not open the memory card slot cover during wireless transfer. • Observe the following precautions when transferring files. Failing to do so may interrupt the transfer and incomplete files may remain at the transfer destination. - Do not disconnect the power source or turn off the camcorder. - Do not change the camera mode. - Do not connect the optional WM-V1 Wireless Microphone. • If the file transfer is interrupted, select [New Files] and perform the file transfer again.
Uploading Recordings to YouTube and Facebook You can upload movies to YouTube and movies and photos to Facebook using the supplied software Network Utility running on a Windows computer. Access point Computer POINTS TO CHECK • If you have not done so already, complete the Wi-Fi network setup (A 151) and file transfer destination setup (A 156) in advance.
3 If you are uploading to YouTube, read the YouTube agreement carefully and touch [I Agree] if you agree. 4 Touch the desired connection point to connect the camcorder to the network and then touch [OK]. Once connected, or if only one connection point has been set up, the wireless upload will begin automatically. You can touch [Stop] and then [X] to cancel the wireless upload while it is in progress. 5 Touch [OK].
Operating modes: Setting Up a Wi-Fi Connection (Ad hoc Mode) 1 Set the camcorder to playback mode and then press . 2 Set up a new connection point. [ Wi-Fi] > [Wi-Fi Setup] > [Network Setup] > [ > [Set Up New]* ] * To replace the current settings, touch [Edit] instead and then manually change the settings. To delete the settings, touch [Delete] and then [Yes]. 3 Enter the details of the connection.
NOTES • If you attempt to test the settings and the camcorder is able to send a Wi-Fi signal, then a message will be displayed indicating that the connection was successfully established even when the camcorder has not established a connection to the iOS device. Uploading Videos 1 Camcorder: Set the camcorder to playback mode and then press . 2 Camcorder: Select the ad hoc Wi-Fi connection.
NOTES • Depending on the wireless router's settings and capability, it can take some time to upload video files. • The procedure above may differ depending on the version of iOS you are using. Wireless Playback on a DLNA-Compatible Device If you have a DLNA-compatible player, such as an HDTV, on your home network, you can watch your recordings* wirelessly. In such case, the camcorder acts as a digital media server (DMS) and the HDTV acts as a digital media player (DMP).
2 Camcorder: Touch [ Wi-Fi] and then touch [DLNA Media Server]. • If the memory card slot cover is open, the option will not be available. Make sure the cover is closed properly. • If only one connection point has been set up, the wireless connection will be established. Skip to step 4. 3 Camcorder: Touch the desired connection point and then touch [OK]. 4 DLNA Digital Media Player: Select your camcorder model from the list and then play back your recordings.
NOTES • Playback may not appear smooth depending on the wireless router's settings and capability. In such case, try the following. - Remove any objects between the camcorder and wireless access point that may interfere with the wireless signal. - Move the camcorder closer to the wireless access point. - Turn off the wireless functions of other wireless devices other than the DLNA-compatible device being used for playback. - Switch the wireless access point to IEEE802.11n and activate channel bonding.
Glossary This is a glossary of some of the basic terms used frequently in this chapter. The documentation for your wireless router may also contain a glossary you can refer to. Access Point A wireless access point (WAP) is a device that allows wireless devices, like your camcorder, to connect to a wired network (including to the Internet) using the Wi-Fi standard. In most cases, this will be your wireless router.
Additional Information This chapter contains troubleshooting advice, screen messages, handling and maintenance tips, and other information. Appendix: Menu Options Lists Menu items not available appear grayed out. For details about how to select an item, refer to Using the Menus (A 27). For details about each function, see the reference page. Menu options without a reference page are explained after the tables. Underlined menu options indicate default values.
Control Button AUTO n Setting options/Function A – z z 50 [m] (automatic), [n] (manual) [Audio Level Indicator]: Toggle on or off – z z 109 [R Faders] [S Off], [T Fade Trigger: Once], [U Fade Trigger: Always], [V Wipe: Once], [W Wipe: Always] – z z 102 [Ò Decoration] [Ó Pens and Stamps], [× Animated Stamps], [Ø Captions]2 z z z 73 [Ü] (image mix): Toggle on or off, [Ý] (pause live video) z z – [ß] (minimize toolbar) z z z [ON], [OFF] – z z 98 – z z 90 [Zoom Type] [
[Edit] Panel - Control Button Mode [ Movies] Index Screen [ [zSD Movies] Movies] Index Screen Index Screen Playback Pause A &/% From the built-in memory: [Copy (%)] , [Select], [All Scenes] [Select], [All Scenes] – – 128 &/% From the built-in memory: [Convert HD'SD (%)] , [Select], [All Scenes] – – – 142 [Delete] , [Select], [All Scenes] [Select], [All Scenes] [This Scene], [All Scenes] [This Scene] 60 [Divide] &/% [ Network Utility] Y P O – – – z 116 YouTube
In the gallery: [Edit Story] from the [Story Details] screen [Edit Scene] from the [Scene List] screen Playback Pause A &/% From the built-in memory: [Copy (%)] – – 129 &/% From the built-in memory: [Convert HD'SD (%)] – – 144 [Delete] or [ [This Scene] [This Scene] 60 – Control Button ] [Delete Story]* z [Story Thumbnail]* z [Edit Title]* z [Copy] – [Move] – [Divide] – [Rating] – C – 63 – – 86 – – 87 z – 85
[ Other Settings] Menus When the camcorder is in the p menu.
[Focus Assistance]: When focus assistance is activated, the image at the center of the screen is magnified to help you focus manually (A 104). • Using focus assistance will not affect the recordings. It will be cancelled automatically after 4 seconds or when you start recording. [Auto Slow Shutter]: The camcorder automatically uses slow shutter speeds to obtain brighter recordings in places with insufficient lighting.
s/ Playback Setup Menu item Setting options y A [Select Music]* [j Off], [i On] When [i On] - list of music tracks, [Music Balance] [y] [Û] (Original sound/Background music) z z 82 [Data Code] [j Off], [% Date], [& Time]*, [' Date and Time]*, [( Camera Data]* z z – [Slideshow Transition] [j Off], [k Dissolve], [l Slide Image] – z 122 [TV Type] [+ 4:3 TV], [, Wide TV] z z – * Option available only for AVCHD movies.
r Recording & Connections Setup Menu item y Setting options A &/% [Rec Media for Movies] [&] (built-in memory), [*] (memory card), z z – – [Relay Recording]: [j Off], [%] z – – – [Recording Mode] [© High Quality 24 Mbps], [¨ High Quality 17 Mbps], [¦ High Quality 12 Mbps], [¤ Standard Play 7 Mbps], [¥ Long Play 5 Mbps] z – – – [ – z – – z – – – [Frame Rate]1 9 Mbps], [ 4 Mbps] [´ 60i (Standard)], [· PF30], [¹ PF24] 40 91 94 30P], [» 24P] – z – – &/% [Rec Media for
Menu item &/% [External Hard Drive Info]3 1 2 3 y Setting options – – – z A z – Option not available in mode. Option available only for AVCHD movies. This is the only option available when an external hard drive is connected to the camcorder. [Rate Scenes (Recording)]: When set to [i On], the scene rating scene will appear after every scene you record.
• If the memory card you insert already contains a file with a larger number, a new file will be assigned a number one higher than that of the last file on the memory card. • We recommend using the [n Continuous] setting. • The file number indicates the name and location of the file on the memory card. For example, the file name of a photo numbered 101-0107 is “IMG_0107.JPG”, stored under the folder “DCIM\101CANON” while an MP4 movie with the same file number will have the file name “MVI_0107.MP4”.
Menu item y Setting options A [Custom Control Button]1 [Rec. Programs], [Ä White Balance], [< Focus], [y Exposure], [Ç Powered IS], [Zoom], [Zoom Type], [ä Mic.
Menu item HDMI]1 y Setting options A [i On], [j Off] z z z z – [HDMI Status]1 – z z z z – [Distance Units]1 [. meters], [/ feet] z z – – – [Demo Mode]1 [i On], [j Off] z z – – – – [Control for [Firmware] – – – – z [Reset All] [No], [Yes] z z z z – [Eye-Fi Communication]4 [k Automatic], [j Off] – – z z 146 1 2 3 4 Option not available in mode. Option available only after connecting an external hard drive to the camcorder.
[Notification Sounds]: A beep will accompany some operations like turning on the camcorder, the self-timer countdown, etc. • Set this to [j Off] to turn off notification sounds. • While pre-recording (A 98) is activated, the camcorder will not emit any notification sounds. [Custom Control Button]: On the lower right of the recording screen, a control button that is a shortcut to one of the functions in the [ Main Functions] panel is constantly displayed.
• If set to [i On], when the camcorder is connected to a compatible HDTV using the supplied HDMI cable, the video input on the TV will automatically be set to the camcorder’s video input. Then, you can use the up/down/left/right buttons and the OK or SET button on the TV’s remote control to play back your recordings. • Depending on the TV set, additional settings may be required on the TV itself to activate the HDMI-CEC function. Refer to the TV’s instruction manual.
Appendix: Onscreen Icons and Displays Recording Movies (using Story Creator) 1 Control button [FUNC.
Recording Movies Manual mode Cinema mode Recording program (A 95) Manual exposure (A 103) Manual focus (A 104) Face detection (A 99) White balance (A 107) Audio level indicator (A 109) x.v.Color (A 176) While recording/during playback: Scene counter (hours : minutes : seconds) ; < Self timer (A 108) f Image stabilizer (A 97) S g Tele macro (A 106) S h A A j k A l A q S a S s S d S C h Remaining recording time S * On the memory card & In the built-in memory* ( Relay recording* (A 41) * &/% only.
Playing Movies (during playback) AVCHD movies: MP4 movies: C k Eye-Fi wireless communication D (A 146) l Scene number D q Playback control buttons (A 55) F 184 Additional Information Y P O F Data code (A 66, 174) a s Volume and background music F balance controls (A 55, 84) d File number (A 176) F f Volume controls (A 56) F
Viewing Photos g F Control button [Edit]: Open the Edit panel (A 171) h F Current photo / Total number of photos C j Control button [h]: Photo jump F (A 119) k Control button [Ð]: Slideshow F (A 122) l Control button [f]: Return to the F [ Photos] index screen (A 118) Y P O Additional Information 185
7 Memory operation Ü Record, Û Record pause, Ð Playback, Ý Playback pause, × Fast playback, Ø Fast reverse playback, Õ Slow playback, Ö Slow reverse playback, Ó Frame advance, Ô Frame reverse. 9 Remaining battery level; also remaining battery time when using an optional battery pack • The icon shows a rough estimate of 100% 75% 50% 25% 0% the remaining charge as a percentage of the full charge of the battery pack. • When the battery charge becomes low, will appear in yellow.
Trouble? Troubleshooting If you have a problem with your camcorder, refer to this section. Sometimes what you think is a malfunction of the camcorder may have the simplest of solutions - please read the “CHECK THIS FIRST” box before going on to the more detailed problems and solutions. Consult your dealer or a Canon Service Center if the problem persists.
- Charge the battery pack in temperatures between approximately 0 °C and 40 °C (32 °F and 104 °F). - The battery pack is faulty. Replace the battery pack. - The camcorder cannot communicate with the battery pack attached. Battery packs not recommended by Canon for use with this camcorder cannot be charged using this camcorder. - If you are using a battery pack recommended by Canon for use with this camcorder, there may be a problem with the camcorder or battery pack. Consult a Canon Service Center.
Cannot record a photo while recording movies. - You cannot take photos in mode, while the digital zoom is activated (A 49) or while fading in or fading out a scene (A 102). After using the camcorder for a long time, it becomes hot. - The camcorder may become hot after using it continuously for long periods of time; this is not a malfunction. If the camcorder becomes unusually hot or it becomes hot after using it only for a short while, it may indicate a problem with the camcorder.
Cannot divide scenes - You cannot divide scenes recorded or edited using another device. Also, you cannot divide scenes that are from movies converted to standard definition (&/% only) or MP4 movies. - The memory is full. Delete some recordings (A 60, 120) to free some space. Cannot copy scenes/photos - You may not be able to copy scenes/photos recorded or edited using another device.
‹ appears on the screen - The LOCK switch on the Eye-Fi card is set to prevent accidental erasure. Change the position of the LOCK switch. - An error occurred when trying to access control data on the Eye-Fi card. Turn the camcorder off then on again. If the icon appears often, there might be a problem with the Eye-Fi card. Contact the card manufacturer’s customer care. Picture and Sound The screen appears too dark. - The LCD screen was dimmed.
Memory Card and Accessories Cannot insert the memory card. - The memory card was not facing the correct direction. Turn the memory card over and insert it. Cannot record on the memory card. - The memory card is full. Delete some recordings (A 60, 120) to free some space or replace the memory card. - Initialize the memory card (A 42) when you use it with the camcorder for the first time. - The LOCK switch on the memory card is set to prevent accidental erasure. Change the position of the LOCK switch.
The camcorder is connected using the supplied HDMI cable, but there is no picture or sound from the HDTV. - Disconnect the supplied HDMI cable and then restore the connection or turn the camcorder off and then on again. The camcorder is connected using the supplied HDMI cable, but HDMI-CEC does not work (cannot play back using the TV’s remote control). - Disconnect the HDMI cable and turn off the camcorder and the TV. After a short while turn them on again and restore the connection.
Cannot play back a movie on a DLNA-compatible device in AVCHD. - Some DLNA-compatible devices may play back movies in standard definition. - In the [Wi-Fi] menu, set [w] to [Off] (A 165). - Remove any objects between the camcorder and wireless access point that may interfere with the wireless signal. - Move the camcorder closer to the wireless access point. - Turn off the wireless functions of other wireless devices other than the DLNA-compatible device being used for playback.
&/% Built-in memory is full - The built-in memory is full (“& End” appears on the screen). Delete some recordings (A 60, 120) to free some space. Alternatively, save your recordings (A 131) and initialize the built-in memory (A 42). &/% Built-in memory writing error Attempt to recover the data? - This message will appear the next time you turn on the camcorder if power supply was accidentally interrupted while the camcorder was writing to the built-in memory.
Cannot load canvas - The canvas file that was saved on the memory is corrupted. - Canvas data cannot be read from canvas files created using other devices. Cannot play back - There is a problem with the memory. If this message appears often without apparent reason, contact a Canon Service Center. &/% Cannot play back Cannot access the built-in memory - There is a problem with the built-in memory.
&/% Cannot record movies in the built-in memory Initialize only using the camcorder - The camcorder's built-in memory was initialized using a computer. Initialize the built-in memory with this camcorder (A 42). Cannot record movies on this memory card - Movies cannot be recorded on a 64 MB or smaller memory card. Use a recommended memory card (A 37). Cannot record movies on this memory card Initialize only using the camcorder - The memory card in the camcorder was initialized using a computer.
Do not disconnect the power source. Do not disconnect the USB cable unless you first use the computer to safely end the connection. - When the camcorder is in mode and is connected to the computer with the supplied USB cable, the camcorder cannot be operated. Disconnecting the USB cable or power source while this message appears may result in permanent loss of the recordings in the camcorder.
Memory card writing error Attempt to recover the data? - This message will appear the next time you turn on the camcorder if power supply was accidentally interrupted while the camcorder was writing to the memory. Select [Recover] to try to recover the recordings. If you inserted a memory card that contains scenes recorded using another device, we recommend that you select [No]. Need to recover files from the memory card. Change the position of the LOCK switch on the memory card.
Select the desired scene number - A number of scenes have the same recording date but different file control information. This can occur for example when you edit movies and write the files back to the camcorder. Select a number to display the corresponding group of scenes. &/% Some scenes could not be converted - Some scenes selected for conversion to SD were recorded using another device. These scenes were not converted.
Unable to recognize the data - You transferred data to the camcorder recorded using a video configuration that is not supported (PAL or SECAM). Play back the recordings with the device originally used to record them. Unable to recover data - Could not recover a corrupted file. Save your recordings (A 131) and initialize the memory using the [Complete Initialization] option (A 42). Unsupported gallery data detected. Cannot record or edit.
Cannot connect to FTP server - Make sure that the camcorder and FTP server have the same IP address configured. - This message will appear if the encryption key is incorrect when the encryption method is set to [Open]. The encryption key is case sensitive so make sure to enter it correctly. - The port number is usually 21 so make sure both the camcorder and FTP server are configured with this setting. - If the Address setting in the FTP server is not configured, set the DNS server address in the camcorder.
No access points found - Cordless phones, microwave ovens, refrigerators and other appliances may interfere with the wireless signal. Try using the camcorder in a location farther away from such appliances. - Make sure that you use the wireless router’s SSID for the camcorder’s Wi-Fi settings. - A connection cannot be established if the wireless router is using MAC address filtering.
Unable to obtain an IP address - If you are not using a DHCP server, configure the camcorder’s Wi-Fi settings manually or obtain an IP address using the [Manual] setting. - Turn on the DHCP server. If it is already on, make sure it is functioning properly. - Make sure the address range for the DHCP server is sufficient. - Turn on the DNS server. If it is already on, make sure it is functioning properly. - Make sure that the DNS server’s IP address and the name for that address are correctly configured.
Do’s and Don’ts Handling Precautions Camcorder Be sure to observe the following precautions to ensure maximum performance. • Save your recordings periodically. Make sure to transfer your recordings to an external device such as a computer or digital video recorder (A 128) and save them on a regular basis. This will protect your important recordings in case of damage and create more free space on the memory. Canon shall not be liable for any data loss. • Do not carry the camcorder by the LCD panel.
• Do not use or store the camcorder in dusty or sandy places. The camcorder is not waterproof – avoid also water, mud or salt. If any of the above should get into the camcorder it may damage the camcorder and/or the lens. • Be careful of heat generated by lighting equipment. • Do not disassemble the camcorder. If the camcorder does not function properly, consult qualified service personnel. • Handle the camcorder with care. Do not subject the camcorder to shocks or vibration as this may cause damage.
Battery Pack DANGER! Treat the battery pack with care. • Keep it away from fire (or it might explode). • Do not expose the battery pack to temperature higher than 60 °C (140 °F). Do not leave it near a heater or inside a car in hot weather. • Do not try to disassemble or modify it. • Do not drop it or subject it to shocks. • Do not get it wet. • Dirty terminals may cause a poor contact between the battery pack and the camcorder. Wipe the terminals with a soft cloth.
• Do not leave memory cards in places subject to high humidity and high temperature. • Do not disassemble, bend, drop, or subject memory cards to shocks and do not expose them to water. • Check the direction before inserting the memory card. Forcing a memory card into the slot if it is not correctly oriented may damage the memory card or the camcorder. • Do not attach any labels or stickers on the memory card.
Maintenance/Others Cleaning Camcorder Body • Use a soft, dry cloth to clean the camcorder body. Never use chemically treated cloths or volatile solvents such as paint thinner. Lens • If the lens surface is dirty, autofocus may not work properly. • Remove any dust or dirt particles using a non-aerosol type blower brush. • Use a clean, soft lens-cleaning cloth to gently wipe the lens. Never use tissue paper. LCD Touch Screen • Clean the LCD touch screen using a clean, soft lens-cleaning cloth.
To avoid condensation • Do not expose the camcorder to sudden or extreme changes in temperature. • Remove the memory card and battery pack. Then, place the camcorder in an airtight plastic bag and let it adjust gradually to temperature changes before removing it from the bag. When condensation is detected The camcorder automatically shuts off. The precise time required for water droplets to evaporate will vary depending on the location and weather conditions.
General Information Accessories (Availability differs from area to area) Card reader/writer Computer External hard drive** * C Y P O TV/HDTV Digital video recorder Optional accessories not listed below are described in more detail in the following pages.
Optional Accessories Call or visit your local retailer/dealer for genuine Canon video accessories. You can also obtain genuine accessories for your Canon camcorder by calling: 1-800-828-4040, Canon U.S.A. Information Center. Use of genuine Canon accessories is recommended. This product is designed to achieve excellent performance when used with genuine Canon accessories. Canon shall not be liable for any damage to this product and/or accidents such as fire, etc.
Charging, Recording and Playback Times The charging times given in the following table are approximate and vary according to charging conditions and initial charge of the battery pack. Battery pack→ BP-709 BP-718 Using the camcorder 170 min. 310 min. 450 min. Using the CG-700 Battery Charger 130 min. 220 min. 315 min.
Battery pack BP-727 Recording mode Recording (maximum) Recording (typical)* Playback MXP 175 min. 100 min. 255 min. FXP 180 min. 100 min. 265 min. XP+ 185 min. 105 min. 275 min. SP 185 min. 105 min. 275 min. LP 185 min. 105 min. 280 min. Recording AVCHD movies using a memory card Battery pack BP-709 BP-718 BP-727 Recording mode Recording (maximum) Recording (typical)* Playback MXP 50 min. 25 min. 75 min. FXP 50 min. 25 min. 75 min. XP+ 50 min. 25 min. 75 min.
6 WM-V1 Wireless Microphone Reliably record rich sound even when shooting subjects at a distance. The transmitter is conveniently equipped with a clothing clip and the receiver can be attached to the camcorder’s grip belt. 9 UA-100 USB Adapter &/% Allows you to connect to the camcorder an external hard drive or similar storage device with a standard-A cable. After doing so, you can save an entire memory onto the device. Check in advance the USB cable supplied with your external hard drive.
Specifications VIXIA HF R32 / VIXIA HF R30 / VIXIA HF R300 — Values given are approximate figures. System • Recording System Movies: AVCHD Video compression: MPEG-4 AVC/H.264; Audio compression: Dolby Digital 2ch MP4 Video compression: MPEG-4 AVC/H.264 Audio compression: MPEG-2 AAC-LC (2ch) Photos: DCF (Design rule for Camera File system), compatible with Exif* Ver. 2.3 Image compression: JPEG * This camcorder supports Exif 2.3 (also called “Exif Print”).
• Image Sensor 1/4.85-inch CMOS, 3,280,000 pixels Effective pixels: 2,070,000 pixels (1920 x 1080) When advanced zoom is on: 2176 x 1224 (full wide angle) 1920 x 1080 (midway between full wide angle and full telephoto) 1360 x 765 (full telephoto) • LCD Touch Screen: 3 inch, wide, TFT color, 230,000 dots, touch operation • Microphone: Stereo electret condenser microphone • Lens f=2.8-89.6 mm, F/1.8-4.5, 32x optical zoom, 51x advanced zoom 35 mm equivalent: 38.5 – 1,232 mm 33.
• MIC Terminal ∅ 3.5 mm stereo minijack –64 dBV (with 600 Ω microphone) / 5 kΩ or more Wi-Fi (&/% only) • Standard: Complies with the IEEE 802.11b/g/n protocol • Frequency: 2.4 GHz • Supported channels: 1 - 11 • Encryption methods: WEP-64/WEP-128, TKIP/AES Power/Others • Power supply (rated) 3.6 V DC (battery pack), 5.3 V DC (compact power adapter) • Power consumption 2.
About the music files The specifications of the music files compatible with the camcorder are as follows. Audio encoding: Linear PCM Audio sampling: 48 kHz, 16 bits, 2 channels Minimum length: 1 second File type: WAV The music data is saved in the memory under the following folders. &/% In the built-in memory: \CANON\MY_MUSIC\MUSIC_01.WAV to MUSIC_99.WAV On the memory card: \CANON\PRIVATE\MY_MUSIC\MUSIC_01.WAV to MUSIC_99.
Index 3D Flip View . . . . . . . . . . . . . . . . .57 A Abroad, using the camcorder . . . . 210 Aspect ratio of a connected TV (TV type) . . . . . . . . . . . . . . . 174 Audio mix . . . . . . . . . . . . . . . . . . 113 Audio recording level . . . . . . . . . . 109 AUTO mode . . . . . . . . . . . . . . . . .44 Auto slow shutter . . . . . . . . . . . . 173 Automatic backlight correction . . . 104 AV OUT/× terminal . . . 111, 123, 125 B Background music . . . . . . . . . . . . .
LCD touch screen . . . . . . . . . . 24, 26 Low light (recording program) . . . . 96 M Main Functions panel . . Maintenance . . . . . . . . . Manual exposure . . . . . . Manual focus . . . . . . . . Manual mode . . . . . . . . Markers . . . . . . . . . . . . Memory card . . . . . . . . . Memory save* . . . . . . . . MIC terminal . . . . . . . . . Microphone attenuator . . . . . 28, 168 . . . . . . . 209 . . . . . . . 103 . . . . . . . 104 . . . . . . . . 89 . . . . . . . 173 . 37, 40, 207 . . . . . . .
V Y Video snapshot . . . . . . . . . . . . . . .72 Volume . . . . . . . . . . . . . . . . . . . . .55 YouTube* . . . . . . . . . . . . . . . . . . 160 W Zoom . . . . . . . . . . . . . . . . . . . . . . 49 Advanced zoom . . . . . . . . . . . 49 Zoom speed . . . . . . . . . 49, 172 White balance . . . . . . . . . . . . . . .107 Wide angle . . . . . . . . . . . . . . . . . .49 Wi-Fi functions* . . . . . . . . . . . . . . 149 Wind screen . . . . . . . . . . . . . . . . 173 Z * &/% only.
USA CANON CONSUMER DIGITAL VIDEO EQUIPMENT LIMITED WARRANTY FOR THE UNITED STATES The limited warranty set forth below is given by Canon U.S.A., Inc. (“Canon USA”) with respect to Canon Consumer Digital Video Equipment (the “Equipment”) purchased in the United States. This limited warranty is only effective upon presentation of your Bill of Sale or other proof of purchase.
LOSS OR CORRUPTION OF DATA, INCLUDING WITHOUT LIMITATION, LOSS OR CORRUPTION OF DATA STORED ON THE EQUIPMENT’S HARD DRIVE, OR ANY OTHER SPECIAL, INCIDENTAL OR CONSEQUENTIAL DAMAGES CAUSED BY THE USE, MISUSE OR INABILITY TO USE THE EQUIPMENT, REGARDLESS OF THE LEGAL THEORY ON WHICH THE CLAIM IS BASED, AND EVEN IF CANON USA HAS BEEN ADVISED OF THE POSSIBILITY OF SUCH DAMAGES.
CANADA CANON CONSUMER DIGITAL VIDEO EQUIPMENT LIMITED WARRANTY The limited warranty set forth below is given by Canon Canada Inc. (“Canon Canada”) with respect to Canon Consumer Digital Video Equipment (the “Equipment”) purchased in Canada. This limited warranty is only effective upon presentation of a bill of sale or other proof of purchase for this Equipment to a Canon Service Facility when repairs are required.
USA CANON U.S.A., INC. NEW JERSEY OFFICE 100 Jamesburg Road, Jamesburg, NJ 08831 USA CANON U.S.A., INC. CHICAGO OFFICE 100 Park Blvd., Itasca, IL 60143 USA CANON U.S.A., INC. LOS ANGELES OFFICE 15955 Alton Parkway, Irvine, CA 92618 USA CANON U.S.A., INC. HONOLULU OFFICE 210 Ward Avenue, Suite 200, Honolulu, Hl 96814 USA ❖ CANADA If you have any questions, call the Canon U.S.A. Information Center toll-free at 1-800-828-4040 (USA only). CANON CANADA INC.