
MULTIMEDIA PROJECTOR WUX500 User's Manual


151
Advanced Projection
Advanced Guide Advanced Projection
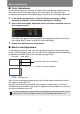
Projecting from Multiple Projectors at Once
(Edge Blending)
Overlapping edges of images from multiple projectors used together can be
blended to make the overall image more seamless.
■ Basic Instructions
Follow these steps when using two projectors side by side.
1 In the [Install settings] menu, select [Professional settings] > [Edge
blending] > [Adjust].
2 Set [Marker] to [On].
Marker lines are projected on the images. The red marker indicates the start
position for adjustment, and the green marker, the end position.
3 Under [Side], select the position where images overlap. Use [Start
position] to move the marker to where the images overlap.
4 Select [Width] and move the marker to the overlapping area.
The area between the starting and ending markers is called the blending area.
Brightness of this area is automatically adjusted to match the brightness of
other image areas. After you complete settings for one image, do the same
thing for the other one to specify the blending area. Adjust the settings to make
the blending area for each image the same.
5 Set [Marker] to [Off].
• If you have already completed edge blending settings, selecting [Adjust] will apply
them.
• To restore the default settings before adjustment, select [Reset].
By default, the green and red markers are displayed in the same position, so only the red
marker is visible.