
Software Starter Guide (For the Canon Digital Camera Solution Disk Ver.25)


39
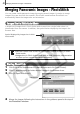
4 Click the (Save), set the file type and
destination, and then click [Save].
Selects the images for saving with these
settings.
Select the method of changing the image
type.
Set the file destination
You can also change the file name
This will convert the image.
5 Click the button in the Main window.
Functions of the Image Quality Adjustment Window
The following adjustments can be made in the Image Quality Adjustment Window. The
available settings may vary depending on the camera used.
This section adjusts the
white balance according
to the light source and
color temperature.
This section adjusts the
digital exposure
compensation, photo
effect, contrast,
sharpness, and saturation.
The effect of the settings
above can be viewed
immediately if you place a
check mark here.
Tone Curve Tab
You can set the levels for
the RGB channels
separately or together.
Advanced Adjustments
Tab
You can select such
settings as the output
color space.
If you cannot set the
desired setting with the
slider on the left, directly
enter the setting here.
Restores all settings to the settings stored
in the camera at the time of shooting.
Applies the settings to
the displayed image