
User Guide


49Routine Maintenance
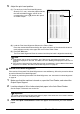
5 Adjust the print head position.
(1) For each row in the Print Head Alignment
Sheet (A, B, C, etc.), select the pattern that has
the least noticeable streaks, and fill in the
corresponding circle ( ) with a dark pencil
or a black ink pen.
(2) Load the Print Head Alignment Sheet on the Platen Glass.
Place the marked side down and align the upper left corner of the sheet with the arrow
mark (alignment mark) at the upper left corner of the Platen Glass.
(3) Press the OK button.
The Print Head Alignment Sheet is scanned and the print head is aligned automatically.
Manual Print Head Alignment
If the results of Automatic Print Head Alignment are not satisfactory, follow the procedure below
to perform Manual Print Head Alignment.
For details on performing Automatic Print Head Alignment, see
“Automatic Print Head Alignment”
on page 48.
1 Make sure that the machine is turned on, open the Front Feeder, and extend the
Output Paper Support.
2 Load two sheets of A4 or Letter-sized plain paper in the Auto Sheet Feeder.
Set the Paper Thickness Lever to the left.
3 Press the Paper Feed Switch to select the paper source where you have loaded
paper.
Note
z If adjustment was not done successfully, the “Failed to scan head alignment sheet.” error
message is displayed on the LCD. For details, see “Error Message Is Displayed on the LCD” on
page 57.
z If the results of Automatic Print Head Alignment are not satisfactory, perform Manual Print Head
Alignment. For details, see “Manual Print Head Alignment” on page 49.
Important
You cannot print the print head alignment pattern if paper of size other than A4 or Letter is loaded.
Be sure to use A4 or Letter-sized plain paper.
(1)