Photo Printer series Quick Start Guide The following ink tanks are compatible with this product. For information on product specifications, please visit our website at www.usa.canon.com QT5-1261-V01 XXXXXXXX © CANON INC.
Getting Help from Canon Ordering Information For additional supplies, use the following descriptions and order numbers. Help Us Help You Better Description Before you contact Canon, please record the following information.
series Photo Printer Quick Start Guide
Canon PIXMA iP3500 series Photo Printer Quick Start Guide. Copyright This manual is copyrighted by Canon U.S.A., Inc. with all rights reserved. Under the copyright laws, this manual may not be reproduced in any form, in whole or in part, without the prior written consent of Canon U.S.A., Inc. © 2007 Canon U.S.A., Inc. Disclaimer Canon U.S.A., Inc. has reviewed this manual thoroughly in order that it will be an easy-to-use guide to your Canon PIXMA iP3500 series Photo Printer.
Table of Contents Before Using the Printer ................................2 Turning the Printer On and Off .......................2 Loading Printing Paper ...................................4 Hints for Handling the Paper Source ..............7 Loading Paper ..............................................10 Loading Envelopes .......................................14 Loading Small-Sized Paper ..........................16 Printing from Your Computer......................17 Printing with Windows...............
Before Using the Printer Turning the Printer On and Off Turn on the printer before printing. Note Auto Power On/Off Feature You can set the printer to turn on and off automatically. z Auto Power On: Automatically turns on the printer when print data is sent from the computer. z Auto Power Off: Automatically turns off the printer when no print data is sent for a certain interval. Set this setting in the Maintenance sheet of the printer driver in Windows®, and in the Canon IJ Printer Utility on a Macintosh®.
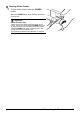
Turning off the Printer 1 To turn off the printer, press the POWER button. When the POWER lamp stops flashing, the printer is turned off. Important About the Power Plug When removing the power plug after turing off the printer, be sure to confirm that the POWER lamp is not lit. If the power plug is removed from the wall outlet with the POWER lamp still lit or flashing green, the printer may become unable to print. See “Keeping the Best Printing Results” on page 28.
Loading Printing Paper This section describes how to load printing paper in the Rear Tray and the Front Tray. Note z At purchase, the printer is set to feed from the Rear Tray. If you are printing without changing paper source settings, load paper in the Rear Tray. z You cannot load paper other than A4, Letter, or B5-sized plain paper in the Front Tray. When using any other type of paper, load it in the Rear Tray. For details on loading paper, see “Loading Paper” on page 10.
Paper Handling z Recommended Paper and Requirements Media Type Model*1 Paper Support Load Limit Paper Output Rear Tray Front Tray Load Tray Limit Position of Printer Driver the Paper Setting for Thickness Media Type Lever*2 Plain Paper*3 — 150 sheets 100 sheets Left Envelopes — 10 envelopes Not 1 envelope Right loadable*4 Envelope High Resolution Paper HR-101N 80 sheets Not 50 sheets loadable*4 Left High Resolution Paper Super White Paper SW-201 100 sheets 80 sheets 50 sheets Left
*3 Proper feeding of paper may not be possible at the maximum capacity depending on the type of paper or environmental conditions (either very high or low temperature and humidity). In such cases, reduce the sheets of paper you load at a time to around half (around 0.2 inches / 5 mm in paper stack height). *4 Feeding this paper from the Front Tray can damage the printer. Load in the Rear Tray.
Hints for Handling the Paper Source This printer offers two paper sources to load printing paper; the Rear Tray (A) and the Front Tray (B). (A) (B) Here are some hints for handling these paper sources according to how you are using them. Note z Some types and sizes of paper are not loadable in the Front Tray and requires the use of the Rear Tray. See “Paper Handling” on page 5. For details on loading paper, see “Loading Paper” on page 10. z Printer driver settings may be required depending on the usage.
(A) (A) Switch paper source here. Note z Some types and sizes of paper are not loadable in the Front Tray and requires the use of the Rear Tray. See “Paper Handling” on page 5. For details on loading paper, see “Loading Paper” on page 10. z Printer driver settings may be required depending on the usage. For details on printer driver settings, refer to the PC Printing Guide on-screen manual.
z Choosing the paper source to match the location of the printer You can choose to use only either the Rear Tray or Front Tray according to the location of the printer. For example, if you intend to install the printer in a small place, such as on a shelf with minimal space, you can use just the Front Tray for printing. Note You cannot load paper other than A4, Letter, or B5-sized plain paper in the Front Tray. When using any other type of paper, load it in the Rear Tray.
Loading Paper Important z If you cut plain paper to 4" x 6" / 101.6 x 152.4 mm, 5" x 7" / 127.0 x 177.8 mm, or 2.13" x 3.39" / 54.0 x 86.0 mm (credit card-size) for a trial print, it can cause paper jams. z You cannot print on postcards affixed with photos or stickers. z Always load paper in portrait orientation (A). Loading paper in landscape orientation (B) can cause the paper to be jammed. (A) (B) Note z We recommend using genuine Canon photo media when printing photographs.
2 Prepare to load paper. (1) Open the Rear Tray and pull out the Paper Support to support the paper. (1) (2) Open the Front Tray. (4) (3) Extend the Output Tray Extension. Note When closing the Output Tray Extension after printing, lift it up slightly. (4) Adjust the position of the Paper Thickness Lever. Set it to the right when printing on envelopes or T-shirt transfers, and left when printing on any other type of the paper. See “Paper Handling” on page 5.
Loading Paper in the Front Tray You can load A4, Letter, or B5-sized plain paper (such as Canon Super White Paper SW-201) in the Front Tray. You cannot load any other paper in the Front Tray. 1 Flatten the four corners of the paper before loading it. See “Flatten the four corners of the paper before loading it.” on page 10. 2 Prepare to load paper. (1) Open the Front Tray. (3) (2) Extend the Output Tray Extension. (3) Set the Paper Thickness Lever to the left. .
4 Select Front Tray for Paper Source, and the size and type of the loaded paper in Page Size (or Paper Size) and Media Type in the printer driver. Note For details on printer driver settings, see “Printing with Windows” on page 17 or “Printing with Macintosh” on page 18.
Loading Envelopes Envelopes must be fed from the Rear Tray. Use either European DL or US Comm. Env. #10-sized envelope. Important z Do not use the following envelopes: – Envelopes with a double flap (or sticker flaps) – Envelopes with an embossed or treated surface – Envelopes with pressure seals – Envelopes whose gummed flaps are already moistened and adhesive z Select either DL Env. or Comm. Env. #10 in the printer driver according to the envelope size you are using.
2 Retract the Paper Support. . Important Envelopes may not be fed properly if the Paper Support is extended. 3 Load the envelopes. (2) (1) Load the envelope against the Cover Guide (the right side of the Paper Support). Load with the address side facing UP and the rear flaps DOWN on the left. Up to 10 envelopes can be loaded at once. . (B) (1) (3) Important Make sure that the Cover Guide is set upright, when you load paper in the Rear Tray.
Loading Small-Sized Paper You can use 4" x 6" / 101.6 x 152.4 mm, 5" x 7" / 127.0 x 177.8 mm, and Credit card-sized papers. . Important Small-sized paper must be fed from the Rear Tray. Loading Small-Sized Paper in the Rear Tray 1 Load the paper. (1) Load the paper into the Rear Tray with the print side facing UP. (3) (1) (2) Align the paper stack against the Cover Guide on the right side of the Paper Support. .
Printing from Your Computer This section describes the procedure for basic printing. Printing with Windows 1 Turn on the printer and load the paper in the printer. See “Turning the Printer On and Off” on page 2 and “Loading Printing Paper” on page 4. 2 3 4 5 Create a document or open a file to print using an appropriate application software. Select Print on the application software’s File menu.
Printing with Macintosh 1 Turn on the printer and load the paper in the printer. See “Turning the Printer On and Off” on page 2 and “Loading Printing Paper” on page 4. 2 3 4 5 6 7 8 9 Create a document or open a file to print using an appropriate application software. Select Page Setup on the application software’s File menu. Make sure that your printer’s name is selected in Format for. Select the desired paper size in Paper Size. Click OK. Select Print on the application software’s File menu.
Printing Photographs Directly from a Compliant Device You can connect a PictBridge compliant device such as a digital camera, camcorder, or mobile phone using a USB cable recommended by the device’s manufacturer, and print recorded images directly without using a computer. z Connectable Devices PictBridge is an industry standard enabling a range of digital photo solutions, including the direct printing of photos from a digital still camera, camcorder or mobile phone* without the need to use a computer.
2 Connect the PictBridge compliant device to the printer. Note Depending on the model or brand of your device, you may have to select a print mode compliant with PictBridge before connecting the device. You may also have to turn on the device or select Play mode manually after connecting the device to the printer. Perform necessary operations on the PictBridge compliant device before connecting it to this printer according to instructions given in the device’s instruction manual.
About PictBridge Print Settings Settings on a PictBridge Compliant Device This section describes the print settings on a PictBridge compliant device. When operating the device, be sure to follow the instructions given in the instruction manual of your PictBridge compliant device. Note z In the following description, names of setting items are given according to those used in Canonbrand PictBridge compliant devices. Setting item names may be different depending on the brand or model of your device.
z Layout Setting Various layout options are available. z Bordered/Borderless: You can select whether or not to print an image with a border. z N-up: You can use this option when printing on sticker paper, or A4- or Letter-sized paper. Sticker paper: When you select 10 x 15 cm/4" x 6" for Paper size, you can print 16 images on a single sheet of paper. A4 or Letter-sized paper: When you select A4 or 8.5" x 11" (Letter) for Paper size, you can print 4 images on a single sheet of paper. z Date/File No.
Routine Maintenance Replacing an Ink Tank This section explains the way to confirm the ink status and the procedure to replace ink tanks. When ink runs out or other errors occur, the ALARM lamp flashes orange to inform you of the error. See “ALARM Lamp Flashes Orange” on page 64 and confirm how to handle it. When printing from your computer, error messages appear on your computer screen as well. Note z Be sure to install the ink tanks in the correct order indicated by the label on the Print Head Holder.
z With the Computer Screen You can confirm the status of each ink tank on the printer status monitor (Windows) and Canon IJ Printer Utility (Macintosh). (A) (A) (A) Confirm whether any symbols are displayed here. Ink is low. You can continue printing for a while, but we recommend you to have a new ink tank available. Ink may have run out. Confirm the number of the times the ALARM lamp is flashing, and see “Four Flashes: Ink tank is not installed properly. / Ink may have run out.
Replacing Ink Tanks When ink tanks run out of ink, replace them using the following steps. Important Handling Ink z To maintain optimal printing quality, we recommend the use of specified Canon brand ink tanks. Refilling ink is not recommended. z Once you remove an ink tank, replace it immediately. Do not leave the printer with ink tanks removed. z Replace empty tanks with new ones. Inserting partially used ink tanks may cause the nozzles to clog.
4 Prepare the replacement tank. (1) Remove the new ink tank from its packaging. (A) (2) Pull the orange tape (A) in the direction of the arrow to peel off the protective film. (3) Remove the film (B) completely. Important Make sure that the protective film does not remain on the air hole (C). If the air hole is blocked with the remaining film, ink may leak out or may not eject properly. (B) (C) (4) Remove the orange protective cap from the bottom of the ink tank. Discard the cap once it is removed.
5 Install the ink tank. (1) Insert the front end of the ink tank into the Print Head. Make sure the position of the tank matches the label (A). (A) (2) Press on the mark on the ink tank until the ink tank snaps firmly into place. (3) Make sure that the ink lamp lights up red. (1) Important The printer cannot be used unless all the ink tanks are installed. (3) (2) 6 Close the Top Cover.
Keeping the Best Printing Results To avoid drying of the Print Head and clogging of the nozzles, note the following. Note z Ink may blur depending on the paper in the following cases; – Printed area is traced with a highlight pen or paint-stick, or – Printed area is traced stained with water or sweat z If the print head nozzles get clogged, printouts will become faint or particular colors will not be printed properly. For details, “When Printing Becomes Faint or Colors Are Incorrect” on page 29.
When Printing Becomes Faint or Colors Are Incorrect When printing becomes faint or colors are incorrect even if ink remains in the ink tanks, the print head nozzles are probably clogged. Print the nozzle check pattern to confirm the condition of the nozzles and then perform Print Head Cleaning. If print results are not satisfactory, performing Print Head Alignment may improve print quality. Note Before performing maintenance z Open the Top Cover and make sure that all lamps for the ink tanks are lit red.
Printing the Nozzle Check Pattern Print the nozzle check pattern to determine whether the ink ejects properly from the print head nozzles. Note z You cannot feed paper from the Front Tray to print Nozzle Check Pattern. Always load paper in the Rear Tray. Printing the Nozzle Check Pattern Without a Computer z Nozzle check pattern printing can be performed also from the printer itself using the RESUME/CANCEL button. 1. 2. 3. 4.
1 2 Make sure that the printer is on and then load a sheet of A4 or Letter-sized plain paper in the Rear Tray. Open the Front Tray and extend the Output Tray Extension. Set the Paper Thickness Lever to the left. For details on the Paper Thickness Lever, refer to “Front View” in “Main Components” of the User’s Guide on-screen manual. 3 4 Open the Canon IJ Printer Utility dialog box. Print the Nozzle Check Pattern. (1) Select Test Print in the pop-up menu. (2) Click Nozzle Check.
Examining the Nozzle Check Pattern Examine the nozzle check pattern output by the printer, and clean the Print Head if necessary. Note The nozzle check pattern will not be printed correctly if there is not enough ink. Replace the ink tank if the remaining amount of ink is insufficient. See “Replacing an Ink Tank” on page 23. 1 Confirm the printed nozzle check pattern. (1) (2) (1) If lines of this pattern are missing, the Black print head nozzle needs cleaning.
Print Head Cleaning Clean the Print Head if lines are missing or if white streaks appear in the printed nozzle check pattern. Cleaning unclogs the nozzles and restores the print head condition. Note that cleaning the Print Head causes used ink to be absorbed in the ink absorber. Cleaning the Print Head consumes ink, so perform Print Head Cleaning only when necessary. Note Cleaning the Print Head Without a Computer The Print Head can also be cleaned from the printer itself, using the RESUME/CANCEL button.
(6) Confirm the displayed message and click Print Check Pattern. The nozzle check pattern is printed. Do not perform any other operations until the nozzle check pattern finishes printing. Note The nozzle check pattern will not be printed correctly if there is not enough ink. Replace the ink tank if the remaining amount of ink is insufficient. See “Replacing an Ink Tank” on page 23. 5 Check the print head condition with the printed nozzle check pattern, and take appropriate action.
(6) Confirm the displayed message and click Print Check Pattern. The nozzle check pattern is printed. Do not perform any other operations until the nozzle check pattern finishes printing. Note The nozzle check pattern will not be printed correctly if there is not enough ink. Replace the ink tank if the remaining amount of ink is insufficient. See “Replacing an Ink Tank” on page 23. 5 Check the print head condition with the printed nozzle check pattern, and take appropriate action.
Print Head Deep Cleaning If print quality does not improve by standard Print Head Cleaning, try Print Head Deep Cleaning, which is a more powerful process. Note that cleaning the Print Head causes used ink to be absorbed in the ink absorber. Print Head Deep Cleaning consumes more ink than standard Print Head Cleaning, so perform this procedure only when necessary. 1 2 3 4 Make sure that the printer is on. Open the Front Tray and extend the Output Tray Extension. Open the printer properties dialog box.
1 2 3 4 Make sure that the printer is on. Open the Front Tray and extend the Output Tray Extension. Open the Canon IJ Printer Utility dialog box. Start Print Head Deep Cleaning. (1) Make sure that Cleaning is selected in the pop-up menu. (2) Click Deep Cleaning. (3) Select the ink group to be deeply cleaned. (4) Click OK. Print Head Deep Cleaning starts when the POWER lamp starts flashing green. Do not perform any other operations until Print Head Deep Cleaning finishes. This takes about 100 seconds.
Aligning the Print Head If ruled lines are printed misaligned or print results are otherwise unsatisfactory, adjust the print head position. Important You cannot feed paper from the Front Tray when performing Print Head Alignment. Always load paper in the Rear Tray. Note The print head alignment pattern is printed in black and blue only. 1 Make sure that the printer is on and then load two sheets of A4 or Letter-sized plain paper in the Rear Tray. Set the Paper Thickness Lever to the left.
(4) After the pattern is printed, click Yes. The dialog for entering a print head alignment value is displayed. 5 Look at the first printout and adjust the print head position. (1) Check the printed patterns and select the number of the pattern in column A that has the least noticeable streaks. Note If it is difficult to pick the best pattern, pick the setting that produces the least noticeable vertical white streaks.
6 Look at the second printout and adjust the print head position. (1) Check the printed patterns and select the number of the pattern in column L and M that has the least noticeable horizontal white streaks, and click OK. In the same way in step 5-(1), select the number. Note If it is difficult to pick the best pattern, pick the setting that produces the least noticeable horizontal white streaks.
1 Make sure that the printer is on and load two sheets of A4 or Letter-sized plain paper in the Rear Tray. Set the Paper Thickness Lever to the left. For details on the Paper Thickness Lever, refer to “Front View” in “Main Components” of the User’s Guide on-screen manual. Important You cannot print the print head alignment pattern if paper of size other than A4 or Letter is loaded. Be sure to use A4 or Letter-sized plain paper. 2 3 4 Open the Front Tray and extend the Output Tray Extension.
5 Look at the first printout and adjust the print head position. (1) Check the printed patterns and select the number of the pattern in column A that has the least noticeable streaks. Note If it is difficult to pick the best pattern, pick the setting that produces the least noticeable vertical white streaks. (A) (B) (A) Less noticeable vertical white streaks (B) More noticeable vertical white streaks (2) Repeat the procedure until you finish inputting the pattern number for column K, then click Send.
6 Look at the second printout and adjust the print head position. (1) Check the printed patterns and select the number of the pattern in column L and M that has the least noticeable horizontal white streaks, and click Send. In the same way in step 5-(1), select the number. Note If it is difficult to pick the best pattern, pick the setting that produces the least noticeable horizontal white streaks.
Cleaning Your Printer This section describes the cleaning procedure that is needed to maintain your printer. Caution z Do not use tissue paper, paper towels, or similar materials for cleaning. Paper tissue powders or fine threads may remain inside the printer and cause problems such as a blocked Print Head and poor printing results. Use a soft cloth to avoid scratching the components.
7 Confirm the displayed message and click OK. The paper that is loaded in the printer will feed through the printer and be ejected. 8 Confirm the displayed message and click OK. If the problem is not resolved, wipe the paper feed roller (A) located on the right side inside the Rear Tray with a moistened cotton swab or the like. Rotate the roller (A) manually as you clean it. Do not touch the roller with your fingers; rotate it with the cotton swab.
If the problem is not resolved, wipe the paper feed roller (A) located on the right side inside the Rear Tray with a moistened cotton swab or the like. Rotate the roller (A) manually as you clean it. Do not touch the roller with your fingers; rotate it with the cotton swab. If this does not solve the problem, contact your Canon Service representative. (A) z Cleaning the Paper Feed Roller of the Front Tray 1 2 Turn off the printer.
4 Manually rotate the paper feed roller toward you and apply a cotton swab or the like to wipe off dust or stain. (A) (A) Paper feed roller Note z If the dirt is hard to remove, slightly moisten the tip of the cotton swab with water. z Paper loaded in the Front Tray will gradually feed and eject as you manually rotate the roller. Remove ejected paper. If you run out of paper while cleaning, reload the paper in the Front Tray. 5 Reattach the Rear Cover.
Cleaning the Inside of the Printer If the printed paper is smudged, the inside of the printer may be dirty. To always get best quality printing result, periodical cleaning of the inside of the printer is recommended. You can clean this part in two ways: z See “Cleaning with the Printer Driver (Bottom Plate Cleaning)” on page 48. z See “Cleaning the Protrusions Inside the Printer” on page 51.
1 2 3 4 Make sure that the printer is turned on, and then remove any paper from the Rear Tray. Open the Front Tray and extend the Output Tray Extension. Fold a single sheet of A4 or Letter-sized plain paper in half widthwise, and then unfold the paper. Load this and only this sheet of paper in the Rear Tray with the open side to the front. (A) Set the Paper Thickness Lever to the left.
1 2 3 4 Make sure that the printer is turned on, and then remove any paper from the Rear Tray. Open the Front Tray and extend the Output Tray Extension. Fold a single sheet of A4 or Letter-sized plain paper in half widthwise, and then unfold the paper. Load this and only this sheet of paper in the Rear Tray with the open side to the front. (A) Set the Paper Thickness Lever to the left.
z Cleaning the Protrusions Inside the Printer If protrusions inside the printer are stained, wipe off any ink from the protrusions using a cotton swab or the like. Caution Be sure to turn off the power and disconnect the power cord before cleaning the printer.
Troubleshooting This section describes troubleshooting tips for problems you may encounter when using the printer. Note This section mainly describes the methods of printer operation for troubleshooting. To handle problems using your computer, refer to “Troubleshooting” in the User’s Guide on-screen manual. For details on how to view the on-screen manuals, see “Reading the On-screen Manuals” on page 71.
Cannot Install the Printer Driver Cause Action If you were unable to proceed beyond the Printer Connection screen, follow the procedure below to reinstall the printer driver. Unable to proceed beyond the Printer Connection screen. (1)Click Cancel on the Printer Connection screen. (2)Click Start Over on the Installation Failure screen. (3)Click Back on the screen that appears next. (4)Click Exit on the PIXMA XXX screen (where “XXX” is your printer’s name), then remove the CD-ROM. (5)Turn the printer off.
Cannot Connect to Computer Properly Printing Speed Is Slow / USB 2.0 Hi-Speed Connection Does Not Work Cause Your system environment is not fully compatible with USB 2.0 Hi-Speed. Action If your system environment is not fully compatible with USB 2.0 Hi-Speed, the printer will operate at a lower speed provided under USB 1.1. In this case, the printer operates properly but printing speed may slow down due to communication speed. Check the following to ensure that your system environment supports USB 2.
Print Results Not Satisfactory If the print result is not satisfactory such as white streaks, misaligned lines, and uneven colors, confirm the paper and print quality settings first. z Check 1: Do the page size and media type settings match the size and type of the loaded paper? When these settings are incorrect, you cannot obtain a proper print result. If you are printing a photograph or an illustration, incorrect paper type setting may reduce the quality of printout color.
Printing Does Not Start/Printing Is Blurred/Colors Are Wrong/Straight Lines Are Misaligned Cause Action Ink tank is empty. Open the Top Cover of the printer to confirm how the ink lamps light or flash, and then take the appropriate action depending on the error condition. For details, see “Getting the Ink Status Information” on page 23. The protective film is remaining. Make sure all of the protective film is peeled off and the air hole is exposed, as illustrated in (A).
Printed Surface Is Scratched/Paper Is Smudged Cause Action Paper Feed Roller is dirty. Clean the Paper Feed Roller. Cleaning the Paper Feed Roller will wear the roller, so perform this procedure only when necessary. For details on cleaning, see “Cleaning the Paper Feed Roller (Roller Cleaning)” on page 44. Inside of the printer is dirty.
Cause Paper is curled. Action For Plain Paper Turn the paper over and reload it to print on the other side. Leaving the paper loaded in the Rear Tray for a long time may cause the paper to curl. If this happens, load the paper with the other side facing up. It may resolve the problem. We recommend putting unused paper back into the package and keep them on a level surface.
Printer Does Not Start Cause Action The printer is not powered on. / The power cord is no connected. Make sure that the power cord is securely plugged into the Power Cord Connector of the printer. Plug the power cord all the way in, since it may be difficult to plug. Ink tank is empty. Open the Top Cover of the printer to confirm how the ink lamps light or flash, and then take the appropriate action depending on the error condition. For details, see “Getting the Ink Status Information” on page 23.
Printer Moves But Ink Is Not Ejected Cause Action Print Head nozzles are clogged. Print the nozzle check pattern to check for uneven ink output. For details on how to print the nozzle check pattern, how to clean the Print Head, and how to perform Print Head Deep Cleaning, see “When Printing Becomes Faint or Colors Are Incorrect” on page 29. z If the nozzle check pattern does not print out properly Check if any of the missing colors are due to empty tanks.
Paper Does Not Feed Properly Cause Action Printing on inappropriate type of paper. Check to see if the paper you are printing on is not too thick or curled. See “Loading Printing Paper” on page 4 and make sure that the paper you are using is suitable. Paper Feed Roller is dirty. Clean the Paper Feed Roller. Cleaning the Paper Feed Roller will wear the roller, so perform this procedure only when necessary. For details on cleaning, see “Cleaning the Paper Feed Roller (Roller Cleaning)” on page 44.
Paper Jams Cause Paper jammed in the Paper Output Slot, the Rear Tray, or the Front Tray. Action Remove the paper following the procedure below. (1)Slowly pull the paper out, either from a paper source or from the Paper Output Slot, whichever is easier. (A) (B) (A) When feeding from the Rear Tray (B) When feeding from the Front Tray z If the paper tears and a piece remains inside the printer, open the Top Cover and remove it.
Cause Action Paper jammed inside the printer at the transport unit. Remove the paper following the procedure below. (1)Hold the Rear Cover Lever and then press to the right and pull to remove the Rear Cover. (2)If you can see the jammed paper, slowly pull the paper out. z Be careful not to touch the components inside the printer. z If you cannot pull the paper out, turn the printer off and turn it back on. The paper may be ejected automatically.
ALARM Lamp Flashes Orange ALARM Lamp Flashes Orange When a printer error occurs, the ALARM lamp flashes orange as shown below. The number of flashes indicates the type of error that has occurred. Count the flashes and take the appropriate action to correct the error. Repeats Note the number of flashes Cause Action Two flashes: Printer is out of paper. / Paper does not feed. Reload paper in the Rear Tray or Front Tray and press the RESUME/CANCEL button. Three flashes: Paper jam.
Cause Action Nine flashes: No response from connected digital camera or video camcorder. / Connected digital camera or video camcorder is not compatible with this printer. Disconnect the USB cable connecting the printer and the device, and then reconnect it. When printing from a PictBridge compliant device, depending on the model or brand of your device, you may have to select a PictBridge compliant print mode on the device before connecting it to the printer.
Error Message Appears on the Computer Screen Writing Error/Output Error/Communication Error Cause Action The printer is not ready. Confirm that the POWER lamp is lit green. If the POWER lamp is off, turn the printer on. While the POWER lamp is flashing green, the printer is initializing. Wait until the POWER lamp stops flashing and remains lit green. If the ALARM lamp is flashing orange, an error may have occurred in the printer.
Error No.: 300 Is Displayed Cause Action The printer is not ready. Confirm that the POWER lamp is lit green. If the POWER lamp is off, turn the printer on. While the POWER lamp is flashing green, the printer is initializing. Wait until the POWER lamp stops flashing and remains lit green. If the ALARM lamp is flashing orange, an error may have occurred in the printer. For details on how to resolve the error, see “ALARM Lamp Flashes Orange” on page 64. Printer is not connected properly.
Error No.: 2002 Is Displayed Cause PictBridge compliant device is connected via an unsupported USB hub. Action See “Nineteen Flashes: An unsupported USB hub is connected. Remove the hub.” on page 65 in “ALARM Lamp Flashes Orange” on page 64. Error Message Appears on a PictBridge Compliant Device The following are the possible errors that may occur when printing directly from a PictBridge compliant device and the countermeasures to clear them.
Error Message On PictBridge Compliant Device “Printer error” Action An error requiring servicing may have occurred. (Printer POWER lamp flashes green and ALARM lamp flashes orange alternately.) Disconnect the USB cable between the printer and the PictBridge compliant device, turn off the printer, and unplug the power cord of the printer from the power supply. After a while, plug the power cord of the printer back in, turn on the printer, and then reconnect the PictBridge compliant device to the printer.
Appendix How to Use the Documentation Provided Printed Documentation Setup Sheet Be sure to read this sheet first. This sheet includes instructions for setting up your printer and getting it ready for use. Quick Start Guide (This guide) Read this guide when starting to use the printer. After following instructions in your setup sheet, we recommend you read this guide to familiarize yourself with the basic operations, for example, printing from your computer and a PictBridge compliant device.
Reading the On-screen Manuals For detailed instructions on installing the on-screen manuals, refer to your setup sheet. You can view the on-screen manuals in the following way: To view the on-screen manual, double-click the XXX On-screen Manual shortcut icon on the desktop, or click Start > All Programs (or Programs) > Canon XXX Manual > XXX On-screen Manual (where “XXX” is your printer’s name). System Requirements Browser: Windows HTML Help Viewer Note z Microsoft® Internet Explorer 5.
Specifications General Specifications Printing resolution (dpi) 4800 (horizontal)* x 1200 (vertical) * Ink droplets can be placed with a pitch of 1/4800 inch at minimum. Interface USB 2.0 High Speed* * A computer that complies with USB 2.0 Hi-Speed standard is required. Since the USB 2.0 Hi-Speed interface is fully upwardly compatible with USB Full-Speed (USB 1.1), it can be used at USB Full-Speed (USB 1.1). Print width 8.0 inches / 203.2 mm max. (for Borderless Printing: 8.
Minimum System Requirements Note Conform to the operating system’s requirements when higher than those given here. Operating System Processor RAM Windows Vista Pentium II (including compatible processors) 300 MHz 128 MB Windows XP SP1, SP2 Pentium II (including compatible processors) 300 MHz 128 MB Windows 2000 Professional SP2, SP3, SP4 Pentium II (including compatible processors) 300 MHz 128 MB Mac OS X v.10.4 Intel processor PowerPC G3 256 MB Mac OS X v.10.2.8 - v.10.
Safety Precautions Please read the safety warnings and cautions provided in this manual to ensure that you use the printer safely. Do not attempt to use the printer in any way not described in this manual. Warning You may cause an electric shock, fire, or damage the printer if you ignore any of these safety precautions. Choosing a location Do not place the printer close to flammable solvents such as alcohol or thinners.
Cleaning the printer Use a damp cloth to clean the printer. Never use flammable solvents such as alcohol, benzene or thinners. If flammable solvents come in contact with electrical components inside the printer, it could cause a fire or electric shock. Always unplug the printer from the power outlet before cleaning the printer. If you accidentally switch the printer on while cleaning it, you could injure yourself or damage the printer.
Working around the printer Never put your hands or fingers in the printer while it is printing. Do not place any object on the printer. Do not place metal objects (paper clips, staples, etc.) or containers of flammable solvents (alcohol, thinners, etc.) on top of the printer. If any foreign object (metal or liquid) fall into the printer, unplug the power cord and call for service. Do not transport or store the printer on a slant, vertically or upside-down, as the ink may leak and damage the printer.
Users in the U.S.A. Regulatory Information FCC Notice (U.S.A. Only) For 120V, 60Hz model Model Number: K10311 This device complies with Part 15 of the FCC Rules. Operation is subject to the following two conditions: (1) This device may not cause harmful interference, and (2) this device must accept any interference received, including interference that may cause undesired operation.
This limited warranty shall only apply if the Product is used in conjunction with compatible computers, peripheral equipment and software. Canon USA shall have no responsibility for such items except for compatible Canon brand peripheral equipment covered by a separate warranty (“Separate Warranty”). Repairs of such Canon brand peripheral equipment shall be governed by the terms of the Separate Warranty.
PURCHASER OF THE PRODUCT OR THE PERSON FOR WHOM IT WAS PURCHASED AS A GIFT, AND STATES YOUR EXCLUSIVE REMEDY. Canon USA offers a range of customer technical support* options: z Interactive troubleshooting, e-mail technical support, the latest driver downloads and answers to frequently asked questions (www.canontechsupport.
Canon U.S.A., Inc. One Canon Plaza Lake Success, NY 11042 USA Canon is a registered trademark of Canon Inc. © 2007 Canon U.S.A., Inc. Canon is a registered trademark of Canon Inc. in the United States and may also be a registered trademark in other countries.
Index A S Appendix 70 Safety Precautions 74 Specialty Media 4 Specifications general 72 PictBridge 72 System Requirements 73 B Before Using the Printer 2 C Canon U.S.A., Inc. Limited Warranty - U.S.
82
Getting Help from Canon Ordering Information For additional supplies, use the following descriptions and order numbers. Help Us Help You Better Description Before you contact Canon, please record the following information.
Photo Printer series Quick Start Guide The following ink tanks are compatible with this product. For information on product specifications, please visit our website at www.usa.canon.com QT5-1261-V01 XXXXXXXX © CANON INC.