
User`s guide


Storing Forwarding Settings
4-21
Setting the Send Function
4
NOTE
• To view the detailed information of a selected destination, select the destination ➞
press [Details].
• To be able to select a forwarding destination, it is necessary to register destinations in
the Address Book beforehand. (See Chapter 4, “Specifying Destinations Easily and
Quickly,” in the Sending and Facsimile Guide.)
10
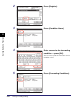
Select a destination ➞ press
[OK].
Press the alphanumeric keys (e.g., [ABC])
to display the individual keys for each letter
or number. You can select a letter or
number to restrict the displayed range of
entries. Press [All] to return to the full
address list.
If the desired destination is not displayed,
press [ ] or [ ] to scroll to the desired
destination.
You can restrict the type of destinations
displayed in the results list by pressing the
Type drop-down list.
You cannot select multiple destinations. To
forward to multiple destinations, select a
group address.
11
Press [File Format].
If any of the following is true, steps 11 and
12 are not necessary:
• A fax number is specified as the
forwarding destination.
• An I-fax address is specified as the
forwarding destination.
• For the imageRUNNER 2545/2535/2530/
2525/2520, the Send function is not
activated with the optional Color Send
Kit-Y1.