User Manual
Table Of Contents
- Contents
- Chapter 1 Preface
- Chapter 2 Explore the print system
- Chapter 3 Explore the ease of operation
- Chapter 4 Start the print system
- Chapter 5 Adjust the control panel
- Chapter 6 Prepare the system
- Chapter 7 Prepare the jobs
- Chapter 8 Plan the workload
- Chapter 9 Plan the jobs
- Chapter 10 Print the jobs
- Chapter 11 Keep the colour quality high
- Chapter 12 Perform colour adjustments
- About colour adjustments
- Automatic colour mismatch correction
- Create a trapping preset
- Perform a manual shading correction
- Adjust CMYK curves for a job
- Adjust CMYK curves for a media family
- Correct the colour tones with the ACCT function
- Register the custom media for automatic gradation adjustment
- Create media families and output profiles
- Chapter 13 Perform media adjustments
- Chapter 14 Maintain the print system
- System configuration and maintenance
- Refill toner and staples
- Consumables
- Check the filling level of the toner cartridge
- Replace a toner cartridge
- Check the filling level of the waste toner container
- Replace the waste toner container
- Check the filling level of the staple cartridge
- Replace the staple cartridge in the staple unit of the stacker / stapler
- Replace the staple cartridge in the saddle-stitch unit of the stacker / stapler
- Remove staple and punch waste
- Clean print system parts
- Cleaning tasks and procedures
- Clean the control panel
- Clean the glass plate area
- Clean the automatic document feeder scanning area
- Clean the scanning sensors
- Clean the rollers of the automatic document feeder
- Clean the inside of the print module
- Clean the corona assembly wires
- Clean the clean roller
- Refresh the fixing roller
- Maintain print system parts
- Install system software
- Read the counters
- Chapter 15 Help
- Chapter 16 References
- Index

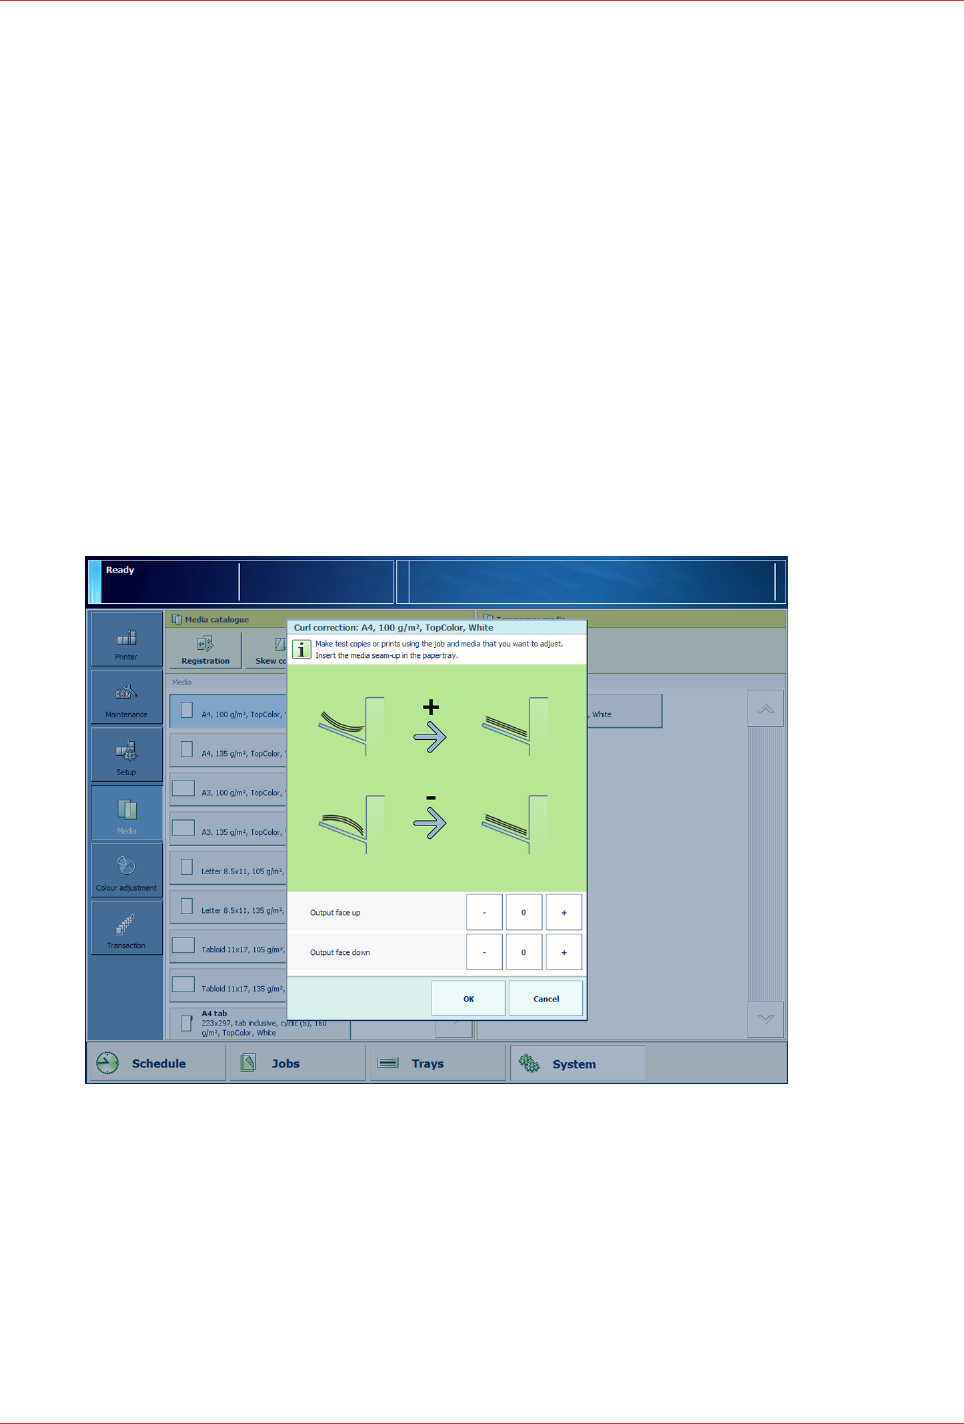
Correct curled output media
Media can arrive curled in the output tray, caused by temperature differences during the print
process. You can perform a correction procedure, to prevent curled sheets on the output trays.
The results of the correction are immediately effective for jobs that use these media.
For media that need a curl correction in long-edge direction and short-edge direction, create two
different entrances in the media catalogue. The correction procedure changes the media
attributes in the media catalogue, so that the adjustments are applied to all jobs that use the
media.
You can correct curled output media via the Trays view, System view, or via the media used in a
job. The procedure below describes the correction via the System view.
Procedure
1.
Touch [System] -> [Media].
2.
Select the media from the media catalogue.
3.
Touch [Optimise] -> [Curl correction].
4.
Define the correction factor with the + and - buttons.
Start with small increments to avoid paper jams.
5.
Touch [OK].
You find the correction values in the system adjustment settings of the Settings Editor
(Preferences tab).
Correct curled output media
Chapter 13 - Perform media adjustments
205
imagePRESS C10000VP


