User's Manual
Table Of Contents
- Cover
- Introduction
- Getting Started
- Charging the Battery
- Installing and Removing the Battery
- Installing and Removing the Card
- Using the LCD Monitor
- Turning on the Power
- Setting the Date, Time, and Zone
- Selecting the Interface Language
- Attaching and Detaching a Lens
- Lens Image Stabilizer
- Basic Operation
- Quick Control for Shooting Functions
- Menu Operations
- Using the Touch Screen
- Before You Start
- Displaying the Grid
- Displaying the Electronic Level
- Feature Guide and Help
- Basic Shooting
- Fully Automatic Shooting (Scene Intelligent Auto)
- Full Auto Techniques (Scene Intelligent Auto)
- Disabling Flash
- Creative Auto Shooting
- Special Scene Mode
- Shooting Portraits
- Shooting Landscapes
- Shooting Close-ups
- Shooting Moving Subjects
- Shooting Night Portraits (With a Tripod)
- Shooting Night Scenes (Handheld)
- Shooting Backlit Scenes
- Quick Control
- Shoot by Ambience Selection
- Shoot by Lighting or Scene Type
- Setting the AF and Drive Modes
- Image Settings
- Setting the Image-Recording Quality
- Setting the ISO Speed
- Selecting a Picture Style
- Customizing a Picture Style
- Registering a Picture Style
- Setting the White Balance
- White Balance Correction
- Auto Correction of Brightness and Contrast
- Setting Noise Reduction
- Highlight Tone Priority
- Lens Peripheral Illumination / Chromatic Aberration Correction
- Creating and Selecting a Folder
- File Numbering Methods
- Setting Copyright Information
- Setting the Color Space
- Advanced Operations
- Program AE
- Shutter-Priority AE
- Aperture-Priority AE
- Manual Exposure
- Selecting the Metering Mode
- Setting Exposure Compensation
- Auto Exposure Bracketing (AEB)
- AE Lock
- Bulb Exposures
- HDR (High Dynamic Range) Shooting
- Multiple Exposures
- Mirror Lockup
- Using the Eyepiece Cover
- Using a Remote Switch
- Remote Control Shooting
- Flash Photography
- Shooting with the LCD Monitor (Live View Shooting)
- Shooting Movies
- Image Playback
- Image Playback
- Shooting Information Display
- Searching for Images Quickly
- Magnified View
- Playing Back with the Touch Screen
- Rotating the Image
- Setting Ratings
- Quick Control for Playback
- Enjoying Movies
- Playing Movies
- Editing a Movie’s First and Last Scenes
- Slide Show (Auto Playback)
- Viewing Images on a TV Set
- Protecting Images
- Erasing Images
- Changing Image Playback Settings
- Post-Processing Images
- Sensor Cleaning
- Printing Images
- Customizing the Camera
- Reference
- INFO. Button Functions
- Checking the Battery Information
- Using a Household Power Outlet
- Using Eye-Fi Cards
- Function Availability Table According to Shooting Mode
- Menu Settings
- System Map
- Troubleshooting Guide
- Error Codes
- Specifications
- Handling Precautions: EF-S18-55mm f/3.5-5.6 IS STM, EF-S18-135mm f/3.5-5.6 IS STM
- Viewing the CD-ROM Instruction Manuals / Downloading Images to Your Computer

q Selecting the Metering ModeN
166
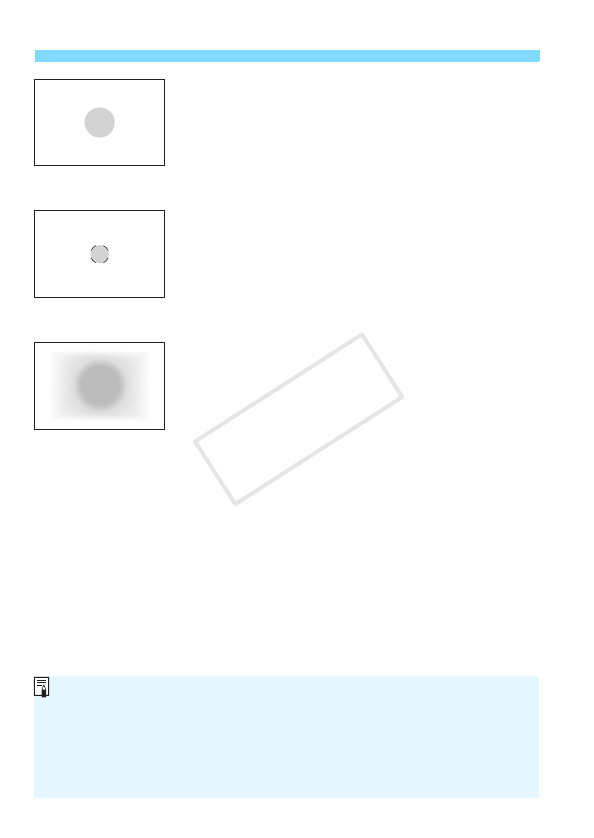
w Partial metering
Effective when the background is much brighter
than the subject due to backlighting, etc. The
metering is weighted at the center covering approx.
7.7% of the viewfinder area.
r Spot metering
This is for metering a specific spot of the subject or
scene. The metering is weighted at the center
covering approx. 3.0% of the viewfinder area.
e Center-weighted average metering
The metering is weighted at the center and then
averaged for the entire scene.
With q (Evaluative metering), the exposure setting will be locked when
you press the shutter button halfway and focus is achieved. In the w
(Partial metering), r (Spot metering), and e (Center-weighted
average metering) modes, the exposure is set when the photo is taken.
(Pressing the shutter button halfway does not lock the exposure.)
When <r> is set, <z> can be displayed in the viewfinder (p.376).
COPY


