User Guide
Table Of Contents
- How to Use this Guide
- Table of Contents
- Control Panel Features
- Scanning Procedures
- Plug-in module FS Special Features
- Quick Start Instructions
- STEP 1 Installing Plug-in module FS
- STEP 2 Scanning Preparations
- STEP 3 Scanning
- STEP 4 Adjusting and Editing Scanned Images
- Optimum Adjustments for Image Quality
- Color Correction
- Color Correction - Histogram Setting
- Color Correction - Brightness and Contrast Settings
- Color Correction - Color Balance
- Color Correction - Tone Curve Settings
- Color Correction - Gamma Value Settings
- Color Correction - Threshold
- Film Correction - Focus Correction
- Film Correction — Exposure Adjustment
- Auto Tone Correction (ColorSync™)
- Saving / Recalling Settings
- Editing Scanned Images
- Appendices
- Troubleshooting
- Error Messages
- List of Film Types <2700F only>
- Glossary
- Index (A - F)
- Index (G - S)
- Index (T - Z)
- Canon Customer Support Help Desk

53
53
Procedure
Click the Color Correction button.
The Color Correction dialog box will open.
You can also click on the [Image] menu in the operation panel and select [Color
Correction] to open the Color Correction dialog box.
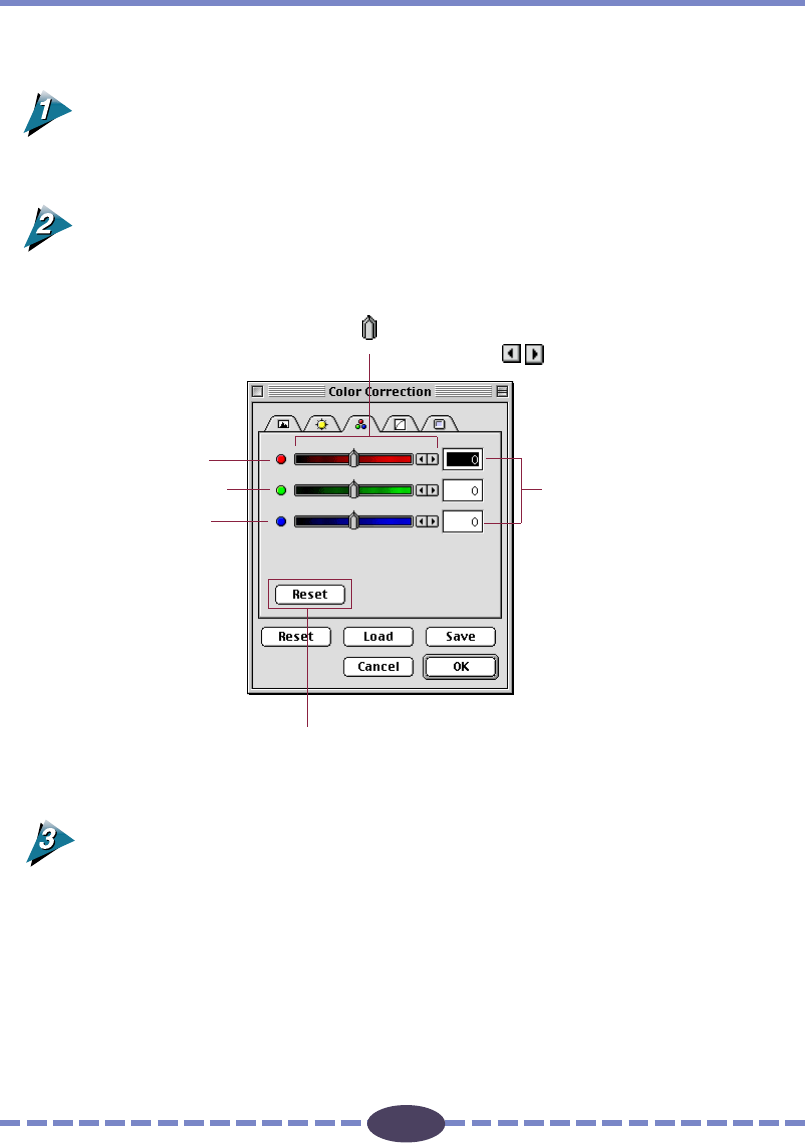
Click the Color Balance tab and adjust the settings for R (red), G (green) and
B (blue).
Click the [OK] button.
The image is adjusted according to the settings you specified in the dialog box.
The values set with the slide bar
are reflected here. You can also
enter values (within the range 127
to 127) directly into the entry
boxes.
Slider
Drag the button right or left, or click the
left or right arrows
to set the value.
Resets all items in this
dialog box to their
default settings.
R (red)
G (green)
B (blue)


