USER’S GUIDE Motorola Satellite Navigation System with Free Map Updates Model: XPLORE 500/600 The features described in this guide are subject to modifications without prior notice.
Welcome... to your new Motorola Navigation System! Congratulations! You have chosen a cutting-edge navigation system. Please enjoy using it. This navigation system leads you straight to your destination, whether you are travelling by car or on foot. You can navigate and plan your route with an easy-to-use and intuitive interface, just by using your finger.
Overview of the Satellite Navigation Device 1. 2. 3. 4. 5. 6. Touch Screen On/Off Button Press and hold to turn the unit On. Press and hold to turn the unit Off or put to sleep via the on-screen options. Reset Button Insert the tip of a stylus pen or small blunt object into the reset hole to reset the system. Charge Indicator Shows the charging status of the battery: Red - charging Green - fully charged Memory Card Slot For use with micro SD cards. USB Port For charging and data transfer.
Important guidelines for installing your Satellite Navigation Device • Satellite signals are required for this product to function in Navigation Mode. There may be occasions within your home or surrounding area when the signal strength is limited and navigation may not be possible. This is quite normal for products of this type. • You can check the number of satellite signals that the unit is receiving and the strength of those signals by viewing the Satellite Navigation Device.
1. 2. Safety Instructions ..................................................................................... 8 Getting Started.......................................................................................... 9 2.1 2.2 2.3 2.4 2.5 2.6 3. Basic Device Operations and Settings ................................................... 14 3.1 3.2 4. 5. Charging the Battery ................................................................................. 9 2.1.1 Using the Car Adapter ...................
5.5 5.6 5.7 5.8 6 How to Navigate .......................................................................................23 5.5.1 Navigate to a Postcode ............................................................. 23 5.5.2 Navigate to a Recent Location ................................................. 23 5.5.3 Navigate to an Address ............................................................. 23 5.5.4 Navigate to Home ..................................................................... 24 5.5.4.
5.8.6 5.8.7 5.8.4.3 Adventure Mode ..........................................................35 Safety Options ...........................................................................35 5.8.5.1 Speed Limit Alarm ................................................................ 35 5.8.5.2 Safety Camera Alert ............................................................. 36 System ............................................................................................... 36 5.8.6.1 Time Format ........
1. Safety Instructions WARNING This product is compliant with all relevant electromagnetic field standards and is, when handled as described in the User’s Guide, safe to use. Therefore, always read the instructions in this User’s Guide carefully before using the device. If you experience any problems, please go through the user guide before contacting the customer helpline.
2.1 Charging the Battery Before using your Sat Nav device for the first time, we recommend that you charge the unit for 5 hours via a USB cable (sold separately) or the supplied in-car charger until the charging indicator turns green. Plug the USB cable/in-car charger into the USB socket, and plug the other end into a suitable power source. 2.1.1 Using the Car Adapter When using your Sat Nav in the car, we recommend that you always use the incar charger to power the unit. 1. 2. 3.
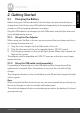
2.2 Installing a Micro SD Card You may install a micro SD card as described below. 1. 2. 3. 4. 2.3 1. 2. 10 Switch the unit off first before installing or removing the micro SD card. The micro SD card can only be fitted one way. The contacts should be facing away from you and the cut-off corner at the bottom (as shown above). Slide the card gently into the slot, until it clicks into place. Once the card is installed, it does not need to be removed.
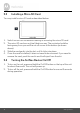
Turning Off the Sat Nav Unit or Put the Unit Into Sleep Mode • Press the Sleep icon to put the unit into sleep mode. • To bring the unit out of sleep mode, press and hold the On/Off button again. When brought out of sleep mode, the unit will show the same screen as when the unit entered sleep mode. • Press the Off icon to turn off the unit. There is a 5 seconds timer which starts to count down. If there is no selection made within 5 seconds, the unit will turn off automatically.
2.6 Using the Car Mounting Kit The car mount has a suction pad that fits to the windscreen or a flat area on the dashboard. 2.6.1 Fitting to the windscreen • Pull the lever away from the suction pad. • Place the pad on the windscreen and push the lever towards the pad until it clicks into place. 2.6.2 Fitting the holding bracket It is best to fit this to the unit before it is attached to the windscreen. • The bracket can only be fitted one way.
Fitting the Unit • Slide the unit into the bottom of the bracket and carefully push the unit up and back until it clicks into place at the top. • To remove the unit from the car mount, press and lift the tab at the top of the bracket then pull the unit forward and out of the bottom of the bracket. • To remove the car mount from the windscreen, lift the lever away from the windscreen, then gentle pull the tab on the suction cup to release the suction as you pull the mount away from the windscreen.
3. Basic Device Operations and Settings 3.1 Starting Up Press the On/Off button to start up. 3.2 Settings You do not need to enter the Settings menu before you start to navigate. If you press on the 3.2.1 icon, the following screen is displayed. Volume Press Volume to modify the volume level of the voice prompts. You can increase or decrease volume level by tapping “<” or “>”. You can also adjust volume level via the navigation software, as described in section 5.8.1.1 “Speaker” .
Press 3.2.2 to confirm and exit. Backlight Press Backlight to change the brightness of the screen. You can make it darker or brighter by tapping “<” or “>”. You can also set a time out period of 10 seconds to 3 minutes using the auto off setting. Press 3.2.3 to confirm and exit GPS Information This page is for information only. You can view the number of satellite signals the unit is receiving as well as the strength of these signals.
3.2.4 Date Time This device can auto-set the current date and time by receiving 3 GPS signals. It has a default timezone based on the country of purchase. To change the time zone, use the “<” or “>” keys to modify the value of the required fields. Press 3.2.5 to confirm and exit. Calibration This function calibrates the unit to respond to your screen taps. You will need to use this function only if the unit begins to respond inconsistently to your screen taps.
Please visit www.ndrive.com and download the NPlus software to gain access to further content (see section 5.11 “Nplus” for more details) This device comes preloaded with maps which include a free yearly update, for the life of your product. You will receive all updates to road network, addresses and points of interest. The product life is defined as the useful life of the device (Max.
5. Navigation This section guides you through the main features of the system. 5.1 GPS Connection Your Sat Nav device uses GPS technology for navigation. The device receives signals from a number of GPS satellites in order to determine your current position. • Place your navigation device in a location with an unobstructed view to the sky to set up your first satellite connection. In the car, this will usually mean mounting the unit on the lower part of the windscreen.
Main Map Screen 5.3.1 Map View ENGLISH 5.3 Points of Interest - Click on the POI to see more information. Zoom In Zoom out 3D/2D - Tap this button to alternate between 2D and 3D map visualization, according to your preference. Device setting button Map scale Main menu button Select from the map screen to enter the main Menu from where you will have access to the many features of the unit.
5.3.2 Navigation View Next street name Next maneuver Return to your GPS location, if you have moved Distance to the next maneuver Road speed limit Time, speed and distance controls (*) Locator will change colour Current street according to signal strength Time, speed and distance controls(*) show different information. Tap to toggle between the different modes as shown below. 5.3.
Basic commands 5.4.1 Exploring Menu Screens ENGLISH 5.4 All menu screens show two buttons at the top which allow for the following actions: Go back one level in the menu Return to the map screen 5.4.2 Using the Keyboard Whenever you want to perform a search, filter results from a list or input data, the keyboard will appear on the screen. Different keyboard layouts can be selected depending on the information you wish to enter.
5.4.2.1 Standard Keyboard Delete characters space bar Remove the keyboard from the screen Access numeric keyboard 5.4.2.2 Numeric Keyboard Access the extended characters keyboard Access the symbols keyboard 5.4.2.
How to Navigate 5.5.1 Navigate to a Postcode • From the main menu, select Go To , and then select Postcode If necessary, select the country from the shown list after selecting the Country field. ENGLISH 5.5 . • Select Postcode, and use the keyboard to enter the postcode (Note: You can enter the postcode with or without a space). • Select the postcode from the shown list, then enter the house number and select it from the list.
• Enter the house number and select it from the list. Alternatively, you can select anywhere or a particular road junction by selecting the "anywhere" or "crossing" option. (Note: "crossing" will show a list of road names that join with the road shown under the postcode). • After completing your selection you will be taken to the Go Screen. • Click 5.5.4 . Navigate to Home • From the main menu, select Go To , and then Home • From the Go Screen, click . .
• Select Around Me to select a POI which is located around your current GPS location or the location currently shown on the map. • Select a POI category from the list of available categories and sub categories to narrow down your search. When at the lowest category level for the category your have chosen, you will be able to view the list of all possible POI matches, or use the keyboard to narrow down the search if you know the name of the POI you are looking for.
• After completing your selection, you will be taken to the Go Screen. • Click . Before you can use the favourites option, you will need to store locations to the favourite list. Storing Favourite Locations • Select your location to be saved to favourites using one of the methods described in 5.5 “How to Navigate” to enter that location. • Once entered, click favourites screen.
Note You can also add a waypoint by selecting any point on the map, and then clicking the waypoint button shown on the context bar. Then you can either add it to an existing itinerary or create a new one where the selected waypoint will be included. Changing an Itinerary • Select an itinerary from the list. • To edit the itinerary’s name and description, click Edit/Rename the fields as described in “Creating an itinerary”. • To delete the itinerary, click Delete and alter .
• Move the waypoint down on the itinerary list; • Mark the waypoint as the next destination, where all previous waypoints will be marked as visited; • Delete the waypoint from the itinerary list. Navigating an Itinerary Select an itinerary from the list then click Navigate . The unit will begin calculating the route to your first waypoint starting at your current GPS location or position currently shown on the map. 5.
My Route From the main menu select My Route . The My Route menu allows you access to several options for viewing and manipulating the route that has been calculated. Note This option is only available when a route has been calculated. 5.7.1 Show Route Select View On Map on the display. 5.7.2 . An overview of the full route will be temporarily shown Stop Navigation Select Stop Navigation . This will cancel the current route and you will be taken to the main menu screen. 5.7.
obstruction. The unit will re-calculate a route which will avoid the original planned route for this distance. The old route will be shown on the map by a light blue line. 5.7.4.3 Avoid Part of Route This option allows you to avoid part or parts of the currently calculated route and allows you to change the route to take into account high traffic areas or road works so that these roads will be avoided.
Settings ENGLISH 5.8 From the main menu, select Settings . You will now have the option of selecting from 7 different settings categories as described below. 5.8.1 General 5.8.1.1 Speaker Use "+" and "–" to either increase or decrease the speaker volume, then select to confirm the setting. You will be taken to the main Settings menu. Note You can change the volume while navigating by tapping on the bottom bar in the centre. 5.8.1.
5.8.2.3 Kph/Mph Use "+" and "–" to change the measurement of speed which will be displayed and announced on the unit, then select to confirm the setting. You will be taken to the main Settings menu. 5.8.3 Map Appearance 5.8.3.1 Lane Assistance Displays information about the up and coming lane layout of junctions on major roads when a manoeuvre is required. There are two ways in which this information is displayed, simplified and detailed.
Use "+" and "–" to switch between On and Off. When On, the zoom level will automatically adjust to suit your current speed. (The faster you are travelling, the further out the zoom will be). Select to confirm the setting. You will be taken to the main Settings menu. 5.8.3.4 Templates Allows you to customise the appearance of the map as well as select the automatic change between day and night mode.
5.8.4 Routing Options 5.8.4.1 Routing Options Allows you to change the way your route is calculated. You can choose from three available options. Use "+" and "–" to switch between each of the option described below. Fastest – calculates the fastest route, regardless of the distance. It is highly recommended that you select this option. The planned route will not only be the fastest, but also more economical and pleasant to drive, since wider and faster roads such as motorways are given priority.
Allows you to navigate to a location or a set of co-ordinates which are not located near a road. Select this mode for outdoor activity or when travelling by sea or air. In this mode, the distance to your destination is calculated in a direct line and a compass will be displayed to guide you towards your destination. Compass Straight line to destination Distance travelled since start Height above sea level Select Settings menu. 5.8.
5.8.5.2 Safety Camera Alert Allows you to activate/deactivate the alert to warn that you are approaching a speed camera location. Use "+" and "–" to switch between On and Off. Select Settings menu. 5.8.6 to confirm your settings. You will be taken to the main System 5.8.6.1 Time Format Allows you to change the time format between 12 hour and 24 hour. Use "+" and "–" to switch between 12H and 24H. Select Settings menu. to confirm your settings. You will be taken to the main 5.8.6.
GPS Allows you to switch GPS On and Off as well as change the input method for entering co-ordinates. Other information relating to GPS connection is shown, but cannot be modified. 5.8.7.1 GPS Use "+" and "–" to switch between On and Off. When switched Off, you will not be able to navigate. Select to confirm your settings. You will be taken to the main Settings menu. 5.8.7.2 Co-ordinates Use "+" and "–" to switch between the available options.
5.9 My Ndrive Allows access to information about your device/software, as well as allow access to further preferential settings. 5.9.1 Define Home Allows you to set or change your home location. See section 5.5.4.1 “Setting Your Home Location” for information on how to set/change your home location. 5.9.2 Start up Wizard Allows for the legal information screen to be shown again the next time the software is started. After selecting, choose Yes to confirm or No to cancel. 5.9.
Firstly, in order to import data, you will need to either connect the device to your computer via a USB cable, or remove the SD card (if applicable) and connect it directly to your PC. You can then copy the .KML files from your source into the corresponding folder: Speedcams, Itineraries or Favourites located inside the main NDrive folder of your device or your SD card. The information in the .
Exporting Favourites After selecting Export Favourites, your favourites will be automatically exported. Once finished, click , and you will be returned to the Data Import/Export screen.
Store ENGLISH 5.10 This feature is not available on this device as it does not have any network connection capability. If you select Store , you will be shown the following screen. Please select to return to the main menu. To gain access to the NDrive store in order to make purchases and to update the software on your device, please visit www.ndrive.com, select the support tab and then NPlus. Download and install the NPlus software on your PC.
5.11 Nplus When running Nplus for the first time you will need to create an account. Click on Create account and you will be taken to an online webpage where you will be able to set up your account and create your login details. Every time you run Nplus, you will need to login, so please make a note of your login details for future use. After logging in, you will be shown the main Nplus screen from where you are able to make purchases/select updates and install them onto your device. 5.11.
ENGLISH Note Some additional language voices are free and do not need to be paid for. Simply select the voice for the language you wish to be downloaded and installed. 5.11.1.1 Paying for purchases When you select an item which needs to be purchased, Nplus will take you to the payment screen. You can then pay for your purchase using one of the following cards: Visa, MasterCard or American Express. Select and enter your details into the provided fields before selecting to continue with your purchase.
5.11.3 My Products Select My Products to begin downloading and installing your selected updates/purchases. A list of items to be downloaded and installed will be shown. If there is an update to the software, this will also be shown in the list of downloadable items. To begin the download and installation process, select . After selecting, Nplus will begin downloading your updates/purchases. A green progress bar will be shown at the bottom of the screen to indicate the current download progress.
Select Device Information to be shown further detailed information about the device which is currently connected to Nplus. 5.11.6 Help Select Help to gain access to Ndrives online help sections, which will provide help and advice on using the Ndrive software. Select from one of the four available categories to be taken directly to the webpage containing that information.
6. Frequently asked questions I can’t find an address. Please make sure that you have correctly spelt your entry. If you do not know the correct spelling of the address, simply enter parts of the address you know for sure (e.g., “ond”, “Leic” for Leicester Square in London). Then browse the results list and look for the address. Also make sure the city in which you are looking for an address is correct. Sometimes the official postal address differs from the address you are looking for.
Unit does not turn on when using battery power The battery in your unit may be too low. Connect the device to a power source with the car charger, then turn the unit on after a waiting a few minutes. Charge the battery until it shows full. Screen responds slowly Make sure that your device is connected via the car charger or has sufficient battery. If the problem persists, reset the unit with the reset switch found on the rear of the unit.
7. Disposal of the Device (Environment) At the end of the product life cycle, you should not dispose of this product with normal household waste. Take this product to a collection point for the recycling of electrical and electronic equipment. The symbol on the product, user's guide and/or box indicates this. Some of the product materials can be re-used if you take them to a recycling point.
ENGLISH 8. General Information If your product is not working properly.... 1. 2. 3. Read this User's Guide. Visit our website: www.motorolastore.com Contact Customer Service at +44 (0) 844 557 0890(UK only)* *Calls cost 7p per minute plus your telephone company's access charge +44 (0) 8187 62092 (ROI) Consumer Products and Accessories Limited Warranty ("Warranty") Thank you for purchasing this Motorola branded product manufactured under license by Binatone Electronics International Ltd ("BINATONE").
What Other Limitations Are There? ANY IMPLIED WARRANTIES, INCLUDING WITHOUT LIMITATION THE IMPLIED WARRANTIES OF MERCHANTABILITY AND FITNESS FOR A PARTICULAR PURPOSE, SHALL BE LIMITED TO THE DURATION OF THIS LIMITED WARRANTY, OTHERWISE THE REPAIR OR REPLACEMENT PROVIDED UNDER THIS EXPRESS LIMITED WARRANTY IS THE EXCLUSIVE REMEDY OF THE CONSUMER, AND IS PROVIDED IN LIEU OF ALL OTHER WARRANTIES, EXPRESS OR IMPLIED.
Length of Coverage One (1) year from the date of the Products, original purchase by the first consumer purchaser of the product. Consumer Accessories Ninety (90) days from the date of the Accessories, original purchase by the first consumer purchaser of the product. Consumer Products and Accessories The balance of the original warranty or that are Repaired or Replaced for Ninety (90) days from the date returned to the consumer, whichever is longer. 8.0.0.1 Exclusions Normal Wear and Tear.
Altered Products. Products or Accessories with (a) serial numbers or date tags that have been removed, altered or obliterated; (b) broken seals or that show evidence of tampering; (c) mismatched board serial numbers; or (d) nonconforming or non-Motorola branded housings, or parts, are excluded from coverage. Communication Services.
Operating Frequencyÿ 800M 9. Technical Support or contact If you have a technical problem with your device, please contact the helpline on 0844 557 0890. Note Calls cost 7p per minute plus your telephone company's access charge. For more information regarding your product, go to: www.binatonetelecom.com 10. Technical Specifications Antenna Built-in GPS high sensitivity receiver (42 channels) Memory 128MB SDRAM Built-in Display Xplore 500: 5" colour TFT touch screen Weight Xplore 500:0.
Manufactured, distributed or sold by Binatone Electronics International LTD., official licensee for this product. MOTOROLA and the Stylised M Logo, are trademarks or registered trademarks of Motorola Trademark Holdings, LLC. and are used under license. All other trademarks are the property of their respective owners. © 2017 Motorola Mobility LLC. All rights reserved. UK_EN Version 1.
FCC Caution: Any Changes or modifications not expressly approved by the party responsible for compliance could void the user's authority to operate the equipment. This device complies with part 15 of the FCC Rules. Operation is subject to the following two conditions: (1) This device may not cause harmful interference, and (2) this device must accept any interference received, including interference that may cause undesired operation.