
User Manual

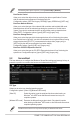


Table Of Contents
- 1 Knowing BIOS
- 2 BIOS Setup program
- 3 Q-Fan Control
- 4 My Favorites menu
- 5 Main menu
- 6 Ai Tweaker menu
- 7 Advanced menu
- 7.1 Platform Misc Configuration
- 7.2 CPU Configuration
- 7.3 System Agent (SA) Configuration
- 7.4 PCH Configuration
- 7.5 PCH Storage Configuration
- 7.6 PCH-FW Configuration
- 7.7 Thunderbolt(TM) Configuration
- 7.8 PCI Subsystem Settings
- 7.9 USB Configuration
- 7.10 Network Stack Configuration
- 7.11 NVMe Configuration
- 7.12 Onboard Devices Configuration
- 7.13 APM Configuration
- 7.14 HDD/SSD SMART Information
- 8 Monitor menu
- 9 Boot menu
- 10 Tool menu
- 11 Exit menu
- 12 Updating BIOS

PRIME / TUF GAMING Intel
®
500 Series BIOS Manual
59
ASUS Secure Erase
SSD speed performance may degrade over time due to accumulated les and frequent data-
writing. Secure Erase completely cleans your SSD and restores it to factory default settings.
Ensure that you run Secure Erase on a compatible SSD. Running Secure Erase on an
incompatible SSD will render the SSD totally unusable.
• The time to erase the contents of your SSD may take a while depending on its size.
Do not turn off the system during the process.
• For the list of Secure Erase-compatible SSDs, visit the ASUS Support site at
www.asus.com/support.
Status definition:
• Frozen. The frozen state is the result of a BIOS protective measure. The BIOS guards
drives that do not have password protection by freezing them prior to booting. If the
drive is frozen, a power off or hard reset of your PC must be performed to proceed
with the ASUS Secure Erase.
• Locked. SSDs might be locked if the Secure Erase process is either incomplete or
was stopped. This may be due to a third party software that uses a different password
dened by ASUS. You have to unlock the SSD in the software before proceeding with
ASUS Secure Erase.
ASUS User Profile
Allows you to store or load multiple BIOS settings and displays the status of the user proles.
Load from Profile
Allows you to load the previous BIOS settings saved in the BIOS Flash. Key in the
number of the prole you wish to load, press <Enter>, and then select [Yes].
The above item is accessible only when at least one BIOS prole is available in the BIOS
Flash.
Displays the
available SSDs