LV20841 Pirmais izdevums / Marts 2023 More info:
AUTORTIESĪBU ATRUNA Šo rokasgrāmatu, ieskaitot tajā aprakstītos produktus un programmatūru, bez rakstiskas ASUSTeK COMPUTER INC. ("ASUS") atļaujas nekādā veidā nedrīkst reproducēt, pārsūtīt, ierakstīt, saglabāt meklēšanas sistēmā vai tulkot jebkurā valodā, izņemot dokumentāciju, ko pircējs saglabā dublējuma nolūkos.
Satura rādītājs Par šo rokasgrāmatu..................................................................................................7 Šajā rokasgrāmatā izmantotie apzīmējumi............................................................ 8 Ikonas................................................................................................................................... 8 Noformējums....................................................................................................................
3. nodaļa: Darbs ar Windows Pirmreizējā palaišana.................................................................................................52 Sākumizvēlne...............................................................................................................53 Windows lietotnes......................................................................................................55 Darbs ar Windows lietotnēm.......................................................................................
4. nodaļa: Ieslēgšanas pašpārbaude (Power-On Self-Test (POST)) Ieslēgšanas pašpārbaude (Power-On Self-Test (POST))................................86 POST izmantošana, lai piekļūtu BIOS un novērstu problēmas........................ 86 BIOS.................................................................................................................................86 Piekļuve BIOS....................................................................................................................
Produktu vides noteikumu atbilstības deklarācija.............................................. 105 ES REACH un 33. pants................................................................................................... 105 ES RoHS............................................................................................................................... 105 Paziņojums par pārklājumu.........................................................................................
Par šo rokasgrāmatu Šajā rokasgrāmatā sniegta informācija par piezīmjdatora aparatūras un programmatūras funkcijām, kas aprakstītas tālākajās nodaļās. 1. nodaļa: Aparatūras uzstādīšana Šajā nodaļā aprakstīti piezīmjdatora aparatūras komponenti. 2. nodaļa: Piezīmjdatora izmantošana Šajā nodaļā aprakstīts, kā lietot dažādas piezīmjdatora daļas. 3. nodaļa: Darbs ar Windows Šajā nodaļā sniegts pārskats par piezīmjdatora operētājsistēmas Windows lietošanu. 4.
Šajā rokasgrāmatā izmantotie apzīmējumi. Lai iezīmētu galveno informāciju šajā lietotāja rokasgrāmatā, dažreiz teksts tiek parādīts, kā aprakstīts tālāk. SVARĪGI! Šajā ziņojumā ietverta ļoti svarīga informācija, kas jāizpilda, lai pabeigtu uzdevumu. PIEZĪME. Šajā ziņojumā ietverta papildinformācija un padomi, kas var palīdzēt izpildīt uzdevumus.
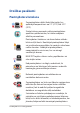
Drošības pasākumi Piezīmjdatora lietošana Šo piezīmjdatoru drīkst lietot tikai vietās, kur apkārtējā temperatūra ir no 5°C (41°F) līdz 35°C (95°F). Skatiet strāvas parametru uzlīmi piezīmjdatora apakšā un pārliecinieties, lai strāvas adapteris atbilstu parametriem. Piezīmjdators lietošanas vai akumulatora uzlādes laikā var kļūt karsts. Neatstājiet piezīmjdatoru klēpī vai uz citām ķermeņa daļām, lai novērstu sakaršanas radītas traumas.
Piezīmjdatora kopšana Pirms tīrīšanas atvienojiet no maiņstrāvas tīkla un izņemiet akumulatoru (ja tāds ir). Lietojiet tīru celulozes sūkli vai zamšādas drāniņu, kas samitrināta ar siltu ūdeni vai ar neskrāpējošu zemas koncentrācijas mazgāšanas līdzekli. Ar sausu drāniņu noņemiet visu lieko mitrumu no piezīmjdatora. Uzglabājiet šķidrumus attāli no šasijas vai tastatūras spraugām, lai neradītu īssavienojumu vai novērstu koroziju.
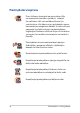
Nelietojiet piezīmjdatoru blakus gāzes noplūdei. Nenovietojiet aktīvās elektroniskās ierīces pie piezīmjdatora, lai izvairītos no elektromagnētisko viļņu traucējumiem displeja panelī. Neizmantojiet šo piezīmjdatoru kriptovalūtas ieguvei (lai iegūtu konvertējamu virtuālo valūtu, ir nepieciešams daudz enerģijas un laika) un/vai ar to saistītām darbībām. Pareiza utilizācija NEIZMEST piezīmjdatoru sadzīves atkritumos. Šis produkts ir izstrādāts tā, lai būtu iespējama detaļu otrreizējā lietošana un pārstrāde.
Akumulatora drošības informācija Akumulatora aizsardzība • Veicot biežu akumulatora uzlādi augstā spriegumā, var tikt saīsināts akumulatora darbības laiks. Lai aizsargātu akumulatoru, kad akumulators ir pilnībā uzlādēts, sistēma var pārtraukt uzlādi, kad akumulatora uzlādes līmenis ir no 90% līdz 100%. PIEZĪME. Līmenis, kādā akumulators atsāk lādēšanu, parasti ir iestatīts no 90% līdz 99%. Faktiskā vērtība var atšķirties atkarībā no modeļa.
Standarta akumulatora apkope • Ja neizmantojat ierīci ilgu laiku, pārliecinieties, vai akumulatora uzlādes līmenis ir 50%, pēc tam izslēdziet ierīci un atvienojiet maiņstrāvas adapteri. Uzlādējiet akumulatoru līdz 50% ik pēc trim mēnešiem, lai akumulators pārmērīgi neizlādētos un netiktu bojāts. • Lai pagarinātu akumulatora darbības laiku, neveiciet ilgstošu akumulatora uzlādi augstā spriegumā.
Piezīmjdatora e-rokasgrāmata
1.
Piezīmjdatora iepazīšana Skats no priekšpuses PIEZĪME. Tastatūras izkārtojums var atšķirties atkarībā no reģiona vai valsts. Piezīmjdatora izskats arī var atšķirties atkarībā no piezīmjdatora modeļa.
Virziena mikrofoni Virziena mikrofoni nodrošina atbalss novēršanas, trokšņu apslāpēšanas un staru kūļa formēšanas funkcijas, kas uzlabo balss atpazīšanu un audio ierakstu. Kamera Izmantojot šo iebūvēto kameru, ar piezīmjdatora palīdzību var uzņemt fotoattēlus vai ierakstīt video. IR kamera Izmantojot šo iebūvēto kameru, ar piezīmjdatora palīdzību var uzņemt fotoattēlus vai ierakstīt video. IR kamera atbalsta arī Windows Hello. PIEZĪME.
Papilddispleja panelis Augstas izšķirtspējas displeja panelis nodrošina piezīmjdatorā lieliskas fotoattēlu, video un citu multivides failu skatīšanās funkcijas. Skārienekrāna panelis Šis augstas izšķirtspējas skārienekrāna panelis nodrošina piezīmjdatorā lieliskas fotoattēlu, video un citu multivides failu skatīšanās funkcijas. Izmantojot to, ar skārienžestu palīdzību varat vadīt piezīmjdatora darbību. PIEZĪME. Detalizētāku informāciju skatiet šīs rokasgrāmatas sadaļā Skārienekrāna paneļa žestu lietošana.
Burtslēga indikators Šis indikators iedegas, kad burtslēga funkcija ir aktivizēta. Izmantojot burtslēga taustiņu, ar piezīmjdatora tastatūru varat ievadīt lielos burtus (piemēram, A, B, C). Stāvokļa indikatori Ar stāvokļa indikatoru palīdzību var noteikt piezīmjdatora pašreizējo aparatūras statusu. Barošanas indikators Barošanas indikators iedegas, kad piezīmjdatoru ieslēdz, un lēni mirgo, kad piezīmjdators pārslēgts miega režīmā.
Krāsa Stāvoklis Nepārtraukti balta Piezīmjdators ir pievienots strāvas avotam, un akumulatora jauda ir 100%. Nepārtraukti oranža Piezīmjdators ir pievienots strāvas avotam, tiek veikta akumulatora uzlāde un akumulatora jauda ir no 0% līdz 99%. Mirgo oranža Piezīmjdatora barošanu nodrošina akumulators un tā uzlādes līmenis ir mazāks par 10%. Izdziest Piezīmjdatora barošanu nodrošina akumulators un tā uzlādes līmenis ir no 10% līdz 100%.
Audio skaļruņi Izmantojot iebūvētos skaļruņus, audio var klausīties tieši no piezīmjdatora. Šī piezīmjdatora audio funkcijas tiek kontrolētas ar programmatūru. Barošanas poga Nospiediet barošanas pogu, lai ieslēgtu vai izslēgtu piezīmjdatoru. Varat arī nospiest barošanas pogu, lai pārslēgtu piezīmjdatoru miega vai hibernācijas režīmā un ieslēgtu no miega vai hibernācijas režīma.
Apakšpuses skats PIEZĪME. Apakšpuses skats ir atkarīgs no modeļa. BRĪDINĀJUMS! Piezīmjdators lietošanas vai akumulatora uzlādes laikā var kļūt karsts. Neatstājiet piezīmjdatoru klēpī vai uz citām ķermeņa daļām, lai novērstu sakaršanas radītas traumas. Strādājot ar piezīmjdatoru, nenovietojiet to uz virsmas, kas var aizsegt ventilācijas atveres. SVARĪGI! 22 • Akumulatora darba laiks ir atkarīgs no lietošanas veida un no piezīmjdatora tehniskajiem raksturlielumiem. Akumulators nav izjaucams.
Ventilācijas atveres Ventilācijas atveres ļauj piezīmjdatorā ieplūst aukstajam gaisam un karstajam gaisam izplūst no tā. BRĪDINĀJUMS! Nodrošiniet, lai papīrs, grāmatas, drēbes, kabeļi un citi objekti neaizsegtu nevienu ventilācijas atveri, jo pretējā gadījumā var rasties pārkaršana. Audio skaļruņi Izmantojot iebūvētos skaļruņus, audio var klausīties tieši no piezīmjdatora. Šī piezīmjdatora audio funkcijas tiek kontrolētas ar programmatūru.
Skats no labās puses USB 3.2 Gen 2 Type-C®/DisplayPort kombinētā pieslēgvieta Šī USB 3.2 (universālās seriālās kopnes 3.2) Gen 2 Type-C® pieslēgvieta nodrošina pārsūtīšanas ātrumu līdz 10 gigabitiem sekundē un ir saderīga ar iepriekšējo versiju USB 2.0. Izmantojiet USB Type-C® adapteri, lai pievienotu piezīmjdatoru ārējam displejam. PIEZĪME. Šīs pieslēgvietas pārraides ātrums var atšķirties atkarībā no modeļa.
Skats no kreisās puses Ventilācijas atveres Ventilācijas atveres ļauj piezīmjdatorā ieplūst aukstajam gaisam un karstajam gaisam izplūst no tā. BRĪDINĀJUMS! Nodrošiniet, lai papīrs, grāmatas, drēbes, kabeļi un citi objekti neaizsegtu nevienu ventilācijas atveri, jo pretējā gadījumā var rasties pārkaršana. Līdzstrāvas (DC) ievades pieslēgvieta Šai pieslēgvietai pievienojiet komplektā ietverto strāvas adapteri, lai nodrošinātu piezīmjdatora barošanu un uzlādētu akumulatoru.
USB 3.2 Gen 2 pieslēgvieta Šī USB 3.2 (universālās seriālās kopnes 3.2) Gen 2 pieslēgvieta nodrošina pārsūtīšanas ātrumu līdz 10 gigabitiem sekundē un ir saderīga ar iepriekšējo versiju USB 2.0. USB 3.2 Gen 2 Type-C®/DisplayPort/ barošanas kombinētā pieslēgvieta Šī USB 3.2 (universālās seriālās kopnes 3.2) Gen 2 Type-C® pieslēgvieta nodrošina pārsūtīšanas ātrumu līdz 10 gigabitiem sekundē un ir saderīga ar iepriekšējo versiju USB 2.0.
MicroSD kartes slots Šim piezīmjdatoram ir viens iebūvētā atmiņas karšu lasītāja slots, kas atbalsta microSD karšu formātus. Austiņu/austiņu ar iebūvētu mikrofonu/mikrofona ligzda Šai pieslēgvietai var pievienot skaļruņus vai austiņas. Varat arī izmantot šo pieslēgvietu, lai pievienotu austiņas ar iebūvētu mikrofonu vai ārēju mikrofonu.
Skats no aizmugures Ventilācijas atveres Ventilācijas atveres ļauj piezīmjdatorā ieplūst aukstajam gaisam un karstajam gaisam izplūst no tā. BRĪDINĀJUMS! Nodrošiniet, lai papīrs, grāmatas, drēbes, kabeļi un citi objekti neaizsegtu nevienu ventilācijas atveri, jo pretējā gadījumā var rasties pārkaršana. LAN pieslēgvieta Šai pieslēgvietai pievienojiet tīkla kabeli, lai izveidotu savienojumu ar lokālo tīklu.
USB 3.2 Gen 2 pieslēgvieta Šī USB 3.2 (universālās seriālās kopnes 3.2) Gen 2 pieslēgvieta nodrošina pārsūtīšanas ātrumu līdz 10 gigabitiem sekundē un ir saderīga ar iepriekšējo versiju USB 2.0. HDMI izejas pieslēgvieta Izmantojot šo portu, var nosūtīt audio un video signālus no piezīmjdatora uz HDMI saderīgu ierīci, izmantojot HDMI kabeli.
Piezīmjdatora e-rokasgrāmata
2.
Darba sākšana Uzlādējiet savu piezīmjdatoru A. Savienojiet maiņstrāvas barošanas vadu ar maiņstrāvas/līdzstrāvas adapteri. B. Pieslēdziet līdzstrāvas barošanas savienotāju piezīmjdatora līdzstrāvas (DC) ievades pieslēgvietai. C. Iespraudiet maiņstrāvas adapteri 100 V ~ 240 V barošanas avotā. Lādējiet piezīmjdatoru 3 stundas, pirms to pirmo reizi lietojat akumulatora režīmā. PIEZĪME. Strāvas adaptera izskats var atšķirties atkarībā no modeļiem un jūsu reģiona.
SVARĪGI! Informācija par maiņstrāvas/līdzstrāvas adapteri: • Ieejas spriegums: 100-240 Vac • Ieeja frekvence: 50-60 Hz • Nominālā izejas strāva: 16,5 A (330 W) • Nominālais izejas spriegums: 20 Vdc Informācija par USB strāvas padeves adapteri*: • Ieejas spriegums: 100-240 Vac • Ieeja frekvence: 50-60 Hz • Nominālā izejas strāva: 5A (100W) • Nominālais izejas spriegums: 20 Vdc * Konkrētiem modeļiem Piezīmjdatora e-rokasgrāmata 33
SVARĪGI! • Atrodiet piezīmjdatora ievades/izvades vērtību marķējumu un pārliecinieties, ka tā atbilst strāvas adaptera ievades/izvades vērtības informācijai. Dažiem piezīmjdatoru modeļiem var būt vairākas nominālās izvades strāvas, atkarībā no pieejamā SKU/ • Pirms piezīmjdatora pirmās ieslēgšanas pārliecinieties, ka piezīmjdators ir savienots ar strāvas adapteri. Vienmēr iespraudiet barošanas vadu sienas kontaktligzdā, neizmantojot pagarinātājus.
Paceliet, lai atvērtu displeja paneli PIEZĪME. Labākai siltuma izkliedei iesakām lietošanas laikā atvērt displeja paneli vismaz 60 grādu platumā. SVARĪGI! Pirms vāka aizvēršanas pārliecinieties, ka telpa aiz papilddispleja paneļa / skārienekrāna paneļa nav aizsegta.
Nospiediet barošanas pogu 36 Piezīmjdatora e-rokasgrāmata
Skārienekrāna paneļa un skārienpaliktņa žesti Žesti ļauj palaist programmas un piekļūt jūsu piezīmjdatora iestatījumiem. Ja skārienekrāna panelī un skārienpaliktnī izmantojat roku žestus, skatiet turpmākos attēlus. PIEZĪME. • Turpmākie ekrānuzņēmumi ir tikai atsaucei. Skārienekrāna paneļa izskats var atšķirties atkarībā no modeļa. • Skārienekrāna panelis ir pieejams atsevišķiem modeļiem. Skārienekrāna žestu izmantošana Žesti jums palaist programmas un piekļūt jūsu piezīmjdatora iestatījumiem.
Tuvināt Tālināt Attāliniet abus pirkstus uz skārienekrāna paneļa. Satuviniet abus pirkstus kopā uz skārienekrāna paneļa. Pirkstu slidināšana Vilkt Slidiniet pirkstu, lai ritinātu uz augšu un uz leju, un slidiniet pirkstu, lai bīdītu ekrānu pa kreisi vai pa labi. • Velciet, lai izveidotu atlases lodziņu ap vairākiem elementiem. • Velciet un atlaidiet elementu, lai to pārvietotu uz jaunu atrašanās vietu.
Skārienpaliktņa izmantošana Kursora kustināšana Jūs varat pieskarties jebkurai skārienpaliktņa daļai, lai aktivizētu tā kursoru, pēc tam velciet pirkstu pa skārienpaliktni, lai pārvietotu kursoru uz ekrāna.
Žesti ar vienu pirkstu Skāriens/dubultskāriens • Pieskarieties lietotnei, lai to izvēlētos. • Dubultpieskarieties lietotnei, lai to palaistu. Pavilkt un atlaist Dubultpieskarieties kādam elementam, tad velciet to pašu pirkstu, nepaceļot no skārienpaliktņa. Lai ieliktu elementu tā jaunajā atrašanās vietā, paceliet pirkstu no skārienpaliktņa.
Kreisais klikšķis Labais klikšķis • Uzklikšķiniet uz lietotnes, lai Uzklikšķiniet uz šīs pogas, lai to izvēlētos. atvērtu labā klikšķa izvēlni. • Izdariet dubultklikšķi uz lietotnes, lai to palaistu. PIEZĪME. Raustītās līnijas iekšpusē esošās zonas attēlo peles kreisās pogas un peles labās pogas atrašanās vietu uz skārienpaliktņa. Žesti ar diviem pirkstiem Skāriens Pieskarieties ar diviem pirkstiem pie skārienpaliktņa, lai modelētu labā klikšķa funkciju.
Ritināšana ar diviem pirkstiem (augšup/lejup) Ritināšana ar diviem pirkstiem (pa kreisi/pa labi) Velciet divus pirkstus, lai ritinātu uz augšu vai leju. Velciet divus pirkstus, lai ritinātu pa kreisi vai pa labi. Tālināt Tuvināt Satuviniet abus pirkstus kopā uz skārienpaliktņa. Attāliniet abus pirkstus uz skārienpaliktņa.
Pavilkt un atlaist Atlasiet elementu, pēc tam nospiediet un turiet kreiso pogu. Izmantojot otru pirkstu, velciet uz skārienpaliktņa, lai pārvilktu elementu, paceliet pirkstu no pogas, lai atlaistu to. Žesti ar trim pirkstiem Skāriens Pieskarieties ar trim pirkstiem, lai palaistu funkciju, kuru izvēlējāties iestatījumos.
Velciet pa labi / velciet pa kreisi Ja atverat vairākas lietotnes, velciet trīs pirkstus pa kreisi vai pa labi, lai pārslēgtos starp šīm lietotnēm. Velciet uz augšu Velciet uz leju Velciet uz augšu, lai redzētu pārskatu par visām pašreiz atvērtajām lietotnēm. Velciet uz leju, lai uzrādītu darbvirsmu.
Žesti ar četriem pirkstiem Skāriens Pieskarieties ar četriem pirkstiem, lai palaistu funkciju, kuru izvēlējāties iestatījumos.
Tastatūras izmantošana Funkciju taustiņi Ar piezīmjdatora tastatūras funkciju taustiņiem var aktivizēt tālāk aprakstītās komandas. Ieslēgt vai izslēgt skaļruni Samazināt skaļruņa skaļumu Palielināt skaļruņa skaļumu Ieslēgt vai izslēgt mikrofonu Pārslēdz ventilatora režīmu Aktivizē ekrāna tveršanas rīku Samazināt displeja spilgtumu Palielināt displeja spilgtumu Pārslēgt displeja režīmu PIEZĪME: Pārliecinieties, ka otrs displejs ir savienots ar jūsu piezīmjdatoru.
Iespējot vai atspējot skārienpaliktni Palielina tastatūras aizmugurapgaismojuma spilgtumu Ieslēdz vai izslēdz Airplane mode (Lidojuma režīms) PIEZĪME. Kad iespējots Airplane mode (Lidojuma režīms), tiek atspējoti savienojumi ar visiem bezvadu tīkliem.
Windows taustiņi Piezīmjdatora tastatūrā ir divi īpaši Windows taustiņi, kas tiek izmantoti kā norādīts turpmāk: Palaiž sākuma izvēlni vai 48 Parāda nolaižamo izvēlni Piezīmjdatora e-rokasgrāmata
NumberPad lietošana PIEZĪME. NumberPad izkārtojums var atšķirties atkarībā no modeļa vai teritorijas, bet lietošanas procedūras paliek nemainīgas. Nospiediet un turiet nospiestu uz sekundi, lai pārslēgtu starp ciparu taustiņiem vai skārienpaliktni. Taustiņš ROG PIEZĪME. Nospiediet taustiņu ROG, lai atvērtu piezīmjdatora lietojumprogrammu Armoury Crate.
Piezīmjdatora e-rokasgrāmata
3.
Pirmreizējā palaišana Pirmreizējās piezīmjdatora palaišanas laikā tiek uzrādīta virkne ekrānu, kas palīdzēs jums konfigurēt Windows operētājsistēmu. Lai pirmo reizi palaistu piezīmjdatoru: 1. Nospiediet barošanas pogu, lai ieslēgtu piezīmjdatoru. Uzgaidiet dažas minūtes, līdz parādās iestatīšanas ekrāns. 2. Iestatīšanas ekrānā izvēlieties savu reģionu un valodu, kuru izmantosiet savā piezīmjdatorā. 3. Rūpīgi izlasiet licences nolīgumu. Izvēlieties Accept (pieņemt). 4.
Sākumizvēlne Sākumizvēlne ir galvenā vārteja uz jūsu piezīmjdatora programmām, Windows lietotnēm, mapēm un iestatījumiem.
Sākumizvēlnes palaišana Darbvirsmā pieskarieties ikonai. Novietojiet peles kursoru darbvirsmā virs „Start” ikonas un tad noklikšķiniet uz tās. Nospiediet Windows logotipa taustiņu uz tastatūras. Programmu atvēršana sākumizvēlnē Viens no biežākajiem sākumizvēlnes lietojumiem ir jūsu piezīmjdatorā instalēto programmu atvēršana. Pieskarieties programmai, lai to palaistu. Novietojiet savu peles kursoru virs programmas, tad uzklikšķiniet, lai to palaistu.
Windows lietotnes Šīs ir lietotnes, kas piespraustas sākumizvēlnē un tiek parādītas šūnu formātā, lai tām būtu ērti piekļūt. PIEZĪME. Dažām Windows lietotnēm ir nepieciešams, lai jūs pierakstītos savā Microsoft kontā, pirms tās pilnībā tiek palaistas.
Darbs ar Windows lietotnēm Windows lietotņu palaišana no sākumizvēlnes Pieskarieties lietotnei, lai to palaistu. Novietojiet savu peles kursoru virs lietotnes, tad uzklikšķiniet, lai to palaistu. Izmantojiet bultiņu taustiņus, lai pārlūkotu lietotnes. Nospiediet , lai palaistu lietotni.
Lietotņu atspraušana Nospiediet un turiet lietotni, tad pieskarieties Unpin from Start (atspraust no „Start”). Novietojiet savu peles kursoru virs lietotnes un izdariet labo klikšķi uz tās, tad uzklikšķiniet uz Unpin from Start (atspraušana no „Start”). Izmantojiet bultiņu taustiņus, lai pārvietotos pa lietotni. Nospiediet vai (konkrētiem modeļiem), tad izvēlieties Unpin from Start (atspraust no „Start”).
Lietotņu piespraušana pie uzdevumjoslas Nospiediet un turiet lietotni, tad pieskarieties Pin to taskbar (piespraust uzdevumjoslai). Novietojiet savu peles kursoru virs lietotnes un izdariet labo klikšķi uz tās, tad uzklikšķiniet uz Pin to taskbar (piespraust pie uzdevumjoslas). Izmantojiet bultiņu taustiņus, lai pārvietotos pa lietotni. Nospiediet vai (konkrētiem modeļiem), tad izvēlieties Pin to taskbar (piespraust uzdevumjoslai).
Uzdevumu skats (task view) Ātri pārslēdzieties starp atvērtām lietotnēm un programmām, izmantojot funkciju „Uzdevumu skats”. Jūs varat uzdevumu skatu izmantot arī, lai pārslēgtos starp darbvirsmām. Uzdevumu skata (task view) palaišana Pieskarieties ikonai uzdevumjoslā vai velciet no ekrāna apakšējās malas. Novietojiet savu peles kursoru uzdevumjoslā virs ikonas un noklikšķiniet uz tās. Nospiediet uz savas tastatūras Piezīmjdatora e-rokasgrāmata .
Logrīki Varat palaist logrīkus, lai ātri piekļūtu svarīgai informācijai. Logrīku palaišana Pieskarieties ikonai uzdevumjoslā. Novietojiet savu peles kursoru uzdevumjoslā virs ikonas un noklikšķiniet uz tās. Nospiediet uz savas tastatūras 60 .
Logrīku personalizēšana Uzklikšķiniet/pieskarieties ikonai, tad atlasiet Manage interests (pārvaldīt intereses), lai mainītu logrīku atrādīto saturu.
Snap funkcija Snap funkcija parāda lietotnes blakus, ļaujot strādāt vai pārslēgties starp lietotnēm. Snap karstvietas Jūs varat vilkt un atlaist lietotnes uz šiem karstvietām, lai tās fiksētu vietā.
Snap izmantošana vai 1. Palaidiet lietotni, kuru vēlaties fiksēt. 2. Velciet lietotnes virsrakstjoslu un atlaidiet lietotni uz ekrāna malas, lai to nofiksētu. 3. Palaidiet citu lietotni un atkārtojiet iepriekš minētos soļus, lai nofiksētu vēl vienu lietotni. 1. Palaidiet lietotni, kuru vēlaties fiksēt. 2. Nospiediet un turiet taustiņu, tad izmantojiet bultiņu taustiņus, lai fiksētu lietotni. 3. Palaidiet citu lietotni un atkārtojiet iepriekš minētos soļus, lai nofiksētu vēl vienu lietotni.
Darbību centrs Darbību centrs apkopo paziņojumus no lietotnēm un piedāvā vienu vietu, kur jūs ar tām varat mijiedarboties. Tajā ir arī noderīga sadaļa Quick Actions (ātrās darbības). Ātro darbību palaišana Pieskarieties statusa ikonai uzdevumjoslā. Novietojiet savu peles kursoru uzdevumjoslā virs statusa ikonas un noklikšķiniet uz tās. Nospiediet uz savas tastatūras 64 .
Paziņojumu palaišana Pieskarieties datumam un laikam uzdevumjoslā. Novietojiet savu peles kursoru uzdevumjoslā virs datuma un laika un noklikšķiniet uz tā. Nospiediet uz savas tastatūras Piezīmjdatora e-rokasgrāmata .
GameVisual acu aizsardzība ROG GameVisual nodrošina, ka visos ROG displeja paneļos ir redzamas vienādas un precīzas krāsas. Lai pielāgotu displeja iestatījumus, var atlasīt acu aizsardzības vai citus krāsu režīmus. Acu aizsardzības režīms: Atbilst TÜV Rheinland zemas zilās gaismas (programmatūras risinājums) sertifikācijai. Acu aizsardzības režīmā tiek samazināta zilās gaismas emisija līdz pat 30%, aizsargājot acis no paneļa zilās gaismas.
• Atkārtojiet šos vingrinājumus, lai mazinātu acu piepūli: (1) Atkārtoti skatieties augšup un lejup (2) Lēnām grieziet acis (3) Kustiniet acis diagonāli Ja acu piepūle saglabājas, lūdzu, sazinieties ar ārstu. Augstas enerģijas zilā gaisma var izraisīt acu piepūli un AMD (Age-Related Macular Degeneration (ar vecumu saistītu makulas deģenerāciju)). Zilās gaismas filtrs samazina par 30 % (maks.) kaitīgo zilo gaismu, lai izvairītos no CVS (Computer Vision Syndrome (datoru lietotāju redzes sindroms)).
OLED displeja iestatīšana Lai maksimāli izmantotu OLED displeja iespējas (konkrētiem modeļiem), mēs iesakām vairākus iestatījumus. Šie iestatījumi palīdz optimizēt vizuālo pieredzi, palielināt akumulatora darbības laiku un pagarināt ASUS piezīmjdatora darbmūžu. Tumšā režīma iestatīšana Tumšais režīms ir iespējots pēc noklusējuma. Lai pārbaudītu vai pielāgotu iestatījumus: 1. Palaidiet sākumizvēlni. 2. Uzklikšķiniet/pieskarieties Settings (iestatījumi) un atlasiet Personalization (personalizācija).
3. Atlasiet cilni Colors (krāsas), lai skatītu opcijas.
Displeja izslēgšana, kad tas netiek izmantots Obligāti iestatiet, lai displejs automātiski izslēgtos, kad tas netiek izmantots. Lai pārbaudītu vai pielāgotu iestatījumus: 1. Palaidiet sākumizvēlni. 2. Uzklikšķiniet/pieskarieties Settings (iestatījumi) un atlasiet System (sistēma).
3. Atlasiet cilni Power & battery (barošana un akumulators), lai skatītu opcijas.
Displeja spilgtuma pielāgošana Lai pagarinātu OLED displeja kalpošanas laiku, ieteicams iespējot animētu tumšā fona ekrānsaudzētāju un izvairīties no OLED displeja maksimālā spilgtuma iestatīšanas. Lai pārbaudītu vai pielāgotu iestatījumus: 1. Palaidiet sākumizvēlni. 2. Uzklikšķiniet/pieskarieties Settings (iestatījumi) un atlasiet Personalization (personalizācija).
3. Atlasiet cilni Lock screen (ekrāna bloķēšana) un tad atlasiet Screen saver (ekrānsaudzētājs), lai skatītu opcijas.
Automātiskā uzdevumjoslas slēpšana Lai ilgstoši nerādītu uzdevumjoslu jūsu OLED displejā, iestatiet automātisko uzdevumjoslas paslēpšanu. Lai pielāgotu iestatījumus: 1. Palaidiet sākumizvēlni. 2. Uzklikšķiniet/pieskarieties Settings (iestatījumi) un atlasiet Personalization (personalizācija).
3. Atlasiet cilni Taskbar (uzdevumjosla) un tad iespējojiet Automatically hide the taskbar (automātisko uzdevumjoslas slēpšanu).
Tumšā režīma iestatīšana Microsoft Office 1. Palaidiet Microsoft Office lietotni un tad uzklikšķiniet/pieskarieties File (fails) > Account (konts). 2. Atlasiet Dark Gray (tumši pelēks) zem Office Theme (Office motīvs). Motīvs tiks piemērots visām Microsoft lietotnēm.
Citi tastatūras īsinājumtaustiņi Izmantojot tastatūru, varat izmantot arī šādus īsinājumtaustiņus, lai palīdzētu palaist lietotnes un vadīt sistēmu Windows.
Palaist Search (meklēšana) Palaist Project (projekts) paneli Atvērt Run (palaist) logu Atvērt Accessibility (pieejamība) Atvērt „Start” pogas konteksta izvēlni Palaist palielinošo ikonu un palielināt ekrānskatu Attālināt savu ekrānu 78 Piezīmjdatora e-rokasgrāmata
Savienošanās ar bezvadu tīklu Wi-Fi Piekļūstiet e-pastiem, sērfojiet Internetā un kopīgojiet lietotnes ar sociālo tīklu vietņu starpniecību, izmantojot piezīmjdatora Wi-Fi savienojumu. SVARĪGI! Airplane mode (lidmašīnas režīms) atspējo šo funkciju. Pārliecinieties, ka Airplane mode (lidmašīnas režīms) ir izslēgts pirms iespējojat sava piezīmjdatora Wi-Fi savienojumu. Pieslēgšanās Wi-Fi Savienojiet savu piezīmjdatoru ar Wi-Fi tīklu, sekojot turpmākajiem soļiem: 1.
Bluetooth Izmantojiet Bluetooth, lai atvieglotu bezvadu datu pārsūtīšanu ar citām ierīcēm, kurās ir iespējota Bluetooth funkcija. SVARĪGI! Airplane mode (lidmašīnas režīms) atspējo šo funkciju. Pārliecinieties, ka Airplane mode (lidmašīnas režīms) ir izslēgts pirms iespējojat sava piezīmjdatora Bluetooth savienojumu. Sapārošana ar citām ierīcēm, kurās ir iespējota Bluetooth funkcija Lai iespējotu datu pārsūtīšanu, piezīmjdators ir jāsapāro ar citām ierīcēm, kurās ir iespējota Bluetooth funkcija.
Lidmašīnas režīms Lidmašīnas režīms atspējo bezvadu sakarus, ļaujot jums droši izmantot savu piezīmjdatoru lidojuma laikā. PIEZĪME. Sazinieties ar savu aviosabiedrības pakalpojumu sniedzēju, lai uzzinātu, kādus saistītos pakalpojumus var izmantot lidojuma laikā,, un ierobežojumiem, kas jāievēro, lietojot piezīmjdatoru lidojuma laikā. Lidmašīnas režīma ieslēgšana/izslēgšana vai 1. No uzdevumjoslas palaidiet Action Center (Darbību centrs). 2.
Piezīmjdatora izslēgšana Jūs varat izslēgt savu piezīmjdatoru, veicot kādu no turpmākajām darbībām: • Palaidiet sākumizvēlni, tad atlasiet > Shut down (izslēgt), lai izslēgtu kā ierasts. • No pierakstīšanās loga, atlasiet (izslēgt). vai • Nospiediet > Shut down , lai palaistu Shut Down Windows (izslēgt Windows). No nolaižamā saraksta atlasiet Shut down (izslēgt), tad OK.
Piezīmjdatora iestatīšana miega režīmā Lai pārslēgtu savu piezīmjdatoru miega režīmā: vai • Palaidiet sākumizvēlni, tad atlasiet > Sleep (miega režīms), lai savu piezīmjdatoru iestatītu miega režīmā. • No pierakstīšanās loga, atlasiet režīms). Nospiediet > Sleep (miega , lai palaistu Shut Down Windows (izslēgt Windows). No nolaižamā saraksta atlasiet Sleep (miega režīms), tad OK. PIEZĪME. Piezīmjdatoru var pārslēgt miega režīmā arī vienreiz nospiežot barošanas pogu.
Piezīmjdatora e-rokasgrāmata
4.
Ieslēgšanas pašpārbaude (Power-On SelfTest (POST)) POST (ieslēgšanas pašpārbaude (Power-On Self-Test)) ir virkne ar programmatūru vadītu diagnostikas testu, kas tiek veikti, ieslēdzot vai restartējot piezīmjdatoru. Programmatūra, kas kontrolē POST, ir piezīmjdatora arhitektūras pastāvīga sastāvdaļa. POST izmantošana, lai piekļūtu BIOS un novērstu problēmas POST laikā varat piekļūt BIOS iestatījumiem vai palaist problēmu novēršanas iespējas, izmantojot piezīmjdatora funkciju taustiņus.
Jūsu sistēmas atkopšana Izmantojot piezīmjdatora atkopšanas opcijas, varat atjaunot sistēmu sākotnējā stāvoklī vai vienkārši atsvaidzināt tās iestatījumus, lai uzlabotu veiktspēju. SVARĪGI! • Dublējiet visus savu datu failus, pirms veicat jebkādas piezīmjdatora atkopšanas opcijas. • Pierakstiet svarīgus personalizētus iestatījumus, piemēram, tīkla iestatījumus, lietotājvārdus un paroles, lai izvairītos no datu zuduma.
• Advanced startup (Uzlabota palaišana) — izmantojot šo opciju, piezīmjdatorā varat veikt citas uzlabotas atkopšanas iespējas, piemēram: - Palaist piezīmjdatoru, izmantojot USB disku, tīkla savienojumu vai Windows atkopšanas DVD.
2. Atlasiet atkopšanas opciju, kuru vēlaties veikt.
Piezīmjdatora e-rokasgrāmata
Padomi un bieži uzdotie jautājumi Piezīmjdatora e-rokasgrāmata 91
Noderīgi padomi darbam ar piezīmjdatoru Lai pēc iespējas optimālāk izmantotu savu piezīmjdatoru, uzturētu tā sistēmas veiktspēju un nodrošinātu savu datu drošību, rīkojieties atbilstoši tālāk sniegtajiem padomiem. • Regulāri atjauniniet Windows, lai jūsu lietojumprogrammām vienmēr būtu visjaunākie drošības iestatījumi. • Atjauniniet lietotni MyASUS, lai nodrošinātu jaunākos ASUS ekskluzīvo lietotņu, draiveru un utilītu iestatījumus.
• • Pirms piezīmjdatora atiestatīšanas atvienojiet visas ārējās ierīces un nodrošiniet, lai jūsu rīcībā būtu tālāk norādītie vienumi. - Operētājsistēmas un instalēto lietojumprogrammu produkta atslēgas - Datu dublējumkopijas - Pieteikšanās ID un parole - Interneta savienojuma informācija Lai uzzinātu problēmu novēršanas risinājumus un skatītu dažus no visbiežāk uzdotajiem jautājumiem, apmeklējiet mūsu atbalsta vietni https://www.asus.com/support.
Bieži uzdotie jautājumi par aparatūru 1. Kad ieslēdzu savu piezīmjdatoru, parādās melns vai dažkārt krāsains punkts. Kā rīkoties? Šādi punkti ir parasta parādība un tiem nevajadzētu ietekmēt jūsu sistēmas veiktspēju. Ja šī parādība atkārtojas un sāk ietekmēt sistēmas veiktspēju, vērsieties pilnvarotā ASUS klientu apkalpošanas centrā. 2. Displeja panelī attēlotās krāsas un spilgtums nav vienmērīgi.
4. 5. Akumulatora uzlādes indikators netiek izgaismots. Kas noticis? • Pārbaudiet, vai strāvas adapteris un akumulators ir pievienoti pareizi. Varat arī atvienot strāvas adapteri un akumulatoru, nogaidīt kādu minūti un no jauna tos pievienot elektroapgādes tīkla kontaktligzdai un piezīmjdatoram. • Ja šī problēma joprojām pastāv, sazinieties ar tuvāko ASUS klientu apkalpošanas centru, lai saņemtu palīdzību. Kādēļ skārienpaliktnis nedarbojas? Lai iespējotu skārienpaliktni, nospiediet 6. .
8. Nav iespējams pareizi rakstīt ar piezīmjdatora tastatūru, jo kursors nepārtraukti kustās. Kā rīkoties? Nodrošiniet, lai nekas nejauši nepieskartos skārienpaliktnim, kamēr rakstāt ar tastatūru. Varat arī atspējot skārienpaliktni, nospiežot 9. . Esmu atspējojis miega režīmu, bet kāpēc piezīmjdators joprojām pārslēdzas miega režīmā, kad aizveru vāku? Aizverot vāku, kad piezīmjdators darbojas liela noslogojuma apstākļos, piezīmjdators pārslēdzas miega režīmā, lai novērstu pārkaršanu.
Bieži uzdotie jautājumi par programmatūru 1. Kad ieslēdzu piezīmjdatoru, barošanas indikators tiek izgaismots, bet ekrānā nekas neparādās. Kā to var izlabot? Varat rīkoties atbilstoši tālāk sniegtajiem norādījumiem. 2. • Veiciet piezīmjdatora piespiedu izslēgšanu, turot nospiestu barošanas pogu vismaz desmit (10) sekunžu ilgumā. Pārbaudiet, vai strāvas adapteris un akumulators ir pievienoti pareizi, un pēc tam ieslēdziet piezīmjdatoru.
4. Piezīmjdators netiek sāknēts. Kā var to novērst? Varat rīkoties atbilstoši tālāk sniegtajiem norādījumiem. 5. 98 • Noņemiet visas piezīmjdatoram pievienotās ierīces un pēc tam restartējiet sistēmu. • Ja šī problēma joprojām pastāv, sazinieties ar tuvāko ASUS klientu apkalpošanas centru, lai saņemtu palīdzību. Kāpēc nevaru piezīmjdatoru pamodināt no miega režīma? • Lai atgrieztos stāvoklī pirms pārslēgšanas miega režīmā, ir jānospiež barošanas poga.
Pielikumi Piezīmjdatora e-rokasgrāmata 99
Paziņojums par traucējumu atbilstību Federālās Sakaru komisijas (FCC) prasībām Šī ierīce atbilst FCC noteikumu 15. pantā noteiktajām prasībām. Uz ierīces darbību attiecas abi tālāk minētie nosacījumi. • Šī ierīce nedrīkst izraisīt kaitīgus traucējumus. • Šai ierīcei ir jāakceptē visi uztvertie traucējumi, tai skaitā traucējumi, kas var izraisīt nevēlamu darbību.
FCC informācija attiecībā uz pakļaušanu radiofrekvenču iedarbībai Šī ierīce atbilst valdības noteikumiem par pakļaušanu radio viļņu iedarbībai. Šī ierīce ir izveidota un izgatavota, lai nepārsniegtu ASV valdības Federālās sakaru komisijas noteiktos ierobežojumus par pakļaušanu radio frekvenču (RF) enerģijas iedarbībai. Pakļaušanas iedarbībai standarts tiek mērīts ar mērvienību, kas zināma kā īpatnēja absorbcijas intensitāte jeb SAR. FCC noteiktā SAR robežvērtība ir 1,6 W/ kg.
UL (Underwiters Laboratories) paziņojumi par drošību Atbilstība standartam UL 1459, kas attiecas uz telekomunikāciju (telefonijas) aprīkojumu, kas paredzēts elektriskam savienojumam ar telekomunikāciju tīklu, kura darba spriegums starp fāzi un zemi nepārsniedz 200 V (pīķis), 300 V (amplitūda) un 105 V rms, un ir uzstādīts vai tiek ekspluatēts atbilstoši ASV Valsts elektrotehnikas standartu kodeksam (NFPA 70).
Drošības prasības attiecībā uz barošanu Produktiem ar strāvas stipruma nominālo vērtību līdz 6 A un svaru, kas pārsniedz 3 kg, jāizmanto apstiprināti strāvas vadi, kuru parametri ir vienādi ar vai pārsniedz: H05VV-F, 3G, 0,75 mm2 vai H05VV-F, 2G, 0,75 mm2. Paziņojumi par televīziju Paziņojums CATV sistēmas uzstādītājam.
Uz ziemeļvalstīm attiecināmie brīdinājumi par litiju (attiecībā uz litija jonu baterijām/ akumulatoriem) CAUTION! Danger of explosion if battery is incorrectly replaced. Replace only with the same or equivalent type recommended by the manufacturer. Dispose of used batteries according to the manufacturer’s instructions. (English) ATTENZIONE! Rischio di esplosione della batteria se sostituita in modo errato. Sostituire la batteria con un una di tipo uguale o equivalente consigliata dalla fabbrica.
Produktu vides noteikumu atbilstības deklarācija ASUS produktu izstrādē un ražošanā tiek ievēroti vides aizsardzības pamatprincipi un tiek nodrošināta ASUS produktu visa dzīves cikla atbilstība globālajiem vides aizsardzības normatīviem. Turklāt ASUS sniedz nepieciešamo informāciju atbilstoši regulējošajām prasībām. Lai uzzinātu par ASUS sniegto informāciju atbilstoši regulējošajām prasībām, apmeklējiet vietni http://csr.asus.com/Compliance.htm. ES REACH un 33.
Paziņojums par pārklājumu SVARĪGI! Lai nodrošinātu elektroizolāciju un elektrodrošību, ierīcei ir izolējošs pārklājums, izņemot zonas, kur atrodas ievadizvades pieslēgvietas. ASUS otrreizējās pārstrādes/nolietoto ierīču savākšanas pakalpojumi ASUS otrreizējās pārstrādes un nolietoto ierīču savākšanas programma ir veidota atbilstoši visaugstākajiem apkārtējās vides aizsardzības standartiem.
Ekodizaina direktīva Eiropas Savienība izziņoja tiesību aktu par ekodizaina prasību ieviešanu ar enerģiju saistītiem produktiem (2009/125/EK). Īpašie ieviešanas pasākumi ir paredzēti konkrētu produktu vai dažādu produktu veidi veiktspējas apkārtējā vidē uzlabošanai. ASUS nodrošina produktu informāciju CSR vietnē. Plašāka informācija ir pieejama šeit: https://csr.asus.com/english/article.aspx?id=1555.
Vienkāršota ES atbilstības deklarācija Uzņēmums ASUSTek Computer Inc. Paziņo, ka šī ierīce atbilst direktīvas 2014/53/ ES būtiskajām prasībām un citiem attiecināmajiem noteikumiem. ES atbilstības deklarācijas pilns teksts ir pieejams vietnē https://www.asus.com/support/. Wi–Fi tīkls, kas darbojas frekvenču diapazonā 5150–5350 MHz, nākamajā tabulā norādītajās valstīs ir atļauts tikai izmantošanai slēgtās telpās.