
User manual


8
Open de deur en druk het apparaat
tegen de zijwand van de nis, aan de
kant waar de scharnieren niet zitten.
Bevestig het apparaat aan de nis met
de vier meegeleverde schroeven.
Bevestig het ventilatierooster (C).
Breng, onder lichte druk, het dekseltje
(D) aan.
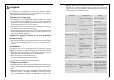
Aanwijzingen voor de geïnte-
greerde inbouw
Nismaten
Hoogte 1030 mm
Breedte 560 mm
Diepte 550 mm
De strip volgens de tekening op het
apparaat aanbrengen
D765
Schuif het apparaat in de nis tot de
aanslaglijst (A) met de voorkant van
het plafond aanlijnt.
D727
C
D
A
D022
29
Starting up and temperature regulation
• Insert the plug into the plug socket. With the refrigerator compartment
door open, the internal lighting is switched on. The temperature selector
knob is located on the RH side of the refrigerator compartment.
Setting „0“ means: Off.
Setting „1“ means: Hightest temperature, (warmest setting).
Setting „6“ (end-stop) means: Lowest temperature, (coldest setting).
However, the exact setting should be chosen keeping in the mind that the
temperature inside the refrigerator depends on:
-the quantity of food stored
-how often the door is opened
The temperatures in the refrigerator compartment and freezer co partment
cannot be independently regulated.
If you want the freeze fresh food rapidly, select setting „6“, ensuring that
the temperature in the refrigerator compartment does not drop blow 0°C.
You should also promptly reset the temperature regulator to setting „3“ or
„4“.
Important!
High ambient temperatures (e.g. on hot summer days) and a cold setting on
the temperature regulator (position"5" to "6") can cause the compressor to
run continuously.
If this happens, turn the temperature regulator back to a warmer setting
(position "3" to "4"). At this setting the compressor will be switched on and
off as usual and automatic defrosting recommenced.
Interior Accessories
Storage Shelves
The shelf above the fruit and vegeta-
ble compartment should always
remain in position, to ensure fruit
and vegetables stay fresh longer.
The remaining storage shelves can be
adjusted to various heights:
Pull the storage shelf forward until it
can be tipped up or down and remo-
ved.
D040