
Information Sheet
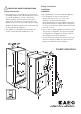


1
Ensure the cabinet base and sides are square and level. This
unit does not have adjustable feet.
2
If the door opening is as required, proceed to step 8.
If the door opening needs to be reversed, proceed to step 3.
If swapping door opening, remove bins from the inner door
(not shown) before the door is removed.
3 Loosen the screws on the top bracket of the cabinet.
4
Using a flat head screwdriver, carefully remove the white
plastic covers as shown.
Loosen the screws fastening the hinges to the fridge
cabinet and remove the door. Ensure that the plastic spacer
between the hinge and the fridge are retained.
Carefully remove the white plugs from the side opposite
the hinges with a flat head screwdriver as the plugs are
threaded.
5
Remove the hinges from the door and replace hinges on
opposite corners.
6
Reassemble the hinge fixing screws on opposite side,
ensuring plastic spacers are fitted as shown.
Mount the door and tighten the screws to fix in place.
Replace the covers - please note that L shaped cover from
step 4 can’t be reused. Use item N included in the assembly
kit instead. Place hinge screw covers “F” on hinges.
Carefully replace the white plugs.
7 Re-tighten the top bracket.
8
Position the sealing strip provided (taped to the side of
fridge under packaging) from the bottom of the refrigerator
up the side and into position.
Measure and mark where the sealing strip reaches the top
of the unit then carefully cut to size.
Remove the backing tape and adhere to the edge of the
fridge making a neat seal.
9 & 10
Feed through the supply cord. If the powerpoint is out
of reach, it is recommended that a line is attached to the
cord so that it can be pulled through after the cabinet is in
position. This will ensure that the supply cord does not get
trapped during installation.
Position the unit into the cabinet. To avoid damaging the
floor, ensure that the unit is lifted out of the foam base
and put directly into the cabinet. Alternatively, ensure that
suitable protection is placed on the floor prior to pack base
being removed. As per step 15 ensure the hinges are flush
with the cabinetry
11
Loosen bottom screws by approximatley 3mm and fit
bracket L as shown. Do not tighten until later.
12
Assemble bracket J into marked holes on the side of the
doors. Do not tighten until door panel is in place to assist
with door alignment.
13
Spacer requirements are based on the cabinet’s internal
width dimension.
600mm nominal width cabinet outer and 19mm cabinet
thickness = 562mm internal dimension. For this size cut the
spacers C and D as shown.
600mm nominal width cabinet outer and 16mm cabinet
thickness = 568 cut out size. For this size fold over spacers C
and D as shown.
14 Press spacers C and D into place as shown.
15
Ensure that the hinge does not extend past the edge of the
cupboard. The hinge should be flush with the edge at the
top and bottom locations.
16
Fix screws to the outer hinge hole only. Ensure only one
screw per hinge is used.
17
Fix the fridge into the cabinet by fastening the top bracket
to the above cabinetry, using one screw on
each side.
18
Position and tighten the bottom bracket from step 11 and
fix the screw into cabinetry to secure.
19
To limit the door opening to maximum of 90°, fit pins as
shown. These pins may need to be tapped in to ensure they
are fixed in place.
20
Remove the door bracket from each door. Loosen the
adjustment screws by 5mm.
Fit the green measuring tool under the fixed washer of
adjustment screws as per next step.
21
This image highlights three different installation types:
a) Cupboard above unit - Line up the green bracket with the
bottom of the cabinet above and go to
step 24.
b) Panel only above unit (door to top of cabinetry)
- Line up the green bracket centreline with the top of
cabinet above.
c) Extending door above fridge by a nominated dimension
“X” - Measure from the top position the panel is required
to the top of the green tools mounting feet. This will give
you “X” dimension.
Note: For door panel stability, if the cupboard panel
extends above the fridge door panel more than 100mm,
sufficient reinforcement will be required to stop the cabinet
door bowing or jamming over time.
22
Measure the centre line of the door and mark up the door
cabinet panel.
Measure down dimension “X” from step 21 and draw a
horizontal line.
23
The feature of the bracket (as shown) should align with the
horizontal line drawn. Position as shown and fix screws into
all of the holes. Proceed to step 25.
24
Remove the green brackets from the fridge. Rotate and fit
to the metal bracket as shown.
Place the bracket centred on top of door. Fix the bracket to
the door with all screws supplied.
25
Open the door 45 . Place the bracket over adjustment
screws on the door. Loosely fasten with a washer and a nut.
26
The screws can be used to adjust door panel squareness
and clearance between side panels, height and depth
of door.
27
Fasten the door panel to the fridge door. Adjust the screws
in the slots to ensure a flush fit of the door to the door
panel.
A. Align the door to the adjacent doors.
B. Fix the screws “O” into panel.
C. Adjust the spacing and tighten the screws in the door
panel to fix into position.
D. Once the adjustment is complete, fit covers “G”
as shown.
28 Fit covers L, G and A1 and A2 as shown.
Notes to consider if Retrofitting AEG into previous Electrolux
built-in refrigerator cabinetry:
Reduce the internal width to between 560mm – 568mm. This can be
done by adding an internal side wall.
The height should be between 1771mm and 1781mm.
Block any air cut-out under the cabinet base.
Ensure that the air flow is from the front kick plate at the front to the
rear and up the back of the cabinetry.
The doors will need to be cut to new size.
Additional Installation Instructions
The following information is to be used in conjunction with the diagrams on the 28 step installation sheet.
Image numbers on the installation sheet correspond with the instructions below.
222372184-A-262015