SCZ71800F0 EN User manual
www.aeg.com CONTENTS 1. 2. 3. 4. 5. 6. 7. 8. 9. 10. SAFETY INFORMATION . . . . . . . . . . . . . . . . . . . . . . . . . . . . . . . . . . . . . . . . . . . . . . . . . . . . . . 3 CONTROL PANEL . . . . . . . . . . . . . . . . . . . . . . . . . . . . . . . . . . . . . . . . . . . . . . . . . . . . . . . . . . . 5 DAILY USE . . . . . . . . . . . . . . . . . . . . . . . . . . . . . . . . . . . . . . . . . . . . . . . . . . . . . . . . . . . . . . . . . 8 HELPFUL HINTS AND TIPS . . . . . . . . . . . . . .
ENGLISH 1. 3 SAFETY INFORMATION In the interest of your safety and to ensure the correct use, before installing and first using the appliance, read this user manual carefully, including its hints and warnings. To avoid unnecessary mistakes and accidents, it is important to ensure that all people using the appliance are thoroughly familiar with its operation and safety features.
www.aeg.com 2. • • • • Make sure that the power plug is not squashed or damaged by the back of the appliance. A squashed or damaged power plug may overheat and cause a fire. 3. Make sure that you can come to the mains plug of the appliance. 4. Do not pull the mains cable. 5. If the power plug socket is loose, do not insert the power plug. There is a risk of electric shock or fire. 6. You must not operate the appliance without the lamp cover (if foreseen) of interior lighting. This appliance is heavy.
ENGLISH 5 ant circuit or insulation materials. The appliance shall not be discarded together with the urban refuse and rubbish. The insulation foam contains flammable gases: the appliance shall be disposed according to the applicable regulations to obtain from your local authorities. Avoid damaging the cooling unit, especially at the rear near the heat exchanger. The materials used on this appliance marked by the are recyclable. symbol 1.
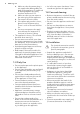
www.aeg.com 2.3 Switching off the fridge 2.8 Temperature regulation To switch off the fridge: 1. Press the Mode button until the corresponding icon appears. The fridge Off indicator and the fridge compartment indicator flash. The fridge temperature indicator shows dashes. 2. Press the OK button to confirm. 3. The fridge Off indicator is shown. The set temperature of the fridge and of the freezer may be adjusted by pressing the temperature regulators.
ENGLISH It is possible to change the time during the countdown and at the end by pressing the Temperature colder button and the Temperature warmer button. 2.10 Child Lock function To lock the buttons from unintentional operation select the Child Lock function. To switch on the function: 1. Press the Mode button until the corresponding icon appears. 2. The Child Lock indicator flashes. 3. Press the OK button to confirm. The Child Lock indicator is shown. To switch off the function: 1.
www.aeg.com 3. DAILY USE 3.1 Cleaning the interior Before using the appliance for the first time, wash the interior and all internal accessories with lukewarm water and some neutral soap so as to remove the typical smell of a brand-new product, then dry thoroughly. Do not use detergents or abrasive powders, as these will damage the finish. If “dEMo” appears on the Display, the appliance is in demonstration mode: refer to “WHAT TO DO IF...” paragraph. 3.
ENGLISH 9 3.7 Movable shelves The walls of the refrigerator are equipped with a series of runners so that the shelves can be positioned as desired. For better use of space, the front halfshelves can lie over the rear ones. 3.8 Positioning the door shelves To permit storage of food packages of various sizes, the door shelves can be placed at different heights. 3.
www.aeg.com 3.11 Humidity control Both drawers can be used according to the desired storage conditions independently of each other with lower or higher humidity. Regulation for each drawer is separate and is controlled using the slide valve at the front of the drawer. • „Dry“: low air humidity - up to 50 % relative humidity This humidity level is reached when both sliders are set into this position and the ventilation openings are wide open.
ENGLISH Type of food Air humidity adjustment Storage time Butter “dry” up to 1 month Large pork cuts “dry” up to 10 days Beef, venison, small pork cuts, poultry “dry” up to 7 days Tomato sauce “dry” up to 4 days Fish, shellfish, cooked meat products “dry” up to 3 days Cooked seafood “dry” up to 2 days Salad, vegetables Carrots, herbs, Brussels sprouts, celery “humid” up to 1 month Artichokes, cauliflower, chicory, iceberg lettuce, endive, lamb’s lettuce, lettuce, leeks, radicchio “
www.aeg.com Cakes containing cream and other kinds of pastry products can be stored in the Longfresh 0°C compartment for 2 or 3 days. Not to be placed in the Longfresh 0°C compartment: • cold sensitive fruit which have to be stored at cellar or room temperature like pineapple, bananas, grapefruit, melons, mango, papaya, oranges, lemons, kiwi fruit. • The types of food not mentioned above should be stored in the refrigerator compartment (e.g. all sorts of cheese, cold cuts, etc.
ENGLISH Cooked foods, cold dishes, etc..: these should be covered and may be placed on any shelf. Fruit and vegetables: these should be thoroughly cleaned and placed in the special drawer(s) provided. Butter and cheese: these should be placed in special airtight containers or wrapped in aluminium foil or polythene bags to exclude as much air as possible. Milk bottles: these should have a cap and should be stored in the bottle rack on the door.
www.aeg.com Do not pull, move or damage any pipes and/or cables inside the cabinet. Never use detergents, abrasive powders, highly perfumed cleaning products or wax polishes to clean the interior as this will damage the surface and leave a strong odour. Clean the condenser (black grill) and the compressor at the back of the appliance with a brush. This operation will improve the performance of the appliance and save electricity consumption.
ENGLISH 15 To remove the frost, follow the instructions below: 1. Switch off the appliance. 2. Remove any stored food, wrap it in several layers of newspaper and put it in a cool place. CAUTION! Do not touch frozen goods with wet hands. Hands can freeze to the goods. 3. Leave the door open and insert the plastic scraper in the appropriate seating at the bottom centre, placing a basin underneath to collect the defrost water.
www.aeg.com 6. WHAT TO DO IF… WARNING! Before troubleshooting, disconnect the mains plug from the mains socket. Only a qualified electrician or competent person must do the troubleshooting that is not in this manual. Problem Possible cause Solution The appliance is noisy The appliance is not supported properly Check if the appliance stands stable (all the four feet should be on the floor) The appliance does not operate. The lamp does not operate.
ENGLISH Problem Possible cause 17 Solution The compressor This is normal, no error does not start imme- has occurred. diately after pressing the FROSTMATIC or COOLMATIC button, or after changing the temperature. The compressor starts after a period of time. Water flows on the rear plate of the refrigerator. During the automatic defrosting process, frost defrosts on the rear plate. This is correct. Water flows into the refrigerator. The water outlet is clogged. Clean the water outlet.
www.aeg.com Problem Possible cause Solution dEMo appears on the Display. The appliance is in demonstration mode (dEMo). Keep pressed approximately 10 sec. the OK button since a long sound of buzzer is heard and the Display shut off for a short while: appliance start works regularly. 6.1 Replacing the lamp The appliance is equipped with a longlife LED interior light. Only service is allowed to replace the lighting device. Contact your Service Center. If necessary, adjust the door.
ENGLISH 1 2 3 5 4 The wires in the mains lead are coloured in accordance with the following code: 1 Green and Yellow: Earth 3 Brown: Live 5 Blue: Neutral As the colours of the wires in the mains lead of this appliance may not correspond with the coloured markings iden- tifying the terminals in your plug, proceed as follows: 1. Connect the wire coloured green and yellow to the terminal marked either with the letter “E“ or by the or coloured green earth symbol and yellow. 2.
www.aeg.com 7.4 Installation of the carbon air filter 1 2 The carbon air filter is an active carbon filter which absorbs bad odors and permits to maintain the best flavour and aroma for all foodstuffs without risk of odor cross contamination. On delivery the carbon filter is in a plastic bag to maintain it’s duration and characteristics. The filter should be placed behind the flap before the appliance is turned on. 1. Open the flap cover (1). 2. Remove the filter from the plastic bag. 3.
ENGLISH SSSRRR! HISSS! BLUBB! SSSRRR! HISSS! BLUBB! CLICK! BRRR! CRACK! 21 CLICK! BRRR! CRACK!
www.aeg.com 9. TECHNICAL DATA Dimension of the recess Height 1780 mm Width 560 mm Depth 550 mm Rising Time 24 h Voltage 230-240 V Frequency 50 Hz The technical information are situated in the rating plate on the internal left side of the appliance and in the energy label. 10. ENVIRONMENT CONCERNS Recycle the materials with the symbol . Put the packaging in applicable containers to recycle it.
ENGLISH 23
222338293-A-172012 www.aeg.