PRO COMBI BS7314721 BS731472E BS731472H BS731472N BS731472W BENUTZERINFORMATION DE
www.aeg.com INHALTSVERZEICHNIS 1. SICHERHEITSINFORMATIONEN.................................................................................. 3 2. SICHERHEITSANWEISUNGEN...................................................................................... 4 3. GERÄTEBESCHREIBUNG...............................................................................................7 4. BEDIENFELD................................................................................................................... 8 5.
DEUTSCH 1. 3 SICHERHEITSINFORMATIONEN Lesen Sie vor der Montage und dem Gebrauch des Geräts zuerst die Gebrauchsanleitung. Der Hersteller übernimmt keine Verantwortung für Verletzungen und Beschädigungen durch unsachgemäße Montage. Bewahren Sie die Gebrauchsanleitung griffbereit auf. 1.
www.aeg.com • • • • • • • Zubehörs und der Töpfe wärmeisolierende Handschuhe. Trennen Sie das Gerät vor Wartungsarbeiten von der Stromversorgung. Vergewissern Sie sich, dass das Gerät ausgeschaltet ist, bevor Sie die Lampe austauschen, um einen Stromschlag zu vermeiden. Benutzen Sie zum Reinigen des Geräts keinen Dampfreiniger. Benutzen Sie keine scharfen Scheuermittel oder Metallschwämmchen zum Reinigen der Glastür; sie könnten die Glasfläche verkratzen und zum Zersplittern der Scheibe führen.
DEUTSCH 2.2 Elektrischer Anschluss WARNUNG! Brand- und Stromschlaggefahr. • Alle elektrischen Anschlüsse sind von einem geprüften Elektriker vorzunehmen. • Das Gerät muss geerdet sein. • Stellen Sie sicher, dass die elektrischen Daten auf dem Typenschild den Daten Ihrer Stromversorgung entsprechen. Wenden Sie sich andernfalls an eine Elektrofachkraft. • Schließen Sie das Gerät nur an eine ordnungsgemäß installierte Schutzkontaktsteckdose an. • Verwenden Sie keine Mehrfachsteckdosen oder Verlängerungskabel.
www.aeg.com • Um Beschädigungen und Verfärbungen der Emailbeschichtung zu vermeiden: – Stellen Sie feuerfestes Geschirr oder andere Gegenstände nicht direkt auf den Boden des Geräts. – Legen Sie keine Alufolie direkt auf den Boden des Geräts. – Stellen Sie kein Wasser in das heiße Gerät. – Lassen Sie nach dem Ausschalten des Geräts kein feuchtes Geschirr oder feuchte Speisen im Backofeninnenraum stehen. – Gehen Sie beim Herausnehmen oder Einsetzen der Innenausstattung sorgfältig vor.
DEUTSCH • Verwenden Sie dazu eine Lampe mit der gleichen Leistung. 2.7 Entsorgung • Entfernen Sie das Türschloss, um zu verhindern, dass sich Kinder oder Haustiere in dem Gerät einschliessen. 2.8 Service WARNUNG! Verletzungs- und Erstickungsgefahr. • Trennen Sie das Gerät von der Stromversorgung. • Schneiden Sie das Netzkabel ab, und entsorgen Sie es. • Wenden Sie sich zur Reparatur des Geräts an einen autorisierten Kundendienst. • Verwenden Sie ausschließlich Originalersatzteile. 3.
www.aeg.com Zum Backen und Braten oder zum Auffangen von austretendem Fett. Ein unperforierter und ein perforierter Garbehälter. Kerntemperatursensor Während des Dampfgarens führt das Dampfgarset Kondenswasser vom Gargut weg. Verwenden Sie die Garbehälter zur Zubereitung von Speisen, die während des Kochens nicht in Wasser liegen sollten (z. B. Gemüse, Fischstücke, Hähnchenbrust). Die Garbehälter eignen sich nicht für Speisen, die in Wasser gegart werden müssen (z. B. Reis, Polenta, Nudeln).
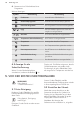
DEUTSCH Bedienen Sie das Gerät über die Sensorfelder. Sensorfeld 1 - 2 3 4 Funktion Beschreibung DISPLAY Anzeige der aktuellen Geräteeinstellungen. EIN/AUS Ein- und Ausschalten des Geräts. OPTIONEN Einstellen einer Ofenfunktion oder eines Automatikprogramms. FAVORITEN-PROGRAMM Speichern Ihres bevorzugten Programms. Über dieses Feld können Sie direkt auf Ihr bevorzugtes Programm zugreifen, selbst wenn das Gerät ausgeschaltet ist.
www.aeg.com G. Nummer einer Ofenfunktion/eines Programms Weitere Anzeigen: Symbol / / Bezeichnung Beschreibung Funktionen Auswahl einer Ofenfunktion. Automatikprogramm Auswahl eines Automatikprogramms. Favoriten-Programm Das Programm Favoriten wird ausgeführt. kg/g Ein Automatikprogramm mit Gewichtseingabe ist eingeschaltet. Std./Min. Es ist eine Uhrfunktion eingeschaltet. Temperatur/Schnellaufheizung Die Funktion ist eingeschaltet. Temperatur Anzeige der aktuellen Temperatur.
DEUTSCH Display h und 12:00 an, wobei „12“ blinkt. Berühren Sie 1. Berühren Sie zum Einstellen der Stunde(n) oder . oder . 2. Berühren Sie 3. Berühren Sie zum Einstellen der Minuten oder . 11 . blinkt im Display. Zum Einstellen der neuen Tageszeit siehe „Einstellen der Uhrzeit“. 5.4 Einstellen des Wasserhärtegrads 4. Berühren Sie oder . Die Temperatur-/Zeitanzeige zeigt die neue Uhrzeit an.
www.aeg.com 6. TÄGLICHER GEBRAUCH • Im manuellen Modus • Mit Automatikprogrammen WARNUNG! Siehe Kapitel "Sicherheitshinweise". 6.1 Bedienung des Geräts Sie können das Gerät wie folgt bedienen: 6.2 Ofenfunktionen Ofenfunktion Anwendung Heißluft mit Ring- Zum Backen auf bis zu drei Einschubebenen und zum heizkörper Dörren von Lebensmitteln.Stellen Sie eine 20 - 40 °C niedrigere Backofentemperatur als bei Ober-/Unterhitze ein.
DEUTSCH Ofenfunktion 13 Anwendung Auftauen Diese Funktion kann zum Auftauen von Tiefkühlgerichten wie z. B. Gemüse und Obst verwendet werden. Die Auftauzeit hängt ab von der Menge und Größe der Tiefkühlgerichte. Feuchte Heißluft Zum energiesparenden Backen und Garen von trockenem Gebäck. Auch zum Backen von Backwaren in Formen auf einer Ebene. Diese Funktion wurde zur Bestimmung der Energieeffizienzklasse gemäß EN50304 verwendet. Sie müssen jedoch zuerst die Gardauer festlegen.
www.aeg.com Sobald das Gerät die eingestellte Temperatur erreicht hat, ertönt drei Mal ein Signalton, und die Aufheiz-Anzeige erlischt. 6.5 Abfragen der Temperatur Sie können die Temperatur während einer laufenden Funktion oder eines laufenden Programms abfragen. 1. Berühren Sie . Die Temperatur-/Zeit-Anzeige zeigt die Backofentemperatur an. 2. Berühren Sie , um zur Anzeige der eingestellten Temperatur zurückzukehren, oder warten Sie fünf Sekunden, bis diese automatisch angezeigt wird. 6.
DEUTSCH 15 7. UHRFUNKTIONEN 7.1 Tabelle der Uhrfunktionen Uhrfunktion Anwendung GARZEITMESSER Einstellen des Garzeitmessers zum Anzeigen, wie lange das Gerät bereits in Betrieb ist. Diese Funktion hat keine Auswirkung auf den Gerätebetrieb. TAGESZEIT Anzeige der Tageszeit. Zum Ändern, siehe „Einstellen der Uhrzeit“. DAUER Einstellen der Einschaltdauer für das Gerät. ENDE Einstellen, wann das Gerät ausgeschaltet werden soll.
www.aeg.com blinkt im Display. 3. Verwenden Sie oder Einstellen von ENDE und zum oder zum Bestätigen. Stellen Sie zuerst die Minuten und dann die Stunden ein. Nach Ablauf der eingestellten Zeit ertönt zwei Minuten lang ein Signalton. Das Symbol und die eingestellte Zeit blinken im Display. Das Gerät wird ausgeschaltet. 4. Zum Ausschalten des Signaltons drücken Sie ein Sensorfeld oder öffnen Sie die Backofentür. 5. Schalten Sie das Gerät aus. 7.
DEUTSCH zubereitet wird, oder keine Erfahrung damit haben. Das Display zeigt die voreingestellten Garzeiten für die einzelnen Automatikprogramme an. 8.
www.aeg.com 8.2 Rezepte online Die Rezepte der Automatikprogramme für dieses Gerät finden Sie auf unserer Website. Um das richtige Rezeptbuch zu finden, suchen Sie die PNCNummer auf dem Typenschild, das sich am vorderen Rahmen des Garraums befindet. 8.3 Automatikprogramme 1. Schalten Sie das Gerät ein. 2. Berühren Sie . Das Display zeigt , ein Symbol und die Nummer des Automatikprogramms an. 3. Berühren Sie oder , um das Automatikprogramm auszuwählen. oder warten Sie fünf 4.
DEUTSCH 19 9. VERWENDUNG DES ZUBEHÖRS WARNUNG! Siehe Kapitel "Sicherheitshinweise". 9.1 KT Sensor Zwei Temperaturen sind einzustellen: Die Backofentemperatur und die Kerntemperatur. Der KT Sensor misst die Kerntemperatur im Inneren des Fleisches. Das Gerät wird ausgeschaltet, sobald das Fleisch die eingestellte Temperatur erreicht hat. ACHTUNG! Verwenden Sie nur den mitgelieferten KT Sensor oder ein Originalersatzteil.
www.aeg.com Wenn Sie mit dem KT Sensor garen, können Sie die im Display angezeigte Temperatur ändern. Wenn Sie den KT Sensor in die Buchse eingesteckt und eine Backofenfunktion und eine Temperatur eingestellt haben, wird im Display die aktuelle Kerntemperatur angezeigt.
DEUTSCH 21 Backblech oder tiefes Blech: • Alle Zubehörteile besitzen kleine Kerben oben auf der rechten und linken Seite, um die Sicherheit zu erhöhen. Diese Einkerbungen dienen auch als Kippsicherung. • Durch den umlaufend erhöhten Rahmen des Rostes ist das Kochgeschirr zusätzlich gegen Abrutschen gesichert. 9.3 Teleskopauszüge Einsetzen des Zubehörs ACHTUNG! Achten Sie darauf, die Teleskopauszüge vollständig in das Gerät zu schieben, bevor Sie die Backofentür schließen.
www.aeg.com 10. ZUSATZFUNKTIONEN 10.1 Verwenden der Funktion „Bevorzugtes Programm“: Mit dieser Funktion können Sie Ihre bevorzugten Einstellungen für Temperatur und Dauer bei Backofenfunktionen oder -programmen speichern. 1. Stellen Sie die Temperatur und die Dauer für eine Backofenfunktion oder ein Programm ein. 2. Berühren Sie länger als drei Sekunden. Ein akustisches Signal ertönt. 3. Schalten Sie das Gerät aus. • Berühren Sie , um die Funktion einzuschalten.
DEUTSCH Beschreibung Mögliche Einstelloption 5 DEMO MODUS Aktivierungscode: 2468 6 HELLIGKEIT NIEDRIG/MITTEL/HOCH 7 WASSERHÄRTE 1-4 8 ERINNERUNGSFUNKTIONEN EIN/AUS 9 SERVICE-MENÜ - 10 ZURÜCK ZUM AUSLIEFERZUSTAND JA/NEIN 23 1) Der Ton des Sensorfelds EIN/AUS lässt sich nicht ausschalten. 1. Wenn das Gerät ausgeschaltet ist, halten Sie drei Sekunden gedrückt. Das Display zeigt SET1 an, wobei die „1“ blinkt. 2. Berühren Sie zum Einstellen oder . 3. Berühren Sie . 4.
www.aeg.com 11. TIPPS UND HINWEISE WARNUNG! Siehe Kapitel "Sicherheitshinweise". Die Temperaturen und Backzeiten in den Tabellen sind nur Richtwerte. Sie sind abhängig von den Rezepten, der Qualität und der Menge der verwendeten Zutaten. 11.1 Innenseite der Tür Bei einigen Modellen finden Sie an der Innenseite der Tür: • Die Nummerierung der Einschubebenen. • Informationen über die Backofenfunktionen, Empfehlungen für Einschubebenen und Temperaturen für übliche Gerichte. 11.
DEUTSCH Gargut Temperatur (°C) Dauer (Min.
www.aeg.com Gargut Temperatur (°C) Dauer (Min.) Ebene Kürbis, Würfel 99 15 - 25 2 Sauerkraut 99 60 - 90 2 Süßkartoffeln 99 20 - 30 2 Tomaten 99 15 - 25 2 Maiskolben 99 30 - 40 2 1) Backofen 5 Minuten vorheizen. Beilagen Gargut Temperatur (°C) Dauer (Min.
DEUTSCH Gargut Temperatur (°C) Dauer (Min.) Ebene Linsen, braun und 99 grün (Verhältnis Wasser/Linsen 2:1) 55 - 60 2 Milchreis (Ver99 hältnis Milch/Reis 2,5:1) 40 - 55 2 Grießpudding (Verhältnis Milch/ Grieß 3,5:1) 20 - 25 2 99 1) Das Wasser/Reis-Verhältnis kann je nach Reistyp variieren. Obst Gargut Temperatur (°C) Dauer (Min.
www.aeg.com Gargut Temperatur (°C) Dauer (Min.) Ebene Hähnchen, pochiert, 1000 - 1200 g 99 60 - 70 2 Kalbs-/Schweinerücken ohne Knochen, 800 - 1000 g 90 80 - 90 2 Kasseler, pochiert 90 70 - 90 2 Tafelspitz 99 110 - 120 2 Chipolatas 80 15 - 20 2 Bayerische Weißwurst 80 20 - 30 2 Wiener 80 20 - 30 2 Eier Gargut Temperatur (°C) Dauer (Min.) Ebene Eier, hart gekocht 99 18 - 21 2 Eier, mittelweich gekocht 99 12 - 13 2 Eier, weich gekocht 99 10 - 11 2 11.
DEUTSCH Gargut 29 Heißluftgrillen (erster Schritt: Fleisch garen) Vital-Dampf (zweiter Schritt: Gemüse hinzufügen) Temperatur (°C) Dauer (Min.) Ebene Temperatur (°C) Dauer (Min.) Ebene Schweine- 180 braten 1 kg Kartoffeln, Gemüse, Soße 60 - 70 Fleisch: 1 99 30 - 40 Fleisch: 1 Gemüse: 3 Kalbsbraten 1 kg Reis, Gemüse 50 - 60 Fleisch: 1 99 30 - 40 Fleisch: 1 Gemüse: 3 180 11.4 Intervall Plus Gargut Temperatur (°C) Dauer (Min.
www.aeg.com Gargut Temperatur (°C) Dauer (Min.
DEUTSCH Backens gleichen sich die Unterschiede wieder aus. • Bei längeren Backzeiten können Sie den Backofen etwa 10 Minuten vor Ablauf der Zeit ausschalten und die Restwärme nutzen. Wenn Sie gefrorene Lebensmittel in den Backofen geben, können sich die 31 Backbleche beim Backen verformen. Nachdem die Backbleche abgekühlt sind, hebt sich die Verformung wieder auf. 11.8 Backtipps Backergebnis Mögliche Ursache Abhilfe Die Unterseite des Kuchens ist zu hell. Die Einschubebene ist nicht richtig.
www.aeg.com 11.9 Backen auf einer Einschubebene: Backen in Formen Gargut Funktion Temperatur (°C) Dauer (Min.
DEUTSCH Gargut Funktion Temperatur (°C) Brot (Roggenbrot): 1. Erster Teil des Backvorgangs. 2. Zweiter Teil des Backvorgangs. Ober-/Unterhitze 1. 2.
www.aeg.com Gargut Funktion Temperatur (°C) Dauer (Min.
DEUTSCH Gargut Funktion Temperatur (°C) Dauer (Min.) Ebene Gemüseauf- Heißluftgrillen 160 - 170 15 - 30 1 Überbackene Baguettes Heißluft mit Ringheizkörper 160 - 170 15 - 30 1 Süße Aufläufe Ober-/Unterhitze 180 - 200 40 - 60 1 Fischaufläufe Ober-/Unterhitze 180 - 200 30 - 60 1 Gefülltes Gemü- Heißluft mit se Ringheizkörper 160 - 170 30 - 60 1 lauf1) 1) Backofen vorheizen. 11.11 Feuchte Heißluft Gargut Temperatur (°C) Dauer (Min.
www.aeg.com Kuchen/Gebäck/Brot auf Backblechen Gargut Temperatur (°C) Dauer (Min.) Windbeutel/ Eclairs 160 - 1801) Streuselkuchen, trocken 150 - 160 Ebene 2 Ebenen 3 Ebenen 25 - 45 1/4 - 30 - 45 1/4 - 1) Backofen vorheizen. Plätzchen/small cakes/Törtchen/Gebäck/Brötchen Gargut Temperatur (°C) Dauer (Min.
DEUTSCH Garen Sie bei Verwendung dieser Funktion stets ohne Deckel. 1. Das Fleisch in einer Pfanne auf dem Kochfeld auf jeder Seite 1-2 Minuten sehr heiß anbraten. 2. Das Fleisch zusammen mit der heißen Bratpfanne auf den Kombirost im Backofen stellen. 3. Stecken Sie den KT Sensor in das Fleisch. 4. Wählen Sie die Funktion Bio-Garen aus und stellen Sie die gewünschte Kerntemperatur ein. Gargut Menge Temperatur (°C) Dauer (Min.
www.aeg.com 11.15 Braten • Benutzen Sie zum Braten hitzebeständiges Geschirr (beachten Sie die Angaben des Herstellers). • Große Bratenstücke können direkt im tiefen Blech (falls vorhanden) oder auf dem Kombirost über dem tiefen Blech gebraten werden. • Braten Sie magere Fleischstücke in einem Bräter mit Deckel. So bleibt das Fleisch saftig. • Alle Fleischarten, die gebräunt werden können oder eine knusprige Kruste bekommen, können in einem Bräter ohne Deckel gebraten werden.
DEUTSCH Kalb Gargut Menge (kg) Funktion Temperatur (°C) Dauer (Min.) Ebene Kalbsbraten 1 Heißluftgrillen 160 - 180 90 - 120 1 Kalbshaxe 1.5 - 2 Heißluftgrillen 160 - 180 120 - 150 1 Gargut Menge (kg) Funktion Temperatur (°C) Ebene Dauer (Min.) Ebene Lammkeule/ Lammbraten 1 - 1.5 Heißluftgrillen 150 - 170 100 - 120 1 Lammrücken 1 - 1.5 Heißluftgrillen 160 - 180 40 - 60 1 Gargut Menge Funktion Temperatur (°C) Dauer (Min.
www.aeg.com Gargut Menge Funktion Temperatur (°C) Dauer (Min.) Ebene Pute 2,5 - 3,5 kg Heißluftgrillen 160 - 180 120 - 150 1 Pute 4 - 6 kg Heißluftgrillen 140 - 160 150 - 240 1 Temperatur (°C) Dauer (Min.) Ebene 40 - 60 1 Fisch, gedämpft Gargut Menge (kg) Funktion Fisch 1 - 1.5 Ober-/Unter- 210 - 220 hitze 11.17 Grillstufe 1 • Benutzen Sie den Grill immer mit der höchsten Temperatureinstellung.
DEUTSCH Gargut Dauer (Min.) Ebene Erste Seite Zweite Seite Filet/Kalbssteaks 7 - 10 6-8 4 Toast/Toast 1-3 1-3 5 Überbackener Toast 6-8 - 4 11.18 Tiefkühlgerichte Gargut Temperatur (°C) Dauer (Min.
www.aeg.com Gargut Funktion Temperatur (°C) Dauer (Min.) Ebene Obstkuchen Ober-/Unterhitze gemäß Herstelleranweisungen gemäß Herstelleranweisungen 3 1) Pommes Frites zwischendurch 2 bis 3 Mal wenden. 11.19 Einkochen - Unterhitze • Verwenden Sie nur handelsübliche Einweckgläser gleicher Größe. • Verwenden Sie keine Gläser mit Schraub- oder Bajonettdeckeln und keine Metalldosen. • Verwenden Sie für diese Funktion die erste Einschubebene von unten.
DEUTSCH 11.20 Dörren - Heißluft mit Ringheizkörper • Verwenden Sie mit Butterbrot- oder Backpapier belegte Bleche. • Sie erzielen ein besseres Ergebnis, wenn Sie nach halber Dörrzeit den Backofen ausschalten, öffnen und am besten über Nacht auskühlen lassen. Gemüse Gargut Temperatur (°C) Dauer (Std.
www.aeg.com 11.
DEUTSCH 11.23 Informationen für Prüfinstitute 45 Tests gemäß IEC 60350-1. Tests für die Funktion: Vital-Dampf. Gargut Behälter (Gastronorm) Menge (g) Ebene Tempera- Dauer tur (°C) (Min.) Bemerkungen Brokkoli1) 1 x 1/2 perforiert 300 3 99 13 - 15 Setzen Sie das Backblech in die erste Einschubebene ein. Brokkoli1) 2 x 1/2 perforiert 2 x 300 2 und 4 99 13 - 15 Setzen Sie das Backblech in die erste Einschubebene ein. Brokkoli1) 1 x 1/2 perforiert max.
www.aeg.com • Reinigen Sie alle Zubehörteile nach jedem Gebrauch und lassen Sie sie trocknen. Feuchten Sie ein weiches Tuch mit warmem Wasser und etwas Reinigungsmittel an. • Zubehörteile mit Antihaftbeschichtung dürfen nicht mit aggressiven Reinigungsmitteln, scharfkantigen Gegenständen oder im Geschirrspüler gereinigt werden. Andernfalls kann die Antihaftbeschichtung beschädigt werden. 1. Ziehen Sie die Einhängegitter vorsichtig nach oben und aus der vorderen Aufhängung heraus. 1 3 2 12.
DEUTSCH 3. Berühren Sie oder , um eine Reinigungsfunktion auszuwählen. 4. Berühren Sie zur Bestätigung. 12.6 Entleeren des Wassertanks - S1 Entfernen Sie alle Zubehörteile. Die Reinigungsfunktion entleert das Restwasser aus dem Wassertank. Verwenden Sie die Funktion nach der Dampfgarfunktion. Die Dauer der Funktion beträgt ca. 6 Minuten. Die Backofenbeleuchtung ist bei dieser Funktion ausgeschaltet. 1. Setzen Sie das Blech in die erste Einschubebene ein. 2. Wassertank entleeren - S1.
www.aeg.com aus dem Dampfgenerator-Kreislauf entfernen. Wählen Sie die Funktion im Menü . Die Gesamtdauer des Verfahrens beträgt ca. 2 Stunden. Die Backofenbeleuchtung ist bei dieser Funktion ausgeschaltet. 1. Entfernen Sie alle Zubehörteile. 2. Vergewissern Sie sich, dass der Wassertank leer ist. Wassertank entleeren - S1, wenn nötig. 3. Setzen Sie das Blech in die erste Einschubebene ein. 4. Füllen Sie 250 ml Entkalker in den Wassertank. 5.
DEUTSCH 49 WARNUNG! Gehen Sie beim Aushängen der Tür vorsichtig vor. Die Tür ist schwer. 1. Öffnen Sie die Tür vollständig. 2. Drücken Sie auf die Klemmhebel (A) an beiden Türscharnieren. A A 3. Schließen Sie die Backofentür bis zur ersten Öffnungsstellung (Winkel ca. 70 Grad). 4. Fassen Sie die Tür mit beiden Händen seitlich an und ziehen Sie sie schräg nach oben vom Gerät weg. 5.
www.aeg.com 2. Entfernen Sie den Metallring und reinigen Sie die Glasabdeckung. 3. Ersetzen Sie die Lampe durch eine geeignete, bis 300 °C hitzebeständige Lampe. 4. Stecken Sie den Metallring auf die Glasabdeckung. 5. Bringen Sie die Glasabdeckung wieder an. 2. Entfernen Sie die Abdeckung mit einem Torx 20-Schraubendreher. 3. Entfernen und reinigen Sie den Metallrahmen und die Dichtung. 4. Ersetzen Sie die Lampe durch eine geeignete, bis 300 °C hitzebeständige Lampe. 5.
DEUTSCH Störung Mögliche Ursache 51 Abhilfe Der Backofen heizt nicht auf. Die Sicherung hat ausgelöst. Vergewissern Sie sich, dass die Sicherung der Grund für die Störung ist. Löst die Sicherung wiederholt aus, wenden Sie sich an eine zugelassene Elektrofachkraft. Die Backofenbeleuchtung funktioniert nicht. Die Lampe ist defekt. Während das Gerät ausgeDas Display ist ausgeschalschaltet ist, zeigt das Display tet. die Uhrzeit nicht an. Tauschen Sie die Lampe aus.
www.aeg.com Störung Mögliche Ursache Abhilfe Der Entkalkungsvorgang wird unterbrochen, bevor er beendet ist. Die Funktion wurde vom Nutzer unterbrochen. Wiederholen Sie den Vorgang. Nach dem EntkalkungsvorSie haben den Wasserbehälgang befindet sich kein Was- ter nicht bis zum maximalen ser in der Brat- und FettFüllstand gefüllt. pfanne. Prüfen Sie, ob sich in der Aufnahme des Wasserbehälters Entkalker/Wasser befindet. Wiederholen Sie den Vorgang.
DEUTSCH Störung Mögliche Ursache Abhilfe Das Gerät ist eingeschaltet, Der Demo-Modus ist eingeheizt aber nicht. Der Ventila- schaltet. tor funktioniert nicht. Im Display erscheint "Demo". 13.2 Servicedaten Wenn Sie das Problem nicht selbst lösen können, wenden Sie sich an den Händler oder einen autorisierten Kundendienst. 53 Siehe „Verwenden des Menüs Einstellungen“ im Kapitel „Zusatzfunktionen“. Typenschild befindet sich am Frontrahmen des Garraums. Entfernen Sie das Typenschild nicht vom Garraum.
www.aeg.com Gewicht EN 60350-1 - Elektrische Kochgeräte für den Hausgebrauch - Teil 1: Herde, Backöfen, Dampfgarer und Grillgeräte Verfahren zur Messung der Gebrauchseigenschaften. • 14.2 Energie sparen Das Gerät verfügt über Funktionen, mit deren Hilfe Sie beim täglichen Kochen Energie sparen können. • Allgemeine Tipps – Achten Sie darauf, dass die Backofentür während des Betriebs vollständig geschlossen ist, und öffnen Sie sie nicht öfter als erforderlich.
DEUTSCH 55
867325633-B-362015 www.aeg.