FAVORIT ÖKO PLUS I Gebruiksaanwijzing Afwasmachine
Inhoud Wij danken u voor uw keuze voor een van onze producten van hoogwaardige kwaliteit. Lees deze gebruiksaanwijzing alstublieft zorgvuldig door, zo kunt u zeker zijn van optimale en professionele prestaties van uw apparaat. De handleiding zal u in staat stellen om alle processen perfect en op de meest efficiënte wijze te laten verlopen. Wij adviseren u deze handleiding op een veilige plaats te bewaren, dan kunt u hem te allen tijde raadplegen.
Veiligheidsinformatie 3 Wijzigingen voorbehouden Bedieningsinstructies Veiligheidsinformatie In het belang van uw veiligheid en om een correct gebruik te kunnen waarborgen is het van belang dat u, alvorens het apparaat te installeren en in gebruik te nemen, deze gebruiksaanwijzing, inclusief de tips en waarschuwingen, grondig doorleest.
Veiligheidsinformatie De veiligheid van kinderen • Dit apparaat is bestemd voor gebruik door volwassenen. Laat kinderen de afwasmachine niet zonder toezicht gebruiken. • Houd alle verpakkingsmateriaal buiten het bereik van kinderen. Gevaar voor verstikking. • Bewaar alle afwasmiddelen op een veilige plaats buiten het bereik van kinderen. • Houd kinderen uit de buurt van de afwasmachine als de deur open staat. Installatie • Controleer uw afwasmachine op eventuele transportschade.
Beschrijving van het product 5 Beschrijving van het product 1 2 3 4 5 6 7 8 9 Bovenrek Aanpassen van de instelling van de waterhardheid Zoutreservoir Afwasmiddeldoseerbakje Glansmiddeldoseerbakje Typeplaatje Filters Onderste sproeiarm Bovenste sproeiarm Deze afwasmachine is in de spoelruimte voorzien van een lamp die aan- en uitgaat met het openen en sluiten van de deur van de machine. De interne verlichting is uitgerust met led-lamp KLASSE 1, conform met EN 60825-1: 1994 + A1: 2002 + A2: 2001.
Bedieningspaneel Bedieningspaneel 7 8 1 2 3 4 5 6 7 8 9 10 Aan/uit-toets RESET toets Programmakeuzetoetsen ÖKO PLUS toets (Energiebesparende) MULTITAB toets Toets uitgestelde start Digitaal display Functietoetsen Controlelampjes Programmalampjes Controlelampjes ÖKO PLUS Gaat branden als de optie ÖKO PLUS is geselecteerd MULTITAB Gaat branden als de optie Multitab is geselecteerd
Bedieningspaneel 7 Controlelampjes Zout Gaat branden als het speciale zout op is. 1) Glansmiddel Gaat branden als het glansmiddel op is. 1) 1) De controlelampjes voor zout en glansmiddel branden nooit als een afwasprogramma bezig is, zelfs niet als bijvullen van zout en/of glansmiddel noodzakelijk is.
Het eerste gebruik Als een lampje van een programma gaat branden, dan is het laatst uitgevoerde of geselecteerde programma nog steeds ingesteld. Om in dit geval terug te keren naar de instelmodus moet het programma worden geannuleerd. Een ingesteld programma of een lopend programma annuleren Houd de RESET-toets ingedrukt tot alle programmalampjes gaan branden. Het programma is geannuleerd en de machine bevindt zich nu in de instelmodus.
De waterontharder instellen Waterhardheid Aanpassen van de waterhardheidsinstelling Gebruik van zout °dH °TH mmol/l handmatig elektronisch 19 - 22 33 - 39 3,3 - 3,9 2 niveau 5 ja 15 - 18 26 - 32 2,61 - 3,2 1 niveau 4 ja 11 - 14 19 - 25 1,9 - 2,5 1 niveau 3 ja 4 - 10 7 - 18 0,71 - 1,8 1 niveau 2 ja <4 <7 < 0,7 1 niveau 1 nee Handmatig instellen De afwasmachine wordt in de fabriek ingesteld op stand 2. 1. Open de deur van de afwasmachine. 2.
Gebruik van zout voor de vaatwasser Gebruik van zout voor de vaatwasser WAARSCHUWING! Gebruik alleen zout dat specifiek is bestemd voor gebruik in afwasmachines. Alle andere soorten zout die niet specifiek zijn ontwikkeld voor gebruik in een afwasmachine, in het bijzonder tafelzout, zullen schade toebrengen aan de waterontharder. Vul alleen zout bij vlak voordat u een van de volledige afwasprogramma's gaat starten.
Gebruik van glansspoelmiddel 11 1. Open het reservoir door op de ontgrendelknop (A) te drukken. 2. Giet glansmiddel in het reservoir. Het maximale vulniveau wordt aangegeven door "max". Het doseerbakje bevat ongeveer 110 ml glansmiddel, voldoende voor tussen de 16 en 40 afwascycli, afhankelijk van de ingestelde dosering. 3. Zorg ervoor dat het deksel na het vullen goed wordt gesloten.
Dagelijks gebruik Verhoog de dosering als er na afloop van het programma waterdruppels of kalkvlekken op het serviesgoed achterblijven. Verlaag de dosering als er kleverige witachtige strepen op het serviesgoed achterblijven of een blauwzweem op glaswerk of op de lemmeten van messen. Dagelijks gebruik • • • • • Controleer of het nodig is regenereerzout of glansmiddel bij te vullen. Plaats bestek en serviesgoed in de afwasmachine. Afwasmiddel doseren.
De vaatwasser inruimen 13 Het volgende serviesgoed en bestek is voor reiniging in de afwasmachine niet geschikt: in beperkte mate geschikt: • bestek met houten, hoornen, porseleinen of • Reinig aardewerk alleen in de afwasmachine parelmoeren handgrepen. als het door de fabrikant specifiek wordt ge• voorwerpen van kunststof die niet hittebekenmerkt als afwasmachinebestendig. stendig zijn.
De vaatwasser inruimen De bestekmand WAARSCHUWING! Rechtop geplaatste lange messen zijn een potentieel gevaar. Lang en/of scherp snijgereedschap zoals bijvoorbeeld vleesmessen moeten horizontaal in het bovenrek worden gelegd. Pas op bij het plaatsen of uitnemen van scherpe voorwerpen zoals messen. Opdat alle bestekdelen in de bestekmand door water worden omspoeld, moet u: 1. de roosterinzet op de bestekmand plaatsen. 2. vorken en lepels met de greep naar onderen in de bestekmand plaatsen.
De vaatwasser inruimen De bestekmand kan open gezet worden. Zorg ervoor dat u beide delen van het handvat goed vastpakt als u de mand uit de afwasmachine haalt. 1. Leg de bestekmand op een tafel of een werkblad. 2. Doe het tweedelige handvat open. 3. Verwijder het bestek. Bierglazen Maximaal 4 bierglazen, glazen met voet, enz. kunnen in de bierglazenhouder aan de linkerkant in het onderrek opgehangen worden. Indien nodig, kunnen de bierglazenhouders worden opgeklapt.
De vaatwasser inruimen Voer deze stappen uit om de bierglazenhouders te verwijderen 1. Trek de houders naar boven en duw vervolgens zachtjes van onderaf tegen de haken. 2. Gebruik de haken om de kopjesrekken aan de horizontale stangen te bevestigen. Indien nodig, kunt u de ondersteuning die de bierglashouders of kopjesrekken op hun plaats houden verwijderen. 1. Gebruik uw duimen om de ondersteuning terug te duwen. 2. Duw ze vooruit om de ondersteuning weer te bevestigen.
De vaatwasser inruimen Bovenrek Plaats klein, teer serviesgoed of lange, puntige bestekdelen in het bovenrek. • Plaats serviesgoed op en onder de neergeklapte kopjesrekken, zodanig dat ze elkaar niet raken en het water alle voorwerpen kan bereiken. • De kopjesrekken kunnen worden opgeklapt zodat er plaats is voor hoge serviesdelen. • Leg of hang wijn- en cognacglazen in de gleuven in de kopjesrekken. • Voor glazen met een lange voet, kan de glazenhouder naar rechts of links worden geplaatst.
Gebruik van vaatwasmiddelen • De rij pinnen aan de linkerkant van het bovenrek bestaat ook uit twee delen en kan weggeklapt worden. Met de pinnen niet weggeklapt: plaats glazen, mokken enz. in het bovenrek. Met de pinnen weggeklapt: meer ruimte voor dekschalen.
Gebruik van vaatwasmiddelen Afwasmiddel doseren 1. Open het deksel. 2. Vul het afwasmiddelbakje (1) met afwasmiddel. De markering geeft de doseerniveaus aan: 20 = ca. 20 g afwasmiddel 30 = ca. 30 g afwasmiddel. 3. Alle programma's met voorwas hebben een extra dosering afwasmiddel nodig (5/10 g) dat in het afwasmiddelbakje voor de voorwas (2) moet worden gedaan. Deze dosering wordt gebruikt tijdens de voorwasfase. 4. Bij gebruik van afwasmiddeltabletten, het tablet in vakje (1) leggen 5.
De Multi-tabfunctie De Multi-tabfunctie Dit apparaat is uitgerust met de "Multitab-functie", die het gebruik van combitabletten "Multitab" mogelijk maakt. Dit zijn producten met een gecombineerde reinigings-, glans- en zoutfunctie. Ook kunnen zij verschillende andere middelen bevatten afhankelijk van de soort tabletten die u kiest ("3 in 1", "4 in 1", "5 in 1" etc...). Controleer of deze producten geschikt zijn voor uw waterhardheid. Zie de instructies van de fabrikant.
Wasprogramma's 21 5. Schakel om de bewerking vast te leggen de afwasmachine uit door op de aan-/uit-toets te drukken. Als u besluit weer over te gaan op het gebruik van de standaardafwasmiddelen adviseren wij u: 1. Deactiveer de Multitab-functie. 2. het zoutreservoir en het glansmiddeldoseerbakje opnieuw te vullen. 3. Stel de waterhardheid in op de hoogste stand en laat 1 normaal afwasprogramma, zonder serviesgoed, draaien. 4.
Wasprogramma's Energie (kWh) Water (liter) 0,1 4 Duur (minuten) 2) Gedeeltelijke lading (later op de dag verder te vullen) 6) 1) - VOORSPOELEN Verbruikswaarden Drogen Alles Beschrijving programma Laatste spoelgang Soort serviesgoed Tussentijdse spoelbeurt Mate van vervuiling Hoofdwas Programma Voorwas 22 1) De verbruikswaarden zijn bedoeld als richtlijn en zijn afhankelijk van de druk en de temperatuur van het water, maar ook van de variaties in de netspanning en de hoeveelheid servies
Een wasprogramma selecteren en starten 23 Een wasprogramma selecteren en starten Selecteer het afwasprogramma en de uitgestelde start met de deur enigszins geopend. De start van het programma of het aftellen voor de uitgestelde start begint pas nadat de deur is gesloten. Tot dat moment kunnen de instellingen nog worden gewijzigd. 1. 2. 3. 4. Controleer of de rekken juist zijn geladen en of de sproeiarmen vrij kunnen draaien. Controleer of de waterkraan is geopend. Druk op de Aan-/uit-toets.
De vaatwasser uitruimen Einde van het afwasprogramma • De afwasmachine stopt automatisch en een geluidssignaal laat u weten dat het programma is afgelopen. • Het controlelampje van het zojuist beëindigde programma blijft branden. • In het display verschijnt een nul. 1. Schakel de afwasmachine uit door op de Aan-/uit-toets te drukken. Het wordt aanbevolen het apparaat uit te schakelen als het wasprogramma is afgelopen.
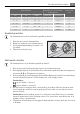
Onderhoud en reiniging 25 2. Het filtersysteem van de afwasmachine omvat een grof filter (A), een microfilter (B) en een platte filter. Ontgrendel het filtersysteem met behulp van de hendel op het microfilter en neem het filter uit het filtersysteem. 3. Draai de greep ongeveer een kwartslag naar links en verwijder het filtersysteem. 4. Pak het grof filter (A) beet bij de greep en verwijder het microfilter (B). 5. Maak alle filters onder stromend water grondig schoon. 6.
Problemen oplossen Als etensresten de openingen in de sproeiarmen hebben verstopt, verwijder deze dan met een cocktailprikker. Buitenkant Reinig de buitenoppervlakken van de machine en het bedieningspaneel met een vochtige zachte doek. Gebruik - indien nodig - alleen neutrale reinigingsmiddelen. Gebruik nooit schurende producten, schuursponsjes of oplosmiddelen (aceton, trichlooretheen, enz.).
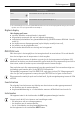
Problemen oplossen Storingscode en storing 27 Mogelijke oorzaak en oplossing • Voortdurend knipperen van het controle• De waterkraan is verstopt of aangezet met lampje programma bezig kalkaanslag. • verschijnt in het display. Maak de waterkraan schoon. • onderbroken geluidssignaal • De waterkraan is dicht. Draai de waterkraan De afwasmachine wordt niet gevuld met water. open. • Het filter (indien aanwezig) in de schroeffitting van de slang bij de waterinlaatklep is verstopt.
Technische gegevens Serienummer. : . . . . . . . . . . . . . . . . . . . . . . . . Het afwasresultaat is niet bevredigend De borden zijn niet schoon • Het verkeerde afwasprogramma is geselecteerd. • Het serviesgoed is zo geplaatst dat het water niet alle delen van het oppervlak kan bereiken. De rekken moeten niet te vol worden geladen. • De sproeiarmen kunnen niet vrij draaien als gevolg van een onjuiste plaatsing van het serviesgoed.
Aanwijzingen voor testinstituten Volledige belading: 12 standaardcouverts Hoeveelheid benodigd afwasmiddel: 5 g + 25 g(type B) Instelling glansmiddel: stand 4 (type III) Voorbeelden voor het inruimen van de afwasmachine: Bovenrek 1) Onderrek met bestekmand 2) Bestekmand 1) Als er kopjesrekken aan de linkerkant zijn geplaatst, verwijder deze dan. 2) Indien nodig, kunt u de kopjesrekken aan de linkerkant en/of de bierglazenhouder verwijderen.
Montage Montage-instructies Montage WAARSCHUWING! Alle elektrotechnische en/of loodgieterswerkzaamheden die nodig zijn voor de installatie van het apparaat dienen te worden uitgevoerd door een erkend installateur. Verwijder alle verpakkingsmaterialen alvorens de machine te plaatsen. Plaats de machine indien mogelijk naast een waterkraan en een afvoer. Deze afwasmachine is ontworpen voor installatie onder een keukenblad of werkoppervlak.
Aansluiting aan de waterleiding 31 De waterdruk moet zich binnen de grenzen bevinden zoals vermeld in de "Technische specificaties". Uw waterleidingbedrijf kan u informeren over de gemiddelde leidingwaterdruk in uw omgeving. De watertoevoerslang mag tijdens het aansluiten niet zijn geknikt, worden platgedrukt of in de knoop zitten. De afwasmachine is voorzien van een vul- en afvoerslang die afhankelijk van de installatie door middel van de sluitmoer naar links of naar rechts kunnen worden gedraaid.
Aansluiting aan de waterleiding 1. Aan de gootsteenafvoer, met bevestiging tegen de onderkant van het werkoppervlak. Hiermee wordt voorkomen dat gootsteenwater de machine inloopt. 2. Aan een standpijp voorzien van een ventilatieopening, minimale binnendiameter 4 cm. De afvalwateraansluiting moet zich op een hoogte bevinden van 60 cm vanaf de bodem van de afwasmachine. De afvoerslang kan vanaf de afwasmachine naar links of naar rechts lopen.
Aansluiting aan het elektriciteitsnet 33 Aansluiting aan het elektriciteitsnet WAARSCHUWING! Het apparaat moet volgens de veiligheidsvoorschriften worden geaard. Alvorens het apparaat in gebruik te nemen dient u zich ervan te verzekeren dat de nominale spanning en het spanningstype op het typeplaatje in overeenstemming zijn met de netspanning waarop de machine aangesloten gaat worden. Ook de waarde van de zekering is te vinden op het typeplaatje.
www.electrolux.com Voor het on-line bestellen van accessoires, consumables en onderdelen gaat u naar de ’webwinkel’ op: www.aeg.nl U kan toebehoren, verbruiksprodukten en onderdelen bestellen via onze webwinkel op: www.aegelectrolux.be 117965090-00-072008 www.aeg-electrolux.