EHBZ EN User manual
www.aeg.com CONTENTS 1. 2. 3. 4. 5. 6. 7. 8. 9. 10. 11. 12. 13. SAFETY INFORMATION . . . . . . . . . . . . . . . . . . . . . . . . . . . . . . . . . . . . . . . . . . . . . . . . . . . . . . 3 SAFETY INSTRUCTIONS . . . . . . . . . . . . . . . . . . . . . . . . . . . . . . . . . . . . . . . . . . . . . . . . . . . . . . 4 PRODUCT DESCRIPTION . . . . . . . . . . . . . . . . . . . . . . . . . . . . . . . . . . . . . . . . . . . . . . . . . . . . . 6 BEFORE FIRST USE . . . . . . . . . . . . . . . . . . . .
ENGLISH 3 1. SAFETY INFORMATION Before the installation and use of the appliance, carefully read the supplied instructions. The manufacturer is not responsible if an incorrect installation and use causes injuries and damages. Always keep the instructions with the appliance for future reference. 1.1 Children and vulnerable people safety WARNING! Risk of suffocation, injury or permanent disability.
www.aeg.com scratch the surface, which may result in shattering of the glass. • To remove the shelf supports first pull the front of the shelf support and then the rear end away from the side walls. Install the shelf supports in the opposite sequence. 2. SAFETY INSTRUCTIONS 2.1 Installation WARNING! Only a qualified person must install this appliance. • Remove all the packaging. • Do not install or use a damaged appliance. • Obey the installation instruction supplied with the appliance.
ENGLISH 2.2 Use WARNING! Risk of injury, burns or electric shock or explosion. • Use this appliance in a household environment. • Do not change the specification of this appliance. • Make sure that the ventilation openings are not blocked. • Do not let the appliance stay unattended during operation. • Deactivate the appliance after each use. • Be careful, when you open the appliance door while the appliance is in operation. Hot air can release.
www.aeg.com • Only use lamps with the same specifications. 2.5 Disposal WARNING! Risk of injury or suffocation. • Disconnect the appliance from the mains supply. • Cut off the mains cable and discard it. • Remove the door catch to prevent children and pets to get closed in the appliance. 3.
ENGLISH 7 Grill- / Roasting pan To bake and roast or as a pan to collect fat. 4. BEFORE FIRST USE WARNING! Refer to the Safety chapters. 4.1 Initial Cleaning • Remove all parts from the appliance. • Clean the appliance before first use. Refer to chapter "Care and Cleaning". 4.2 Setting the time You must set the time before you operate the appliance. cut, the Time function indicator flashes automatically. Press the + or - button to set the correct time.
www.aeg.com 5.2 Oven Functions Oven function Application Light To activate the lamp without a cooking function. True Fan Cooking To bake on up to 3 oven levels at the same time and to dry food. Set the oven temperatures 20 - 40 °C lower than when using Conventional Cooking. Pizza Setting To bake food on one shelf position for a more intensive browning and a crispy bottom. Set the temperature 20 - 40 °C lower than for Conventional Cooking.
ENGLISH Control knob 0 Function 5.6 Using the double zone CAUTION! To activate the double zone, turn the knob clockwise. Do not turn it through the stop position. Off position Keep warm setting 1-9 Heat settings (1 = lowest heat setting, 9 = highest heat setting) Double zone switch Operating the hob: 1. Turn the knob to a necessary heat setting. 2. To complete the cooking process, turn the knob to the off position. 9 1. Turn the knob clockwise to position 9. 2.
www.aeg.com 7. USING THE ACCESSORIES WARNING! Refer to the Safety chapters. 7.1 Inserting the accessories Baking tray: Push the baking tray between the guide bars of the shelf support. Wire shelf: Push the shelf between the guide bars of the shelf support and make sure that the feet point down. Wire shelf and baking tray together: Push the baking try between the guide bars of the shelf support and the wire shelf on the guide bars above.
ENGLISH 11 9. HELPFUL HINTS AND TIPS 9.1 Examples of cooking applications for hob The data in the table is for guidance only.
www.aeg.com • Cakes and pastries at different heights do not always brown equally at first. If this occurs, do not change the temperature setting. The differences equalize during the baking procedure. • Unless otherwise stated, the values in the tables assume that the appliance is cold when the cooking starts. 9.3 Tips on baking Baking results Possible cause Remedy The bottom of the cake is not browned sufficiently. The shelf position is incorrect. Put the cake on a lower shelf.
ENGLISH Type of baking 13 Oven function Shelf position Temperature (°C) Time (min) Fatless sponge cake / Fatless sponge cake True Fan Cooking 2 140 - 150 35 - 50 Fatless sponge cake / Fatless sponge cake Conventional Cooking 2 160 35 - 50 Flan base - short pastry True Fan Cooking 2 170 - 180 1) 10 - 25 Flan base - sponge mixture True Fan Cooking 2 150 - 170 20 - 25 Apple pie / Apple pie (2 tins Ø20 cm, diagonally off set) True Fan Cooking 2 160 60 - 90 Apple pie / Apple pie (
www.aeg.
ENGLISH 15 Bakes and gratins Oven function Shelf position Temperature (°C) Time (min) Pasta bake Conventional Cooking 1 180 - 200 45 - 60 Lasagne Conventional Cooking 1 180 - 200 25 - 40 Vegetables au gratin 1) Turbo Grilling or True Fan Cooking 1 160 - 170 15 - 30 Baguettes topped with melted cheese Turbo Grilling or True Fan Cooking 1 160 - 170 15 - 30 Sweet bakes Conventional Cooking 1 180 - 200 40 - 60 Fish bakes Conventional Cooking 1 180 - 200 30 - 60 Turbo Grilling
www.aeg.
ENGLISH 9.7 Roasting Roasting dishes • Use heat-resistant ovenware to roast (refer to the instructions of the manufacturer). • You can roast large roasting joints directly in the deep pan (if present) or on the wire shelf above the deep pan. • Roast lean meats in the roasting tin with the lid. This keeps the meat more succulent. • All types of meat that can be browned or have crackling can be roasted in the roasting tin without the lid.
www.aeg.com Veal Type of meat Quantity Oven function Shelf position Temperature (°C) Time (min) Roast veal 1 kg Turbo Grilling 1 160 - 180 90 - 120 Knuckle of veal 1.5 - 2 kg Turbo Grilling 1 160 - 180 120 - 150 Type of meat Quantity Oven function Shelf position Temperature (°C) Time (min) Leg of lamb, roast lamb 1 - 1.5 kg Turbo Grilling 1 150 - 170 100 - 120 Saddle of lamb 1 - 1.
ENGLISH Type of meat 19 Quantity Oven function Shelf position Temperature (°C) Time (min) Turkey 2.5 - 3.5 kg Turbo Grilling 1 160 - 180 120 - 150 Turkey 4 - 6 kg Turbo Grilling 1 140 - 160 150 - 240 Type of meat Quantity Oven function Shelf position Temperature (°C) Time (min) Whole fish 1 - 1.5 kg Conventional Cooking 1 210 - 220 40 - 60 Fish (steamed) 9.9 Grilling • Always grill with the maximum temperature setting.
www.aeg.com 1) Preheat the oven 9.
ENGLISH Dish Weight (g) Defrosting time (min) Further defrosting time (min) Comment 21 Chicken 1000 100 - 140 20 - 30 Place the chicken on an upturned saucer placed on a large plate Turn halfway through Meat 1000 100 - 140 20 - 30 Turn halfway through Meat 500 90 - 120 20 - 30 Turn halfway through Trout 150 25 - 35 10 - 15 --- Strawberries 300 30 - 40 10 - 20 --- Butter 250 30 - 40 10 - 15 --- Cream 2 x 200 80 - 100 10 - 15 Cream can also be whipped when still slight
www.aeg.
ENGLISH 23 10. CARE AND CLEANING WARNING! Refer to the Safety chapters. Notes on cleaning: • Clean the front of the appliance with a soft cloth with warm water and a cleaning agent. • To clean metal surfaces, use a usual cleaning agent. • Clean the oven interior after each use. Then you can remove dirt more easily and it does not burn on. • Clean all oven accessories after each use and let them dry.
www.aeg.com Install the heating element correctly above the supports on the inner walls of the appliance. 2. Install the shelf supports. 10.3 Removing / inserting the door WARNING! Be careful when you remove the door from the appliance. The door is heavy. 2. Hold the heating element with two hands at the front. 3. Pull it forwards against the spring pressure and out along the supports on the two sides. 4. The heating element folds down. You can clean the oven ceiling.
ENGLISH 8. 9. Inserting the door and the glass panels When the cleaning is completed, install the glass panels and the door. Do the above steps in the opposite sequence. Install the smaller panel first, then the larger. Hold the door glass panels on their top edge one by one and pull them up out of the guide. Clean the glass panel with water and soap. Dry the glass panel carefully. Replacing the top lamp: 1. Turn the lamp glass cover counterclockwise to remove it. 10.
www.aeg.com Problem Possible cause Remedy The appliance does not heat up. The necessary settings are not set. Make sure that the settings are correct. The appliance does not heat up. The fuse in the fuse box is released. Do a check of the fuse. If the fuse is released more than one time, contact a qualified electrician. The lamp does not oper- The lamp is defective. ate. Replace the lamp. The display shows 12.00. Set the clock. There was a power cut.
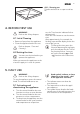
ENGLISH 27 To lift the appliance, do not use the door handle. 12.1 Installing the oven under a work surface WARNING! Installation into flammable material must agree with NIN SEV 1000 (Association of Cantonal Fire Insurers) fire protection guidelines and regulations. B 180 A ca.50 A N 600 A 595 442 A = appliance N = recess 1. Install the hob according to the installation instruction number 374307900/ 374307901. 2.
www.aeg.com 400V PE L1 L2 L3 1 Only a qualified person can connect the appliance to the electricity supply. 400V 2~ 400V 400V 3~ 2 3 5 4 PE L1 L2 1 2 3 5 4 Do the electrical connections as in the connection illustration. Connection diagram 400V Phase definitions: L1, L2, L3 (or R, S, T). 2. Secure the cable grip. 1. WARNING! If service is required always disconnect the appliance from the power supply.
ENGLISH 13. CH 29 GARANTIE, GARANZIA, GUARANTEE 13.1 Kundendienst, service-clientèle, Servizio clienti, Customer Service Centres Servicestellen Points de Service Servizio dopo vendita 5506 Mägenwil/Zürich In- 3018 Bern Mordustriestrasse 10 genstrasse 131 1028 Préverenges Le Trési 6 Point of Service 6928 Manno Via Violino 11 9000 St. Gallen Zürcherstrasse 204e 4052 Basel St.
www.aeg.com 14. ENVIRONMENT CONCERNS Recycle the materials with the symbol . Put the packaging in applicable containers to recycle it. Help protect the environment and human health and to recycle waste of electrical and electronic appliances. Do not dispose appliances marked with the symbol with the household waste. Return the product to your local recycling facility or contact your municipal office.
ENGLISH 31
892934783-D-042013 www.aeg.