EN User manual Microwave Oven ZKG44500
Contents Safety information _ _ _ _ _ _ _ _ _ _ _ _ _ _ 2 Safety instructions _ _ _ _ _ _ _ _ _ _ _ _ _ _ 4 Product description _ _ _ _ _ _ _ _ _ _ _ _ _ 6 Before first use _ _ _ _ _ _ _ _ _ _ _ _ _ _ _ 6 Daily use _ _ _ _ _ _ _ _ _ _ _ _ _ _ _ _ _ _ _ 7 Microwave mode _ _ _ _ _ _ _ _ _ _ _ _ _ _ 9 Clock functions _ _ _ _ _ _ _ _ _ _ _ _ _ _ 11 Using the accessories _ _ _ _ _ _ _ _ _ _ _ Additional functions _ _ _ _ _ _ _ _ _ _ _ _ Helpful hints and tips _ _ _ _ _ _ _ _ _ _ _ Care and cleaning _ _ _ _ _ _
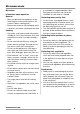
General Safety • Only a qualified person must install this appliance and replace the cable. • Internally the appliance becomes hot when in operation. Do not touch the heating elements that are in the appliance. Always use oven gloves to remove or put in accessories or ovenware. • Do not use a steam cleaner to clean the appliance. • Before maintenance cut the power supply. • If the door or door seals are damaged, the appliance must not be operated until it has been repaired by a competent person.
• The appliance should be cleaned regularly and any food deposits removed. • Failure to maintain the appliance in a clean condition could lead to deterioration of the surface that could adversely affect the life of the appliance and possibly result in a hazardous situation. • Do not use harsh abrasive cleaners or sharp metal scrapers to clean the glass door since they can scratch the surface, which may result in shattering of the glass.
• Do not let mains cables to come in touch with the appliance door, specially when the door is hot. • The shock protection of live and insulated parts must be fastened in such a way that it cannot be removed without tools. • Connect the mains plug to the mains socket only at the end of the installation. Make sure that there is access to the mains plug after the installation. • If the mains socket is loose, do not connect the mains plug. • Do not pull the mains cable to disconnect the appliance.
• If you use an oven spray, obey the safety instructions on the packaging. • Do not clean the catalytic enamel (if applicable) with any kind of detergent. Internal light • The type of light bulb or halogen lamp used for this appliance, is only for household appliances. Do not use it for house lighting. Warning! Risk of electrical shock. • Only use lamps with the same specifications. Disposal Warning! Risk of injury or suffocation. • Disconnect the appliance from the mains supply.
Setting the time After the first connection to the mains, all symbols in the display are on for some seconds. For the subsequent few seconds the display shows the software version. After the software version goes off, the display and "12:00". "12" flashes. shows 1. Press or to set the current hour. 2. to confirm (necessary only for Press the first setting. Later the new time will be saved automatically after 5 seconds). and the set The display shows hour. "00" flashes. 3. Press 4.
Oven function Application Microwave Creates the heat directly in the food. Use it to heat pre-prepared meals and drinks, to defrost meat or fruit, and to cook vegetables and fish. Microwave grilling The Microwave grilling starts as normal grilling function. When you add the microwave function, it combines the microwave and the grilling function at different time periods and power levels (refer to the power setting table). Use the Microwave grilling to keep the crispness of certain foods.
Microwave mode Microwave Information about operation General: • After you deactivate the appliance, let the food stand for some minutes (refer to “Microwave Tables: standing time”). • Remove the aluminium foil packaging, metal containers, etc. before you prepare the food. Cooking: • If possible, cook food covered with material suitable for use in the microwave. Only cook food without a cover if you want to keep a crust. • Do not overcook the dishes by setting the power and time too high.
Suitable cookware and materials Cookware / Material Microwave Defrosting Heating Grilling Cooking Ovenproof glass and porcelain (with no metal components, e. g. Pyrex, heat-proof glass) X X X X Non-ovenproof glass and porcelain 1) X -- -- -- Glass and glass ceramic made of ovenproof/ frost-proof material (e. g.
Power setting • • • • Use 1000 Watt 900 Watt 800 Watt 700 Watt • • • • Heating liquids Searing at the start of the cooking process Cooking vegetables Melting gelatine and butter • 600 Watt • 500 Watt • • • • Defrosting and heating frozen meals Heating one-plate meals Simmering stews Cooking egg dishes • 400 Watt • 300 Watt • 200 Watt • • • • • • Continuing to cook meals Cooking delicate food Heating baby food Simmering rice Heating delicate food Melting cheese • 100 Watt • • • • • Defrosting me
3. For Duration first you set the minutes first you and then the hours, for End set the hours and then the minutes. An acoustic signal sounds for 2 minutes or symbol and after the time ends. time setting flash in the display. The oven stops. Press any button or open the oven door to stop the acoustic signal. when you set the hours If you press , the appliance goes for DURATION function. to setting of the END Setting the MINUTE MINDER Use this to set a countdown (maximum 2 h 30 min).
safety. The indentations are also anti-tip devices. • The high rim around the shelf is a device which prevents cookware from slipping. Additional functions Child Lock The Child Lock prevents an accidental operation of the appliance. Activating and deactivating the Child Lock function: 1. Do not set an oven function. 2. Press and hold and at the same time for 2 seconds. 3. An acoustic signal sounds. SAFE comes on / goes out on the display (when you activate or deactivate the Child Lock).
Helpful hints and tips The temperature and baking times in the tables are guidelines only. They depend on the recipes and the quality and quantity of the ingredients used. Tips for the microwave Result Remedy You cannot find details for the amount of food prepared. Look for a similar food. Increase or shorten the length of the cooking times according to the following rule: Double the amount = almost double the time, Half the amount = half the time The food has got too dry.
Microwave Food Weight (g) Power (Watts) Time (min) Standing time (min) Comments Chicken breast 100 - 200 200 3-5 10 - 15 Turn halfway through; cover defrosted parts with aluminium foil Chicken thighs 100 - 200 200 3-5 10 - 15 Turn halfway through; cover defrosted parts with aluminium foil 2000 200 45 - 60 20 - 30 Turn halfway through; cover defrosted parts with aluminium foil Duck Defrosting fish Microwave Food Weight (g) Power (Watts) Time (min) Standing time (min) Comments Wh
Microwave Food Weight (g) Power (Watts) Time (min) Standing time (min) Comments Yeast dough 1 piece 100 2-3 15 - 20 Turn plate halfway through Cheesecake 1 piece 100 2-4 15 - 20 Turn plate halfway through Cake (gateau) 1 piece 100 1-2 15 - 20 Turn plate halfway through Dry cake (e. g.
Microwave Food Weight (g) Power (Watts) Time (min) Standing time (min) Comments 200 1000 0:20 0:40 --- Put spoon into bottle, stir and check temperature! Convenience food 400 - 500 600 4-6 5 Remove any aluminium lids, turn halfway through Frozen ready meals 400 - 500 400 14 - 20 5 Remove any aluminium lids, turn halfway through Milk 1 cup approx. 200 ml 1000 1:15 1:45 --- Put spoon in the container Water 1 cup approx.
Microwave Food Popcorn Weight (g) Power (Watts) Time (min) Standing time (min) Comments --- 1000 3–4 --- Put the popcorn on a plate on the bottom level 1) Cook all vegetables with a cover on the container. The times given are guidelines only and depend upon the type and qualities of the foodstuffs. Preheat Crostino plate: 4 minutes at 700 Watt Combi-Function Table (for selected models only) Baking / roasting dishes Temp.
Notes on cleaning: • Clean the front of the appliance with a soft cloth with warm water and a cleaning agent. • To clean metal surfaces, use a usual cleaning agent. • Clean the appliance interior after each use. Then you can remove dirt more easily and it does not burn on. • Clean stubborn dirt with a special oven cleaner. • Clean all accessories after each use and let them dry. Use a soft cloth with warm water and a cleaning agent.
Problem Possible cause Remedy The appliance does not heat up. The fuse is released. Make sure that the fuse is the cause of the malfunction. If the fuse releases again and again, contact a qualified electrician. The lamp does not operate. The lamp is defective. Replace the lamp. The display shows an error code that is not on this list. There is an electrical fault. • Deactivate the appliance with the house fuse or the safety switch in the fuse box and activate it again.
Important! After installation and connecting, the cable must be placed so that it cannot at any point reach a temperature of more than 50°C above the ambient temperature. Before the oven is connected, check that the main fuse and the domestic installation can 448-452 min. 560 support the load; and that the power supply is properly earthed. The manufacturer declines any responsibility should these safety measures not be carried out. 21 15 547 455 440 min. 550 567 547 448-452 448-452 21 15 min.
547 448-452 21 15 455 440 448-452 455 440 448-452 min. 560 min. 550 455 440 567 594 333 H05VV-F H05RR-F min. 1,60 m alternativ 22 www.zanussi.
90° 13 20 2x3,5x25 Environment concerns Recycle the materials with the symbol . Put the packaging in applicable containers to recycle it. Help protect the environment and human health and to recycle waste of electrical and electronic appliances. Do not dispose appliances marked with the symbol with the household waste. Return the product to your local recycling facility or contact your municipal office. www.zanussi.com Packaging material The packaging material is environmentally-friendly and recyclable.
892956469-C-432013 www.zanussi.