NL EN FR Gebruiksaanwijzing User Manual Notice d'utilisation Kookplaat Hob Table de cuisson ZGO63414 BE LU 2 17 31
Inhoudsopgave Veiligheidsinformatie Veiligheidsvoorschriften Beschrijving van het product Dagelijks gebruik Aanwijzingen en tips 2 4 6 7 8 Onderhoud en reiniging Probleemoplossing Montage Technische gegevens Energiezuinigheid 8 9 11 14 15 Wijzigingen voorbehouden. Veiligheidsinformatie Lees zorgvuldig de meegeleverde instructies voor installatie en gebruik van het apparaat. De fabrikant is niet verantwoordelijk voor letsel of schade veroorzaakt door een verkeerde installatie of verkeerd gebruik.
• • • • • • • • • • • • kinderen jonger dan 8 jaar uit de buurt of onder permanent toezicht. Bedien het apparaat niet met een externe timer of een apart afstandbedieningssysteem. WAARSCHUWING: Zonder toezicht koken op een kookplaat met vet of olie kan gevaarlijk zijn en brandgevaar opleveren. Probeer brand NOOIT met water te blussen, maar schakel in plaats daarvan het apparaat uit en bedek de vlam bijv. met een deksel of blusdeken.
• isolatiehoes) met onderdelen die temperaturen kunnen bereiken van 50°C hoger dan kamertemperatuur. WAARSCHUWING: Gebruik alleen kookplaatbeschermers die door de fabrikant van het kookapparaat zijn ontworpen of door de fabrikant van het apparaat in de gebruiksinstructies als geschikt zijn aangegeven of kookplaatbeschermers die in het apparaat zijn geïntegreerd. Het gebruik van ongeschikte kookplaatbeschermers kan ongelukken veroorzaken.
• • • • • • elektromonteur om een beschadigde hoofdkabel te vervangen. De schokbescherming van delen onder stroom en geïsoleerde delen moet op zo'n manier worden bevestigd dat het niet zonder gereedschap kan worden verplaatst. Steek de stekker pas in het stopcontact als de installatie is voltooid. Zorg ervoor dat het netsnoer na installatie bereikbaar is. Sluit de stroomstekker niet aan op een losse stroomaansluiting. Trek niet aan het netsnoer om het apparaat los te koppelen. Trek altijd aan de stekker.
• • • • • • • • Zorg dat de vlam niet uit gaat als u de knop snel van de maximale stand naar de minimale stand draait. Gebruik alleen de accessoires die zijn meegeleverd met het apparaat. Plaats geen vlamverdeler op de brander. Het gebruik van een kookapparaat op gas leidt tot de productie van warmte en vocht. Zorg voor een goede ventilatie in de ruimte waar het apparaat is geïnstalleerd.
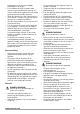
Bedieningsknop Symbool Symbool Beschrijving Beschrijving ontstekingsstand / maximale gastoevoer geen gastoevoer / uit-stand minimale gastoevoer Dagelijks gebruik 1. Druk de bedieningsknop helemaal in en draai de knop linksom naar de maximale WAARSCHUWING! Raadpleeg de hoofdstukken Veiligheid. Branderoverzicht A gastoevoerstand ( ). 2. Houd de bedieningsknop ongeveer 10 seconden ingedrukt. Het thermokoppel kan dan opwarmen. Als u dat niet doet, wordt de gastoevoer onderbroken. 3.
WAARSCHUWING! De vonkontsteking kan automatisch starten wanneer u de stekker in het stopcontact steekt, na de installatie of na een stroomonderbreking. Dat is normaal. Draai de vlam altijd lager of schakel hem uit voordat u de pan van de brander haalt De brander uitschakelen Om de vlam te doven, de knop naar de offpositie draaien . Aanwijzingen en tips LET OP! WAARSCHUWING! Zorg dat de potten zich in het midden van de brander bevinden, voor een maximum aan stabiliteit en lager gasverbruik.
WAARSCHUWING! Gebruik geen messen, schrapers of gelijksoortige hulpmiddelen om het glazen oppervlak of de kieren tussen de branders en het frame schoon te maken (indien van toepassing). • Was de onderdelen van roestvrij staal af met water en droog ze vervolgens met een zachte doek. De kookplaat schoonmaken • • Pannendragers De pansteunen zijn niet bestand tegen afwassen in een afwasautomaat. Ze moeten met de hand worden afgewassen. 1.
Probleem Mogelijke oorzaak Oplossing De zekering is doorgeslagen. Controleer of de zekering de oorzaak van de storing is. Als de zekeringen keer op keer doorslaan, neemt u contact op met een erkende installateur. De branderdeksel en kroon zitten niet goed op hun plaats. Plaats de branderdeksel en de kroon op juiste wijze. De vlam gaat meteen na de ontsteking uit. Het thermokoppel is niet voldoende opgewarmd. Na het ontsteken van de vlam, de knop circa 10 sec. ingedrukt houden.
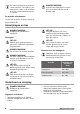
Labels meegeleverd in de zak met accessoires Bevestig de stickers zoals hieronder weergegeven: A B MOD. MOD. PROD.NO. PROD.NO. SER.NO SER.NO DATA DATA C MOD. PROD.NO. SER.NO. 0049 TYPE IP20 03 IT MADE IN ITALY A. Plak het op de garantiekaart en verstuur dit deel (indien van toepassing). B. Plak het op de garantiekaart en bewaar dit deel (indien van toepassing). C. Plak het op het instructieboekje. Montage WAARSCHUWING! Raadpleeg de hoofdstukken Veiligheid.
Controleer of de gastoevoerdruk van het apparaat voldoet aan de aanbevolen waarden. De verstelbare aansluiting wordt op de uitbreidingsbrug bevestigd met behulp van een schroefdraadmoer R 1/2". Alle onderdelen die getoond worden op de afbeelding zijn reeds in de fabriek gemonteerd. Het apparaat werd voor het de fabriek verliet getest, om voor u de beste resultaten te verzekeren. A B C A. Uiteinde van as met moer B. Wasautomaat C.
WAARSCHUWING! Zorg dat de vlam niet uit gaat als u de knop snel van de maximale stand naar de minimale stand draait. In elkaar zetten 1. Aansluiting op het elektriciteitsnet • • • • • • • Zorg er voor dat het aangegeven voltage en het type stroom op het typeplaatje overeenkomen met het voltage en stroomtype van uw lokale stroomleverancier. Dit apparaat wordt geleverd met een netsnoer.
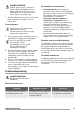
5. eenvoudig toegang bieden indien technische hulp nodig is. Keukenmeubel met 30 mm 6. min 20 mm (max 150 mm) A 60 mm A B B 7. A. Verwijderbaar paneel B. Ruimte voor aansluitingen LET OP! Installeer het apparaat alleen op een werkblad met een plat oppervlak. Keukenmeubel met oven Om veiligheidsredenen en om een gemakkelijke verwijdering van de oven uit het meubel mogelijk te maken, moeten de elektrische aansluitingen van de kookplaat en de oven afzonderlijk geïnstalleerd worden.
Elektrische voeding: 220-240 V ~ 50/60 Hz Categorie apparaat: II2E+3+ (BE) I2E (LU) Gasaansluiting: R 1/2" Apparaatklasse: 3 Bypassdiameters BRANDER Ø BYPASS 1/100 mm Snel 42 Normale brander 32 Sudderbrander 28 Gasbranders voor AARDGAS G20/G25 20/25 mbar (BE) - G20 20 mbar (LU) BRANDER NORMAAL VERMOGEN kW MINIMUM VERMOGEN kW INSPUITERMARKERING 1/100 mm Snel 2,9 0,75 119 Normale brander 1,9 0,45 96 Sudderbrander 1,0 0,33 70 Gasbranders voor lpg G30/G31 28-30/37 mbar BRANDER N
Aantal gasbranders Energiezuinigheid per gasbrander (EE gas burner) 4 Linksachter - Normale brander 55.0% Rechtsachter - Normale brander 55.0% Linksvoor - Snelle brander 57.6% Rechtsvoor - sudderbrander niet van toepassing Energiezuinigheid voor de gaskookplaat (EE gas hob) 55.9% EN 30-2-1: Huishoudelijke kooktoestellen op gas - Deel 2-1 : Energieverbruik - Algemeen Energie besparen • • • • • • • Zorg er voor gebruik voor dat de branders en pansteunen goed worden geplaatst.
Contents Safety information Safety instructions Product description Daily use Hints and tips 17 19 21 21 22 Care and cleaning Troubleshooting Installation Technical data Energy efficiency 23 24 25 28 30 Subject to change without notice. Safety information Before the installation and use of the appliance, carefully read the supplied instructions. The manufacturer is not responsible for any injuries or damages that are the result of incorrect installation or usage.
• • • • • • • • • • • • • 18 elements. Children less than 8 years of age shall be kept away unless continuously supervised. Do not operate the appliance by means of an external timer or separate remote-control system. WARNING: Unattended cooking on a hob with fat or oil can be dangerous and may result in fire. NEVER try to extinguish a fire with water, but switch off the appliance and then cover flame e.g. with a lid or a fire blanket. CAUTION: The cooking process has to be supervised.
suitable or hob guards incorporated in the appliance. The use of inappropriate guards can cause accidents. Safety instructions This appliance is suitable for the following markets: BE LU Installation WARNING! Only a qualified person must install this appliance. • • • • • • • • • • Remove all the packaging. Do not install or use a damaged appliance. Follow the installation instruction supplied with the appliance. Keep the minimum distance from the other appliances and units.
• • • Make sure that there is air circulation around the appliance. The information about the gas supply is on the rating plate. This appliance is not connected to a device, which evacuates the products of combustion. Make sure to connect the appliance according to current installation regulations. Pay attention to requirements regarding adequate ventilation. Use WARNING! Risk of injury, burns and electrical shock.
• Do not clean the burners in the dishwasher. Disposal • WARNING! • Cut off the mains electrical cable close to the appliance and dispose of it. Flat the external gas pipes. Service Risk of injury or suffocation. • • Contact your municipal authority for information on how to discard the appliance correctly. Disconnect the appliance from the mains supply. • • To repair the appliance contact an Authorised Service Centre. Use original spare parts only.
Burner overview If after some tries the burner does not light, check if the crown and its cap are in correct positions. WARNING! A B C A. Burner cap and crown B. Thermocouple C. Ignition candle Ignition of the burner Always light the burner before you put on the cookware. WARNING! Be very careful when you use open fire in the kitchen environment. The manufacturer declines any responsibility in case of the flame misuse. 1.
CAUTION! WARNING! Liquids spilt during cooking can cause the glass to break. Do not put the same pan on two burners. WARNING! Do not put unstable or damaged pots on the burner to prevent from spill and injury. Diameters of cookware Use cookware with diameters applicable to the size of burners. CAUTION! Burner Make sure that the bottoms of pots do not stand above the control knob, otherwise the flame heats the control knob up.
detergent. After cleaning, wipe the hob dry with a soft cloth. To clean the enamelled parts, cap and crown, wash them with warm soapy water and dry them carefully before you put them back on. • Cleaning the spark plug This feature is obtained through a ceramic ignition candle with a metal electrode. Keep these components well clean to prevent difficult lighting and check that the burner crown holes are not obstructed.
Labels supplied with the accessories bag Stick the adhesive labels as indicated below: A B MOD. MOD. PROD.NO. PROD.NO. SER.NO SER.NO DATA DATA C MOD. PROD.NO. SER.NO. 0049 TYPE IP20 03 IT MADE IN ITALY A. Stick it on Guarantee Card and send this part (if applicable). B. Stick it on Guarantee Card and keep this part (if applicable). C. Stick it on instruction booklet. Installation WARNING! Refer to Safety chapters.
A B C A. End of shaft with nut B. Washer C. Elbow (if needed) Liquid gas Use the rubber pipe holder for liquid gas. Always engage the gasket. Then continue with the gas connection.
• • • • • Always use a correctly installed shockproof socket. Make sure that there is an access to the mains plug after the installation. Do not pull the mains cable to disconnect the appliance. Always pull the mains plug. There is a risk of fire when the appliance is in connection with an extension cable, an adapter or a multiple connection. Make sure that the ground connection agrees with the standards and regulations. Do not let the power cable to heat up to a temperature higher than 90° C.
A. Removable panel B. Space for connections 7. Kitchen unit with oven The electrical connection of the hob and the oven must be installed separately for safety reasons and to let easy remove oven from the unit. CAUTION! Install the appliance only on a worktop with flat surface. Possibilities for insertion The panel installed below the hob must be easy to remove and let an easy access in case a technical assistance intervention is necessary.
Other technical data G20/G25 (2E+) 20/25 mbar (BE) = 7,7 kW G20 (2E) 20 mbar (LU) = 7,7 kW Gas original: TOTAL POWER: Gas replacement: G30 (3+) 28-30 mbar = 545 g/h G31 (3+) 37 mbar = 536 g/h Electric supply: 220-240 V ~ 50/60 Hz Appliance category: II2E+3+ (BE) I2E (LU) Gas connection: R 1/2" Appliance class: 3 Bypass diameters BURNER Ø BYPASS 1/100 mm Rapid 42 Semi-rapid 32 Auxiliary 28 Gas burners for NATURAL GAS G20/G25 20/25 mbar (BE) - G20 20 mbar (LU) BURNER NORMAL POWER kW MINI
Energy efficiency Product information according to EU 66/2014 Model identification ZGO63414BA Type of hob Built-in hob Number of gas burners 4 Energy efficiency per gas burner (EE gas burner) Left rear - Semi-rapid 55.0% Right rear - Semi-rapid 55.0% Left front - Rapid 57.6% Right front - Auxiliary not applicable Energy efficiency for the gas hob (EE gas hob) 55.
Table des matières Informations de sécurité Consignes de sécurité Description de l'appareil Utilisation quotidienne Conseils 31 33 36 36 37 Entretien et nettoyage En cas d'anomalie de fonctionnement Installation Caractéristiques techniques Rendement énergétique 38 39 40 43 45 Sous réserve de modifications. Informations de sécurité Avant d'installer et d'utiliser cet appareil, lisez soigneusement les instructions fournies.
• • • • • • • • • • • • 32 pas toucher les éléments chauffants. Les enfants de moins de 8 ans doivent être tenus à l'écart, à moins d'être surveillés en permanence. Ne faites pas fonctionner l'appareil avec un minuteur externe ou un système de commande à distance. AVERTISSEMENT : Il peut être dangereux de laisser chauffer de la graisse ou de l'huile sans surveillance sur une table de cuisson car cela pourrait provoquer un incendie. N'essayez JAMAIS d'éteindre un feu avec de l'eau.
• manchon isolant) avec des parties pouvant atteindre des températures supérieures de 50 °C à la température ambiante. AVERTISSEMENT : Utilisez uniquement les dispositifs de protection pour table de cuisson conçus ou indiqués comme adaptés par le fabricant de l'appareil de cuisson dans les instructions d'utilisation, ou les dispositifs de protection pour table de cuisson intégrés à l'appareil. L'utilisation de dispositifs de protection non adaptés peut entraîner des accidents.
• • • • • • La protection contre les chocs des parties sous tension et isolées doit être fixée de telle manière qu'elle ne peut pas être enlevée sans outils. Ne branchez la fiche d'alimentation à la prise de courant qu'à la fin de l'installation. Assurez-vous que la prise de courant est accessible une fois l'appareil installé. Si la prise de courant est lâche, ne branchez pas la fiche d'alimentation secteur. Ne tirez jamais sur le câble d'alimentation pour débrancher l'appareil.
• • • • • • • • • • Soulevez toujours ces objets lorsque vous devez les déplacer sur la surface de cuisson. Utilisez uniquement des récipients stables ayant une forme adaptée et un diamètre supérieur à celui des brûleurs. Assurez-vous que les récipients sont placés au centre des brûleurs. Assurez-vous que la flamme ne s'éteint pas lorsque vous tournez rapidement la manette de la position maximale à la position minimale. N'utilisez que les accessoires fournis avec l'appareil.
Description de l'appareil Description de la table de cuisson 1 2 1 2 3 4 3 Brûleur rapide Brûleur semi-rapide Brûleur auxiliaire Manettes de commande 4 Manette de commande Symbole Description pas d'alimentation en gaz / position Arrêt Symbole Description position d'allumage / alimentation en gaz maximale alimentation en gaz minimale Utilisation quotidienne AVERTISSEMENT! Vue d'ensemble des brûleurs Reportez-vous aux chapitres concernant la sécurité. A B C A. Chapeau et couronne du brûleur B.
C. Bougie d'allumage Allumage du brûleur Allumez toujours le brûleur avant de poser un récipient dessus. AVERTISSEMENT! Faites très attention lorsque vous utilisez une flamme nue dans une cuisine. Le fabricant décline toute responsabilité en cas de mauvaise utilisation de la flamme. 1. Enfoncez la manette et tournez-la vers la gauche jusqu'à la position d'arrivée de gaz maximale ( ). 2. Maintenez la manette enfoncée pendant 10 secondes environ. Cela permet au thermocouple de chauffer.
ATTENTION! Assurez-vous que le fond des récipients ne dépasse pas audessus de la manette de commande sinon la flamme fait chauffer la manette. Diamètres des récipients Utilisez uniquement des récipients dont le diamètre correspond aux dimensions des brûleurs. Brûleur ATTENTION! Assurez-vous que les poignées des récipients ne dépassent pas du devant de la table de cuisson.
Nettoyage de la table de cuisson Nettoyage de la bougie d'allumage • Cette fonctionnalité est obtenue grâce à une bougie d'allumage en céramique dotée d'une électrode en métal. Veillez à maintenir ces composants propres afin de faciliter l'allumage. Assurez-vous également que les orifices des couronnes des brûleurs ne sont pas obstrués. • • Enlevez immédiatement : plastique fondu, films plastiques, sucre et aliments contenant du sucre. Sinon, la saleté pourrait endommager la table de cuisson.
Si vous ne trouvez pas de solution... vente ou du vendeur pourra être facturé, même en cours de garantie. Les instructions relatives au service après-vente et aux conditions de garantie figurent dans le livret de garantie. Si vous ne trouvez pas de solution au problème, veuillez contacter votre revendeur ou un service après-vente agréé. Veuillez lui fournir les informations se trouvant sur la plaque signalétique. Assurez-vous d'utiliser correctement l'appareil.
tuyaux flexibles métalliques, ils ne doivent pas entrer en contact avec des parties mobiles ni être comprimés. Soyez également vigilant lorsque la table est installée avec un four. Assurez-vous que la pression de l'alimentation en gaz de l'appareil correspond aux valeurs recommandées. Le raccordement réglable est relié à la rampe complète par un écrou fileté R 1/2 po. Tous les composants apparaissant dans la figure ont déjà été assemblés en usine.
• • du gaz naturel G20/G25 20/25 mbar au gaz liquéfié, serrez entièrement la vis de réglage. du gaz liquéfié au gaz naturel G20/G25 20/25 mbar, dévissez la vis de réglage d'environ 1/4 de tour. doit être plus long d'environ 2 cm que le câble de phase marron (ou noir). Montage 1. AVERTISSEMENT! Assurez-vous que la flamme ne s'éteint pas lorsque vous tournez rapidement la manette de la position maximale à la position minimale.
5. au cas où une intervention technique serait nécessaire. Élément de cuisine avec porte 30 mm 6. A min 20 mm (max 150 mm) 60 mm A B B 7. A. Panneau amovible B. Espace pour les branchements ATTENTION! Installez l'appareil uniquement sur un plan de travail dont la surface est plane. Élément de cuisine avec four Les branchements électriques de la table de cuisson et du four doivent être installés séparément pour des raisons de sécurité et pour permettre un retrait facile du four de l'ensemble.
Autres caractéristiques techniques PUISSANCE TOTALE : Gaz d'origine : G20/G25 (2E+) 20/25 mbar (BE) = 7,7 kW G20 (2E) 20 mbar (LU) = 7,7 kW Gaz de remplacement : G30 (3+) 28-30 mbar = 545 g/h G31 (3+) 37 mbar = 536 g/h Alimentation électrique : 220-240 V ~ 50/60 Hz Catégorie de l'appareil : II2E+3+ (BE) I2E (LU) Raccordement au gaz : R 1/2" Classe de l'appareil : 3 Diamètres des vis de réglage BRÛLEUR Ø VIS DE RÉGLAGE 1/100 mm Rapide 42 Semi-rapide 32 Auxiliaire 28 Brûleurs à gaz pour
Rendement énergétique Informations de produit selon la norme EU 66/2014 Identification du modèle ZGO63414BA Type de table de cuisson Table de cuisson intégrée Nombre de brûleurs à gaz 4 Efficacité énergétique selon le brûleur à gaz (EE gas burner) Arrière gauche - Semi-rapide 55.0% Arrière droit - Semi-rapide 55.0% Avant gauche - Rapide 57.6% Avant droit - Auxiliaire non applicable Efficacité énergétique de la table de cuisson (EE gas hob) 55.
www.zanussi.
www.zanussi.
867329339-A-142016 www.zanussi.