User Manual GETTING STARTED? EASY.
SAFETY INFORMATION Before the installation and use of the appliance, carefully read the supplied instructions. The manufacturer is not responsible for any injuries or damages that are the result of incorrect installation or usage. Always keep the instructions in a safe and accessible location for future reference.
• • • • • • Ensure that the appliance is switched off before replacing the lamp to avoid the possibility of electric shock. Do not use a steam cleaner to clean the appliance. Do not use harsh abrasive cleaners or sharp metal scrapers to clean the glass door since they can scratch the surface, which may result in shattering of the glass.
• must have a contact opening width of minimum 3 mm. This appliance complies with the E.E.C. Directives. USE • • • WARNING! Risk of injury, burns and electrical shock or explosion. • • • • • • • • • • • • • This appliance is for household use only. Do not change the specification of this appliance. Make sure that the ventilation openings are not blocked. Do not let the appliance stay unattended during operation. Deactivate the appliance after each use.
• • • Disconnect the appliance from the mains supply. Cut off the mains electrical cable close to the appliance and dispose of it. Remove the door catch to prevent children or pets from becoming trapped in the appliance. SERVICE • To repair the appliance contact an Authorised Service Centre. • Use original spare parts only.
After approximately five seconds, the flashing stops and the display shows the time of day you set. CHANGING THE TIME You cannot change the time of day if the Duration operates. or End function Press again and again until the indicator for the Time of Day function flashes. To set a new time, refer to "Setting the time". 1. Set the function and the temperature to 250ºC. Let the appliance operate for 1 hour. 2. Set the function and the temperature to 250ºC. Let the appliance operate for 15 minutes. 3.
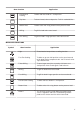
Oven function Application Conventional Cooking To bake and roast food on 1 shelf position. Top Heat To brown bread, cakes and pastries. To finish cooked dishes. Bottom Heat To bake cakes with crispy bottom and to preserve food. Grilling To grill flat food and to toast bread. Fast Grilling To grill flat food in large quantities and to toast bread. MAIN OVEN FUNCTIONS Symbol Oven function Application Light To activate the lamp without a cooking function.
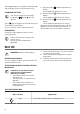
DISPLAY The electronic programmer works only with the main oven. A B A. Function indicators B. Time display C. Function indicator C BUTTONS Button Function Description MINUS To set the time. CLOCK To set a clock function. PLUS To set the time. CLOCK FUNCTIONS CLOCK FUNCTIONS TABLE Clock function Application Time of day To set, change or check the time of day. Minute Minder To set countdown time. This function has no effect on the operation of the appliance.
For the Minute Minder function the display shows the time left. 3. When the time ends the indicator of the clock function flashes and an acoustic signal sounds. Press a button to stop the signal. 4. Turn the knob for the oven functions and the knob for the temperature to the off position. CANCELLING THE CLOCK FUNCTIONS 1. Press the again and again until the necessary function indicator flashes. . 2. Press and hold The clock function goes out after some seconds.
2. Put the deep pan into the oven on the necessary shelf position. You can use the trivet to grill flat dishes in large quantities and to toast. 1. Put the trivet into the deep pan so that the supports of the wire shelf point down. 2. Put the deep pan into the oven on the necessary shelf position. ADDITIONAL FUNCTIONS COOLING FAN When the appliance operates, the cooling fan activates automatically to keep the surfaces of the appliance cool.
TIPS ON BAKING Baking results Possible cause Remedy The bottom of the cake is not browned sufficiently. The shelf position is incorrect. Put the cake on a lower shelf. The cake sinks and becomes soggy, lumpy or streaky. The oven temperature is too high. The next time you bake, set a slightly lower oven temperature. The cake sinks and becomes soggy, lumpy or streaky. The baking time is too short. Set a longer baking time. You cannot decrease baking times by setting higher temperatures.
Food Temperature (°C) Time (min) Shelf position - Madeira 140 - 150 75 - 90 2 - Rich Fruit 140 - 150 120 - 150 2 - Gingerbread 140 - 150 75 - 90 2 - Meringues 90 - 100 150 - 180 2 - Flapjack 160 - 170 25 - 30 2 - Shortbread 130 - 150 45 - 65 2 - Beef / Lamb 160 - 170 150 - 180 1 - Chicken 160 - 180 75 - 90 1 Convenience Foods Follow manufacturer's instructions.
ROASTING • Use heat-resistant ovenware to roast (refer to the instructions of the manufacturer). • You can roast large roasting joints directly in the deep pan (if present) or on the wire shelf above the deep pan. • Roast lean meats in the roasting tin with the lid. This keeps the meat more succulent. • All types of meat that can be browned or have crackling can be roasted in the roasting tin without the lid. • We recommend that you cook meat and fish weighing 1 kg and above in the appliance.
Lamb Food Quantity (kg) Temperature (°C) Time (min) Shelf position Leg of lamb, roast lamb 1 - 1.5 150 - 170 75 - 120 2 Saddle of lamb 1 - 1.5 160 - 180 60 - 90 2 Game Food Quantity (kg) Temperature (°C) Time (min) Shelf position Saddle of hare, leg of hare Up to 1 kg 220-250 25 - 40 2 Loin of Game 1.5-2 210-220 75 - 105 1 Leg of Game 1.
Grilling and Fast Grilling - Top oven Food Time (min) Bacon Rashers 5 -6 Beefburgers 10 - 20 Chicken Joints 20 - 40 Lamb Chops 15 - 25 Pork Chops 20 - 25 Whole Fish, Trout / Makarel 10 - 12 Fillets, Plaice / Cod 4-6 Kebabs 12 - 18 Kidneys, Lamb / Pig 6 - 10 Sausages 20 - 30 Toasted Sandwiches 3-4 Steaks: - Rare 4-6 - Medium 6-8 - Well Done 12 - 15 Grilling - Main oven Time (min) Food Temperature (°C) Shelf position 1st side 2nd side Roast beef 210 - 230 30 - 40 30 - 40
Fast Grilling - Main oven Time (min) Food Shelf position 1st side 2nd side Burgers / Burgers 8 - 10 6-8 4 Pork fillet 10 - 12 6 - 10 4 Sausages 10 - 12 6-8 4 Fillet / Veal steaks 7 - 10 6-8 4 Toast / Toast 1) 1-3 1-3 5 Toast with topping 6-8 - 4 1) Preheat the oven. DEFROST - MAIN OVEN Remove the food packaging and put the food on a plate. Use the first shelf position from the bottom. Do not cover the food with a bowl or a plate, as this can extend the defrost time.
• • • • • To clean metal surfaces, use a dedicated cleaning agent. Clean the appliance interior after each use. Fat accumulation or other food remains may result in a fire. The risk is higher for the grill pan. Clean stubborn dirt with a special oven cleaner. Clean all accessories after each use and let them dry. Use a soft cloth with warm water and a cleaning agent. If you have nonstick accessories, do not clean them using aggressive agents, sharp-edged objects or a dishwasher.
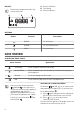
CAUTION! Rough handling of the glass, especially around the edges of the front panel, can cause the glass to break. 7. Pull the door trim to the front to remove it. 8. Hold the door glass panels on their top edge one by one and pull them up out of the guide. WARNING! Danger of electrocution! Disconnect the fuse before you replace the lamp. The lamp and the lamp glass cover can be hot. 1. Deactivate the appliance. 2. Remove the fuses from the fuse box or deactivate the circuit breaker.
Problem Possible cause Remedy The lamp does not operate. The lamp is defective. Replace the lamp. Steam and condensation settle on the food and in the cavity of the oven. You left the dish in the oven for too long. Do not leave the dishes in the oven for longer than 15 - 20 minutes after the cooking process ends. The display shows "12.00". There was a power cut. Reset the clock.
EN 60350-1 - Household electric cooking appliances - Part 1: Ranges, ovens, steam ovens and grills - Methods for measuring performance. ENERGY SAVING The appliance contains features which help you save energy during everyday cooking. • General hints – Make sure that the oven door is closed properly when the appliance operates and keep it closed as much as possible during the cooking. – Use metal dishes to improve the energy saving. – When possible, put the food inside the oven without heating it up.
867326576-B-142016 WWW.ZANUSSI.