DIEPVRIEZER FREEZER ZBF7116 GEBRUIKSAANWIJZING INSTRUCTION BOOKLET 2223 494-12
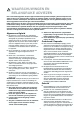
INHOUD Waarschuwingen en belangrijke adviezen 3 Het gebruik 5 Technische gegevens Reiniging van de binnenkant Bedieningspaneel 5 5 Installatie Display 5 Gebruik van het vriesvak Invriezen van verse levensmiddelen Bewaren van diepvriesproducten Diepvrieskalender Ontdooien van diepvriesproducten IJslaatjes 6 6 6 7 7 7 Tips 8 Tips m.b.t. invriezen Tips m.b.t.
WAARSCHUWINGEN EN BELANGRIJKE ADVIEZEN Het is uiterst belangrijk dat de bij het apparaat behorende gebruiksaanwijzing bewaard blijft. Zou het apparaat door u aan iemand anders gegeven of verkocht worden, of zou het apparaat in het huis van waaruit u verhuist achterblijven, dan dient de nieuwe gebruik(st)er over de gebruiksaanwijzing en de daarin opgenomen waarschuwingen te kunnen beschikken.
■ ■ ■ onherstelbare schade aan het apparaat en bederf van de levensmiddelen veroorzaakt. Geen voorwerpen of methodes gebruiken om het ontdooiproces te versnellen die niet door de fabrikant zijn aangegeven. Nooit metalen voorwerpen gebruiken om het apparaat schoon te maken; dit zou het apparaat kunnen beschadigen. Plaats geen koolzuurhoudende of mousserende dranken in het vriesvak, het vriesgedeelte of de vriezer; de blikjes of flesjes kunnen door bevriezing van de inhoud exploderen.
HET GEBRUIK Dit apparaat is voorzien van het 4-sterren symbool dat wil zeggen dat het bedoeld is voor zowel het bewaren van diepvriesartikelen als voor het zelf invriezen van verse levensmiddelen. Voor het veilig bewaren van diepvriesartikelen dient de inwendige temperatuur niet warmer dan -18°C te zijn. Reiniging van de binnenkant Voor u de kast in gebruik neemt, dient u de binnenkant met lauw water en een neutraal schoonmaakmiddel te reinigen om de typische geur van een nieuw apparaat weg te nemen.
Werking De functies inschakelen Druk op toets (A) om de apparatuur in te schakelen, als het display niet brandt nadat de stekker in het stopcontact gedaan is. Zodra de apparatuur ingeschakeld is, zijn de volgende signaleringen op het bedieningspaneel te zien: • Het symbool (2) zal positief zijn om aan te geven dat de temperatuur boven nul is.
Bewaren van diepvriesprodukten Alarm voor overtemperatuur Wacht na de inbedrijfstelling of na een periode waarin het apparaat niet gebruikt is minstens 12 uur alvorens de voedingsmiddelen in het apparaat te doen. Aangeraden wordt de knop op de tussenstand te houden. Als u grote hoeveelheden voedsel moet invriezen, kunt u alle laden en manden uit het apparaat verwijderen en het voedsel direct op de koelplaten leggen.
TIPS Tips m.b.t. invriezen Teneinde de best mogelijke resultaten te verkrijgen geven wij u hieronder enkele belangrijke tips: ■ De max. hoeveelheid levensmiddelen die u kunt invriezen in 24 uur staat aangegeven op het typeplaatje. ■ Het invriezen duurt 24 uur. Voeg gedurende deze tijd geen andere in te vriezen levensmiddelen toe. ■ Vries uitsluitend levensmiddelen van eerste kwaliteit in. ■ Zie toe dat de levensmiddelen vers zijn en maak ze, waar nodig, van te voren goed schoon.
ONDERHOUD Tijdelijk buiten gebruik stellen Neem voor iedere handeling altijd eerst de stekker uit het stopcontact. Tijdens de periodes waarin het apparaat niet gebruikt wordt, de volgende aanwijzingen opvolgen: - de stekker uit het stopcontact halen; - alle levensmiddelen verwijderen, - het apparaat laten ontdooien en de - binnenwanden en accessoires schoonmaken; - de deur op een kier laten staan zodat er geen onaangename geuren ontstaan.
INSTALLATIE Indien dit apparaat in de plaats van een oud model met haak- of veersluiting opgesteld wordt, dan is het raadzaam de sluiting van het oude apparaat, onbruikbaar te maken. Hiermee wordt voorkomen dat spelende kinderen zich erin opsluiten, hetgeen levensgevaarlijk is. Dit apparaat voldoet aan de EG-richtlijn 87/308 van 2.6.87 met betrekking tot de radio-ontstoring.
min. 2 200 cm 50 mm Aanwijzingen voor de geïntegreerde inbouw Nismaten Hoogte (1) 1030 mm Diepte (2) 550 mm Breedte (3) 560 mm min. 200 cm2 Om veiligheidsredenen moet de ventilatie zodanig zijn als aangegeven in Fig. D567 Attentie: zorg ervoor dat de ventilatie openingen tijdens gebruik niet worden afgedekt. 540 3 De nis moet tevens voorzien zijn van een luchtkanaal met de volgende afmetningen: diepte 50 mm breedte 540 mm 50 2 1 PR0 .
U moet het gedeelte van het kunststof deksel (E), dat gebruikt wordt om het scharnier af te dekken, verwijderen, zoals aangegeven op de tekening. Deze handeling wordt vergemakkelijkt omdat er aan de binnenkant van het scharnierdeksel een groef is aangebracht, waardoor u dit onderdeel makkelijker kunt verwijderen. "Verwijder het onderdeel dat gemarkeerd is met DX, als de scharnierpen in het rechter scharnier is geplaatst, in het tegenovergestelde geval het onderdeel gemarkeerd met SX verwijderen.
De deur van het apparaat en die van de kast met een hoek van ongeveer 90° openen. IJzer (Hb) in geleider (Ha) aanbrengen. De deuren samen vasthouden en de gaten aangeven zoals in de tekening. 8mm Ha Hb PR167 Verwijder de haken en zet met de spijker (K) een teken op 8 mm van de buitenste rand van de deur. 8mm K Ha Plaats het ijzer opnieuw op de geleider en bevestig het met de bijgeleverde schroeven. Voor het rechtstellen van de kastdeur kunt u gebruik maken van de langwerpige gaten.
CONTENTS Instructions for the User Instructions for the Installer Important Safety Instructions 15 Technical specifications 21 Use 16 Installation 21 Cleaning the interior Control panel 16 17 Display 17 Positioning Electrical connection Door reversal Instructions for totally built-in appliances Use of the freezer compartment 18 Freezing of fresh foods Storage of commercially frozen food 18 18 Freezing calendar Thawing 19 19 Ice-cube production 19 Tips Tips for freezing fresh foods Tips
IMPORTANT SAFETY INSTRUCTIONS It is most important that this instruction book should be retained with the appliance for future reference. Should the appliance be sold or transferred to another owner, or should you move house and leave the appliance, always ensure that the book is supplied with the appliance in order that the new owner can be acquainted with the functioning of the appliance and the relevant warnings. These warnings are provided in the interest of safety.
■ ■ ■ ■ ■ personnel using a special cable of the same type. During normal operation, the condenser and compressor at the back of the appliance heat up considerably. For safety reasons, minimum ventilation must be as shown in the relevant paragraph. Attention: keep ventilation openings clear of obstruction. If the appliance is transported horizontally, it is possible that the oil contained in the compressor flows in the refrigerant circuit.
Control panel A ABCD- B C D Appliance button ON/OFF Temperature and function indicator Function button Freezer Thermostat control knob DISPLAY 1 1. 2. 3. 4. 2 3 4 Door open alarm indicator Positive or negative Temperature indicator Temperature indicator If on the fast freeze function is on Operation Activation of functions After plugging the plug into the power outlet, if the display is not illuminated, press key (A), appliance on.
Use of the freezer compartment Temperature regulation The temperature is automatically regulated and can be increased to achieve a higher temperature (warmer) by rotating the thermostat knob toward l settings or reduced (colder) rotating the knob towards l settings. However, the exact setting should be chosen keeping in mind that the temperature inside the refrigerator depends on: • room temperature; • how often the door is opened; • the quantity of food stored; • location of appliance.
Door open acoustic alarm The numbers indicate storage times in months for the appropriate types of frozen goods. Whether the upper or lower value of the indicated storage time is valid depends on the quality of the foods and pretreating before freezing. An acoustic alarm will sound when the door is left open for more than 1 minute. The door open alarm conditions are indicated by: - flashing symbol (1); - red display illumination; - beeping sound. Press the button (C) to stop the acoustic alarm.
MAINTENANCE Unplug the appliance before carrying out any maintenance operation. Warning This appliance contains hydrocarbons in its cooling unit maintenance and recharging must therefore only be carried out by authorised technicians. Periodic cleaning Never use metal objects for clearing your appliance as it may get damaged. Clean the inside with warm water and bicarbonate of soda. Rinse and dry thoroughly.
TECHNICAL INFORMATION The technical infomation are situated in the rating plate on the internal left side of the appliance . INSTALLATION lf this appliance featuring magnetic door seals is to replace an older appliance having a spring lock (latch) on the door or lid, be sure to make that spring lock unusable before you discard the old appliance. This will prevent it from becoming a death-trap for a child.
Door Reversibility The appliance is supplied with the door opening to the right. For door opening in the opposite direction, perform the following actions prior to installation 1. Unscrew the upper pin and remove the spacer 2. Remove the door. 3. Unscrew with a key the lower pin and replace it on the opposite side. 4. Reinsert the door, refit the spacer and rescrew the upper pin on the opposite side. min. 2 200 cm 50 mm Instructions for totally built-in appliances Building-in instructions min.
Fasten the appliance with 4 screws provided in the kit included with the appliance. I I Apply the sealing strip pushing it between the refrigerator and the adjacent cabinet. D724 From the plastic cover (E), which is used to cover the hinge with the pivot pin, you must take away the part as indicated in the drawing. This operation is made easer since there is, in the internal part of the cover hinge lid a groove that facilates the removal of this coomponent.
Separate parts Ha, Hb, Hc, Hd as shown in the figure. Ha Hb Hc Hd PR266 Place guide (Ha) on the inside part of the furniture door, up and down as shown in the figure and mark the position of external holes. After having drilled holes, fix the guide with the screws supplied. ca. 50 mm 90° 21 m m 90° ca. 50 mm 21 m m Fix cover (Hc) on guide (Ha) until it clips into place Ha Hc PR33 Open the appliance door and the furniture door at 90°. Insert the small square (Hb) into guide (Ha).
Remove the brackets and mark a distance of 8 mm from the outer edge of the door where the nail must be fitted (K). 8mm K Ha Place the small square on the guide again and fix it with the screws supplied. Should the lining up of the furniture door be necessary, use the clearance of slots. At the end of operations, it is necessary to check if the door of the furniture closes properly. Hb PR168 Fix cover (Hd) on guide (Hb) until it clips into place.
www.electrolux.com www.zanussi.