BUILT-IN OVEN ZBF 865 INSTRUCTION BOOKLET Please read this instruction booklet before using the appliance GB
Important Safety Information You MUST read these warnings carefully before installing or using the oven. If you need assistance, contact our Customer Care Department on 08705 727727 Installation Maintenance and Cleaning This oven must be installed by qualified personnel to the relevant British Standards. Only clean this oven in accordance with the instructions. This oven is heavy. Take care when moving it. Remove all packaging, both inside and outside the oven, before using the oven.
Contents For the User For the Installer Important Safety Information 2 Installation 21 Description of the Oven 4 Electrical Connection 21 Controls 5 Building In 22 24 hour Clock and Timer 6 Before the First Use 8 Using the Oven 8 Hints and Tips 8 The Fan Oven 9 Cooking Chart - Fan Oven 10 Defrosting 11 Grilling 12 Cooking Chart - Grilling 13 Cleaning the Oven 14 Care of catalytic liners 15 Cleaning the hinged grill 16 Replacing the Oven Light 16 Something not working
Description of the Oven Thermostat Control Light Oven Function Control Knob Thermostat Control Knob 24 hour Clock and Timer Grill Element Oven Light Fan Rating Plate Oven accessories Grill trivet Grill/roasting pan Removable handles Anti-tip shelf (x 2) 4
Controls Oven Function Control Knob OFF Oven Light - The oven light will be on without any cooking function 0 Inner grill element only - can be used for grilling small quantities. Double Grill - The full grill element will be on. Thermal Grilling - This function offers an alternative method of cooking food items, normally associated with conventional grilling. The grill element and the oven fan operate together, circulating hot air around the food.
24 hour Clock and Timer Minute minder Cookpot symbol Cooking duration End of cooking time Manual function A U T O Cookpot symbol - This will be displayed when a program is in operation. - + Auto symbol - This will be displayed when the oven has been programmed for automatic operation. A U T O - + Programming controls Time setting knob The electronic timer can indicate the time of day, operate as a minute minder and automatically operate the oven.
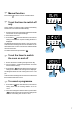
F Manual function Press button to set the oven for manual function. F To set the timer to switch off - + only This is useful if you want to begin cooking immediately but have the oven switch off automatically. 1. Set the oven function control knob and the thermostat control knob on the required settings. 2. Place food in the oven. and, at the same time, turn the time 3. Press button setting knob until the required cooking duration is displayed. Our diagram shows the timer set for 1 hour 10 minutes.
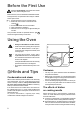
Before the First Use Remove all packaging, both inside and outside the oven, before using the oven. Before first use, the oven should be heated without food. During this time, an unpleasant odour may be emitted. This is quite normal. 1. Set the electronic timer to manual function. 2. Switch the oven function control knob to fan cooking . 3. Set the thermostat control knob to MAX. 4. Open a window for ventilation. 5. Allow the oven to run empty for approximately 45 minutes.
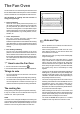
The Fan Oven The air inside the oven is heated by the element around the fan situated behind the back panel. The fan circulates hot air to maintain an even temperature inside the oven. The advantage of cooking with this function is energy saving through: l l Faster Preheating As the fan oven quickly reaches temperature, it is not usually necessary to preheat the oven although you may find that you need to allow an extra 5-7 minutes on cooking times.
Cooking Chart - Fan Oven This chart is intended as a guide only. It may be necessary to increase or decrease the temperature to suit your individual requirements. Only experience will enable you to determine the correct setting for your personal requirements.
Defrosting Hints and Tips The oven fan operates without heat and circulates the air, at room temperature, inside the oven. This increases the speed of defrosting. However, please note that the temperature of the kitchen will influence the speed of defrosting. This function is particularly suitable for delicate food which could be damaged by heat, e.g. cream filled gateaux, iced cakes, pastries, bread and other yeast products. F How to Use Defrosting 1. Turn the oven function control knob to .
Grilling Grilling must be carried out with the oven door closed. The grill pan handles must be removed from the pan. F How to Use the Grill 1. Turn the oven control function knob on . 2. Turn the thermostat control knob on the required temperature. 3. Adjust the grid and grill pan runner position to allow for different thicknesses of food. Position the food close to the element for faster cooking and further away for more gentle cooking.
Hints and Tips Prepare foods in the same way as for conventional grilling. Brush lean meats and fish lightly with little oil or butter to keep them moist during cooking. A general guide to cooking times is given below but these times may vary slightly depending on the thickness and quantity of food being cooked.
Cleaning the Oven Before cleaning always allow the cooling fan to cool the oven down before switching off at the electricity supply. The oven should be kept clean at all times. A build-up of fats or other foodstuffs could result in a fire, especially in the grill pan. Cleaning materials Before using any cleaning materials on your oven, check that they are suitable and that their use is recommended by the manufacturer. Cleaners that contain bleach should NOT be used as they may dull the surface finishes.
Grease Filter To prevent a build-up of fats on the fan impellor, the grease filter must be fitted by clipping it over the vents in the back panel. To clean the grease filter When the oven has cooled down, remove the filter by pushing the protruding tongue on the filter upward, and wash carefully. The grease filter should be cleaned after every use. The filter may be washed in a dishwasher on a 65°C wash.
Cleaning the hinged grill This model has been fitted with a hinged grill element to enable you to clean the roof of the oven easily. Before proceeding ensure the oven is cool and is isolated from the electricity supply. the screws which holds the grill in place F 1)(seeUndo diagram). When doing this operation for the first time, we recommend using a screwdriver. 2) Then gently pull the grill downward to allow access to the oven roof (see diagram).
Something not working If the oven is not working correctly, please carry out the following checks, before contacting your local Zanussi Service Centre. IMPORTANT: If you call out an engineer to a fault listed below, or to repair a fault caused by incorrect use or installation, a charge will be made even if the appliance is under guarantee. SYMPTOM n The oven does not come on SOLUTION u Check the oven is in manual operation and that both a cooking function and temperature have been selected.
Service and Spare Parts If you require spare parts or an engineer contact your local Service Force Centre by telephoning: 0870 5 929929 Your call will be routed to your local Service Force Centre. For further details, please see the accompanying Customer Care Booklet. For general enquiries concerning your Zanussi appliance or for further information on Zanussi products, please contact our Customer Care Department by letter or telephone at the address below or visit our website at www.zanussi.co.
To contact your local Service Force Centre telephone 08705 929 929 CHANNEL ISLANDS GUERNSEY Guernsey Electricity PO Box 4 Vale, Guernsey Channel Islands GY1 3AD JERSEY Jersey Electricity Company Haut De Lorme Rue De Haut De Lorme Trinity Jersey Channel Islands JE3 5FG SCOTLAND ABERDEEN AUCHTERMUCHTY BLANTYRE 54 Claremont Street Aberdeen AB10 6RA 33a Burnside Auchtermuchty Fife KY14 7AJ Unit 5 Block 2 Auchenraith Ind.
To contact your local Service Force Centre telephone 08705 929 929 MIDLANDS BIRMINGHAM 66 Birch Road East Wyrley Trading Estate Witton Birmingham B6 7DB BOURNE Pinfold Road Bourne PE10 9HT BRIDGNORTH 68 St.
Installation The oven must be installed according to the instructions supplied. Heating elements rating Technical Data DIMENSIONS OF RECESS Height Width Depth DIMENSIONS OF THE OVEN CAVITY This oven must be installed by qualified personnel to the relevant British Standards. 580 mm. 560-570 mm. 550 mm. Height Width Depth Oven capacity 320 mm. 420 mm. 390 mm. 53.
Building In Please ensure that when the oven is installed it is easily accessible for the engineer in the event of a breakdown. Building In The surround or cabinet into which the oven will be built must comply with these specifications: l the dimensions must be as shown in the relevant diagrams; l the materials must withstand a temperature increase of at least 60°C above ambient; l proper arrangements must be made of a continuous supply of air to the oven to prevent the oven overheating.
Grafiche MDM - Forlì CUSTOMER CARE Zanussi 55-77 High Street Slough Berkshire, SL1 1DZ Tel: 08705 727727 © Electrolux Household Appliances Limited 2000 From the Electrolux Group. The worlds No.1 choice. The Electrolux Group is the worlds largest producer of powered appliances for kitchen, cleaning and outdoor use. More than 55 million Electrolux Group products (such as refrigerators, cookers, washing machines, vacuum cleaners, chain saws and lawn mowers) are sold each year to a value of approx.