NL EN PT Gebruiksaanwijzing User manual Manual de instruções Koel-vriescombinatie Fridge-Freezer Combinado ZBB8297 2 16 29
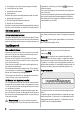
Inhoud Veiligheidsinformatie _ _ _ _ _ _ _ _ _ _ _ _ _ _ _ Bedieningspaneel _ _ _ _ _ _ _ _ _ _ _ _ _ _ _ _ _ Het eerste gebruik _ _ _ _ _ _ _ _ _ _ _ _ _ _ _ _ _ Dagelijks gebruik _ _ _ _ _ _ _ _ _ _ _ _ _ _ _ _ _ Nuttige aanwijzingen en tips _ _ _ _ _ _ _ _ _ _ _ _ 2 4 6 6 7 Onderhoud en reiniging _ _ _ _ _ _ _ _ _ _ _ _ _ _ 8 Problemen oplossen _ _ _ _ _ _ _ _ _ _ _ _ _ _ _ 10 Technische gegevens _ _ _ _ _ _ _ _ _ _ _ _ _ _ 11 Montage _ _ _ _ _ _ _ _ _ _ _ _ _ _ _ _ _ _ _ _ 11 Het milieu _ _ _ _ _ _ _
Waarschuwing! Alle elektrische onderdelen (netsnoer, stekker, compressor) mogen uitsluitend vervangen worden door een erkende onderhoudsdienst of gekwalificeerd onderhoudspersoneel. 1. Het netsnoer mag niet verlengd worden. 2. Verzeker u ervan dat de stekker niet platgedrukt of beschadigd wordt door de achterkant van het apparaat. Een platgedrukte of beschadigde stekker kan oververhit raken en brand veroorzaken. 3. Verzeker u ervan dat u de stekker van het apparaat kunt bereiken. 4. Trek niet aan het snoer.
Bescherming van het milieu • Verzeker u ervan dat de stekker bereikbaar is nadat het apparaat geïnstalleerd is. • Sluit het apparaat alleen aan op een drinkwaterleiding. Dit apparaat bevat geen gassen die de ozonlaag kunnen beschadigen, niet in het koelcircuit en evenmin in de isolatiematerialen. Het apparaat mag niet worden weggegooid bij het normale huishoudelijke afval.
Uitschakelen Het apparaat wordt uitgeschakeld door de AAN/UIT-schakelaar langer dan 1 seconde ingedrukt te houden. Daarna wordt het aftellen van de temperatuur van -3 -2 -1 weergegeven. Wanneer het apparaat wordt uitgeschakeld, gaat het display ook uit. Temperatuurdisplay Iedere keer dat de indicatietoets temperatuur van de koelvriescombinatie wordt ingedrukt, geeft het display het volgende aan: 1. – De indicatie koelvak is aan. – Het display geeft de koelkasttemperatuur aan. 2.
• het knipperen van het vriesvak (weergave vriesvak) • rood lampje op het display • het geluid van de zoemer • alarmsymbool Wanneer de normale omstandigheden worden hersteld: • gaat het geluidssignaal uit • blijft de temperatuurwaarde knipperen • display blijft rood branden. Wanneer u op de functietoets/alarmterugzettoets drukt om het alarm uit te schakelen, verschijnt de hoogst bereikte temperatuur in het vak op het display gedurende enkele seconden.
Ontdooien Diepgevroren of ingevroren voedsel kunt, voordat het gebruikt wordt, in het koelvak of op kamertemperatuur laten ontdooien, afhankelijk van de hoeveelheid tijd die hiervoor nodig is. Kleine stukken kunnen zelfs rechtstreeks vanuit de vriezer gekookt worden als ze nog bevroren zijn: in dat geval zal de bereiding iets langer duren.
• plaats het voedsel zodanig dat de lucht er vrijelijk omheen kan circuleren Nuttige tips voor het koelen Nuttige tips: Vlees (alle soorten) in plastic zakken verpakken en op het glazen schap leggen, boven de groentelade. Bewaar het, voor de veiligheid, slechts een of maximaal twee dagen op deze manier. Gekookt voedsel, koude schotels, enz.: deze moeten afgedekt worden en mogen op willekeurig welk schap gezet worden.
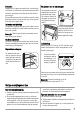
Maak de condensor (zwart rooster) en de compressor op de achterkant van het apparaat schoon met een borstel of stofzuiger. Deze handeling zal de prestatie van het apparaat verbeteren en het elektriciteitsverbruik besparen. Belangrijk! Zorg ervoor dat u het koelsysteem niet beschadigt. Veel normaal verkrijgbare keukenreinigers bevatten chemicaliën die de kunststoffen die in dit apparaat gebruikt zijn kunnen aantasten/beschadigen.
Problemen oplossen Waarschuwing! Voordat u storingen opspoort, de stekker uit het stopcontact trekken. Het opsporen van storingen die niet in deze handleiding vermeld zijn, dient te worden verricht door een gekwalificeerd technicus of competent persoon. Probleem Het apparaat werkt niet. Het lampje brandt niet. Het lampje werkt niet. De compressor werkt continu. Belangrijk! Er zijn tijdens de normale werking geluiden te horen (compressor, koelcircuit).
Probleem Mogelijke oorzaak Er zijn veel producten tegelijk opgeborgen. Oplossing Berg minder producten tegelijk op. De temperatuur in de koelkast is Er is geen koude luchtcirculatie in het Zorg ervoor dat er koude luchtcirculatie te hoog. apparaat. in het apparaat is. De temperatuur in het vriesvak is Producten liggen te dicht op elkaar. te hoog. Berg de producten zodanig op dat er koude lucht kan circuleren. Er is te veel rijp. Het product is niet goed verpakt.
Klimaatklasse Het apparaat moet geaard zijn. De netsnoerstekker is voorzien van een contact voor dit doel. Als het stopcontact niet geaard is, sluit het apparaat dan aan op een afzonderlijk aardepunt, in overeenstemming met de geldende regels, raadpleeg hiervoor een gekwalificeerd elektricien. De fabrikant neemt geen verantwoordelijkheid op zich als de bovenstaande veiligheidsmaatregelen niet worden nageleefd. Dit apparaat voldoet aan de EU. richtlijnen.
2 I 4mm 1 44mm I Installeer het apparaat in de nis. Duw het apparaat in de richting van de pijlen (1) totdat de afdekking van de opening tegen het keukenmeubel aankomt. Zorg ervoor dat de afstand tussen het apparaat en de voorste rand van de kast 44 mm is. Duw het apparaat in de richting van de pijlen (2) tegen de kast aan de andere kant van het scharnier. Zorg ervoor dat er een ruimte van 4 mm tussen het apparaat en de kast aanwezig is.
ca. 50 mm Ha Hb Ha 90° 8 mm 21 mm 90° Hc Hd Ha Hc ca. 50 mm 21 mm Maak de onderdelen (Ha), (Hb), (Hc) en (Hd) los. Hb Duw onderdeel (Hc) op Monteer onderdeel (Ha) aan de binnenkant van het onderdeel (Ha). keukenmeubel. Zet de deur van het apparaat en de deur van het keukenmeubel open onder een hoek van 90°. Plaats het kleine vierkantje (Hb) in de geleider (Ha). Zet de deur van het apparaat en de deur van het keukenmeubel tegen elkaar en markeer de gaten.
gemeente, de gemeentereiniging of de winkel waar u het product hebt gekocht.
Contents Safety information _ _ _ _ _ _ _ _ _ _ _ _ _ _ _ _ Control panel _ _ _ _ _ _ _ _ _ _ _ _ _ _ _ _ _ _ First use _ _ _ _ _ _ _ _ _ _ _ _ _ _ _ _ _ _ _ _ Daily use _ _ _ _ _ _ _ _ _ _ _ _ _ _ _ _ _ _ _ _ Helpful hints and tips _ _ _ _ _ _ _ _ _ _ _ _ _ _ 16 18 20 20 21 Care and cleaning _ _ _ _ _ _ _ _ _ _ _ _ _ _ _ _ What to do if… _ _ _ _ _ _ _ _ _ _ _ _ _ _ _ _ _ Technical data _ _ _ _ _ _ _ _ _ _ _ _ _ _ _ _ _ _ Installation _ _ _ _ _ _ _ _ _ _ _ _ _ _ _ _ _ _ _ Environmental concerns _ _ _ _ _
or damaged power plug may overheat and cause a fire. 3. Make sure that you can come to the mains plug of the appliance. 4. Do not pull the mains cable. 5. If the power plug socket is loose, do not insert the power plug. There is a risk of electric shock or fire. 6. You must not operate the appliance without the lamp cover7) of interior lighting. • This appliance is heavy. Care should be taken when moving it.
Environment Protection insulation foam contains flammable gases: the appliance shall be disposed according to the applicable regulations to obtain from your local authorities. Avoid damaging the cooling unit, especially at the rear near the heat exchanger. The materials used on this appliance marked by the are recyclable. symbol This appliance does not contain gasses which could damage the ozone layer, in either its refrigerant circuit or insulation materials.
– The display indicates the freezer temperature. In any case, after 10 seconds normal display conditions are restored. Functions menu Each time Function button is pressed, the following functions are activated in a clockwise direction: • Fast Freeze function • Shopping function • no symbol: normal operation. Important! You can set one function ON at a time. To set the functions OFF, press the Function button several times until no icon appears.
First use Cleaning the interior Before using the appliance for the first time, wash the interior and all internal accessories with lukewarm water and some neutral soap so as to remove the typical smell of a brand-new product, then dry thoroughly. Important! Do not use detergents or abrasive powders, as these will damage the finish. Daily use Freezing fresh food The freezer compartment is suitable for freezing fresh food and storing frozen and deep-frozen food for a long time.
Movable shelves Air cooling The Dynamic Air Cooling (DAC) fan let food cool quickly and a more uniform temperature in the compartment. The walls of the refrigerator are equipped with a series of runners so that the shelves can be positioned as desired. 1. You can switch on the fan by pressing the switch (1). The green light (2) comes on. 2 1 Positioning the door shelves To permit storage of food packages of various sizes, the door shelves can be placed at different heights.
Hints for freezing To help you make the most of the freezing process, here are some important hints: • the maximum quantity of food which can be frozen in 24 hrs. is shown on the rating plate; • the freezing process takes 24 hours.
In order to speed up the defrosting process, place a pot of warm water in the freezer compartment. In addition, remove pieces of ice that break away before defrosting is complete. 4. When defrosting is completed, dry the interior thoroughly and keep the scraper for future use. 5. Switch on the appliance. 6. After two or three hours, reload the previously removed food into the compartment.
Problem Possible cause Solution The mains plug is not connected to the Connect the mains plug to the mains mains socket correctly. socket correctly. The appliance has no power. There is Connect a different electrical appliance no voltage in the mains socket. to the mains socket. Contact a qualified electrician. The lamp does not work. The compressor operates continually. Water flows on the rear plate of the refrigerator. The lamp is in stand-by. Close and open the door. The lamp is defective.
Problem Possible cause Solution The temperature regulator is not set correctly. Replacing the lamp 1. Disconnect the mains plug from the mains socket. 2. Press on the rear hook and at the same time slide the lamp cover in the direction of the arrow. 3. Replace the lamp with one of the same power and specifically designed for household appliances. (the maximum power is shown on the light lamp cover) Set a higher temperature. 4. Install the lamp cover by sliding it into its original position. 5.
Electrical connection Before plugging in, ensure that the voltage and frequency shown on the rating plate correspond to your domestic power supply. The appliance must be earthed. The power supply cable plug is provided with a contact for this purpose. If the domestic power supply socket is not earthed, connect the appliance to a separate earth in compliance with current regulations, consulting a qualified electrician.
2 I 4mm 1 44mm I Install the appliance in the niche. Push the appliance in the direction of the arrows (1) until the upper gap cover stops against the kitchen furniture. Make sure that the distance between the appliance and the cupboard front-edge is 44 mm. Push the appliance in the direction of the arrows (2) against the cupboard on the opposite side of the hinge. Make sure that the clearance between the appliance and the cupboard is 4 mm.
ca. 50 mm Ha Hb Ha 90° 8 mm 21 mm 90° Hc Hd Ha Hc ca. 50 mm 21 mm Disconnect the parts (Ha), Install the part (Ha) on the (Hb), (Hc) and (Hd). inner side of the kitchen furniture. Hb Push the part (Hc) on the Open the appliance door and part (Ha). the kitchen furniture door at an angle of 90°. Insert the small square (Hb) into guide (Ha). Put together the appliance door and the furniture door and mark the holes.
Índice Informações de segurança _ _ _ _ _ _ _ _ _ _ _ _ Painel de controlo _ _ _ _ _ _ _ _ _ _ _ _ _ _ _ _ Primeira utilização _ _ _ _ _ _ _ _ _ _ _ _ _ _ _ _ Utilização diária _ _ _ _ _ _ _ _ _ _ _ _ _ _ _ _ _ Sugestões e conselhos úteis _ _ _ _ _ _ _ _ _ _ _ 29 31 33 33 34 Manutenção e limpeza _ _ _ _ _ _ _ _ _ _ _ _ _ _ O que fazer se… _ _ _ _ _ _ _ _ _ _ _ _ _ _ _ _ Dados técnicos _ _ _ _ _ _ _ _ _ _ _ _ _ _ _ _ _ Instalação _ _ _ _ _ _ _ _ _ _ _ _ _ _ _ _ _ _ _ _ Preocupações ambientais _ _ _ _ _ _ _
2. Certifique-se de que a ficha não está esmagada ou danificada pela parte traseira do aparelho. Uma ficha esmagada ou danificada pode sobreaquecer e causar um incêndio. 3. Certifique-se de que consegue alcançar a ficha do aparelho. 4. Não puxe o cabo de alimentação. 5. Se a tomada da ficha de alimentação estiver solta, não introduza a ficha de alimentação. Existe um risco de choque eléctrico ou incêndio. 6. Não deve utilizar o aparelho sem a tampa da lâmpada 13) iluminação interior.
• A manutenção deste produto deve ser efectuada por um Centro de Assistência autorizado, o qual deverá utilizar apenas peças sobressalentes originais. deverá ser eliminado juntamente com o lixo doméstico. A espuma de isolamento contém gases inflamáveis: o aparelho deverá ser eliminado de acordo com as normas aplicáveis que pode obter junto das autoridades locais. Evite danificar a unidade de arrefecimento, especialmente na parte traseira, perto do permutador de calor.
1. – O indicador do compartimento do frigorífico está aceso. – O ecrã indica a temperatura do frigorífico. 2. – O indicador do compartimento do congelador está aceso. 17) – O ecrã indica a temperatura do congelador. Em qualquer caso, após 10 segundos, as condições de ecrã normais são repostas.
Quando prime o botão de função para desactivar o alarme, a temperatura mais elevada atingida no compartimento é durante alguns segundos. apresentada no indicador Neste momento, indicação da temperatura pára de estar intermitente e a iluminação do visor muda de vermelho para branco. Durante a fase de alarme, o alarme sonoro pode ser desligado premindo o botão de função/interruptor de reiniciação do alarme. A iluminação do ecrã permanece vermelha até as condições de armazenamento normais serem repostas.
Produção de cubos de gelo Refrigeração do ar Este aparelho possui um ou mais tabuleiros para a produção de cubos de gelo. Encha estes tabuleiros com água, de seguida coloque-os no compartimento do congelador. A ventoinha da Refrigeração Dinâmica do Ar (DAC-Dynamic Air Cooling) permite refrigerar rapidamente os alimentos e obter uma temperatura mais uniforme dentro do compartimento. Importante Não utilize instrumentos metálicos para remover os tabuleiros do congelador.
Conselhos para a refrigeração de alimentos frescos Para obter o melhor desempenho: • não guarde alimentos quentes ou líquidos que se evaporam no frigorífico • cubra ou embrulhe os alimentos, particularmente se tiverem um cheiro forte • posicione os alimentos de modo a que o ar possa circular livremente em redor Conselhos para a refrigeração Conselhos úteis: Carne (todos os tipos) : embrulhe em sacos de politeno e coloque na prateleira de vidro acima da gaveta de vegetais.
• verifique regularmente os vedantes de porta e limpe-os para se certificar de que estão limpos e sem resíduos. • lave e seque minuciosamente. Importante Não puxe, desloque nem danifique quaisquer tubos e/ou cabos dentro do armário. Nunca utilize detergentes, pós abrasivos, produtos de limpeza muito perfumados ou cera de polir para limpar o interior, pois isto irá danificar a superfície e deixar um odor forte.
Advertência Nunca utilize ferramentas de metal pontiagudas para raspar o gelo do evaporador, pois pode danificá-lo. Não utilize um dispositivo mecânico ou qualquer meio artificial para acelerar o processo de descongelação além daqueles recomendados pelo fabricante. Um aumento de temperatura das embalagens de alimentos congelados, durante a descongelação, pode encurtar a vida útil de armazenamento.
Problema A água escorre na placa traseira do frigorífico. Possível causa Solução Durante o processo de descongelação Isto está correcto. automático, o gelo é descongelado na placa traseira. A água escorre para o frigorífico. A saída de água está obstruída. Limpe a saída da água. Os produtos evitam que a água escorra Certifique-se de que os produtos não para o colector de água. tocam na placa traseira. A água escorre para o chão.
6. Abra a porta. Certifique-se de que a lâmpada se acende. Fechar a porta 2. Se necessário, ajuste a porta. Consulte "Instalação". 3. Se necessário, substitua as juntas de porta defeituosas. Contacte o Centro de Assistência. 1. Limpe as juntas da porta. Dados técnicos Dimensão do nicho de instalação Altura 1780 mm Largura 560 mm Profundidade 550 mm Tempo de reinício 24 h As informações técnicas encontram-se na placa de dados no lado esquerdo interno do aparelho e na etiqueta de energia.
No lado oposto: • Instale o pino inferior. C • Instale a porta inferior. B • Volte a colocar os pinos A (B) e os espaçadores (C) na dobradiça do meio no lado oposto. • Instale a porta superior. • Desaperte o pino supe- • Retire a tampa da dobra- • Retire a porta inferior. rior e retire o espaçador. diça (A). Desaperte os • Desaperte o pino inferi- • Aperte o espaçador e o pino superior. pinos (B) e os espaça• Retire a cavilha superior or. dores (C). Coloque a e a porta superior. tampa da dobradiça (A).
2 I 4mm 1 44mm I Instale o aparelho no local de instalação. Empurre o aparelho na direcção das setas (1) até que a tampa do espaço superior pare contra o móvel de cozinha. Certifique-se de que a distância entre o aparelho e a extremidade frontal do armário é de 44 mm. Empurre o aparelho na direcção das setas (2) contra o armário no lado oposto da dobradiça. Certifique-se de que a folga entre o aparelho e o armário é de 4 mm.
ca. 50 mm Ha Hb Ha 90° 8 mm 21 mm 90° Hc Hd Ha Hc ca. 50 mm 21 mm Hb Separe as peças (Ha), (Hb), Instale a peça (Ha) no lado Pressione a peça (Hc) (Hc) e (Hd). interior do móvel de cozi- contra a peça (Ha). nha. Abra a porta do aparelho e a porta do móvel de cozinha a um ângulo de 90°. Insira o quadrado pequeno (Hb) na calha (Ha). Junte a porta do aparelho e a porta do móvel e assinale os orifícios.
222348413-00-042010 www.zanussi.