
Operation Manual


20 21 22
23 24 25
28
31
30
26
27
33
34
32
35
1
2
3
4
5
6
7
8 9
10
11
12
13 14
15
16
17
18 19
Safe ty pre cautions
Th is appliance is not inte nde d for us e by pe rs ons (including
ch ildre n) w ith re duce d ph ys ical, se nsory or m e ntal
capabilitie s , or lack of e xpe rie nce and k now le dge , unle ss
th e y h ave be e n give n supe rvis ion or ins truction conce rning
us e of th e appliance by a pe rs on re s pons ible for th e ir safe ty.
Th e vacuum cle ane r fe ature s double insulation and doe s not
ne e d to be e arth e d.
Ch ildre n sh ould be supe rvis e d to e ns ure th at th e y do not
play w ith th e appliance .
Ne ve r vacuum :
• In w e t are as.
• Clos e to am m able gase s , e tc.
• W ith out a dust bag (th is m ay dam age th e cle ane r). A
safe ty de vice is fitte d w h ich pre ve nts th e cove r to close
w ith out a dust bag. D o not atte m pt to force cove r to close .
• Sh arp obje cts.
• Fluids (th is can caus e se rious dam age to th e m ach ine ).
• H ot or cold cinde rs, lit cigare tte butts, e tc.
• Fine dust from plas te r, concre te , or or ash , for e xam ple .
Th e above can caus e se rious dam age to th e m otor —
dam age w h ich is not cove re d by th e w arranty.
Ele ctrical cable pre cautions:
• If th e supply cord is dam age d, it m us t be re place d by th e
m anufacture r, it’s se rvice age nt or sim ilary q ualifie d
pe rson in orde r to avoid a h azard. D am age to th e
cle ane r cable w ill not be cove re d by th e w arranty.
• Ne ve r pull or lift th e vacuum cle ane r by th e cable .
• D is conne ct th e plug from th e w all sock e t be fore cle aning
or m aintaining th e vacuum cle ane r.
• Re gularly ch e ck th at th e cable is not dam age d. Ne ve r us e
th e vacuum cle ane r if th e cable is dam age d.
All se rvice and re pairs m ust be carrie d out by an auth oris e d
Ele ctrolux se rvice ce ntre . Alw ays k e e p th e vacuum cle ane r in
a dry place .
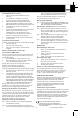
Be fore starting
(9 .) Ch e ck th at th e dus t bag and m otor filte r are in
place .
(10.) Ins e rt th e h os e until th e catch click s to e ngage
(pre s s th e catch to re le ase th e h ose ).
(11.) Attach th e e xte ns ion w and or te le s copic w and (only
on ce rtain m ode ls ) to th e h ose h andle and oor
nozzle (to tak e th e m apart again, tw ist and pull).
(12.) Exte nd th e cord and plug it into th e w all sock e t.
Th e vacuum cle ane r h as an inte grate d cord
w inde r. To re w ind th e cable pre s s th e foot pe dal
(tak e h old of th e plug to pre ve nt it strik ing you).
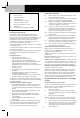
(13.) Start th e vacuum cle ane r by rotating th e pow e r
control button.
(13./14.) Adjus t suction pow e r us ing th e pow e r control
button on th e vacuum cle ane r or th e suction
control on th e h ose h andle .
(15.) A practical park ing fe ature (as w e ll as m inim izing
th e risk of bre ak age ) m ak e s th ings e asie r w h e n
paus ing during cle aning.
(16.) Th e park ing fe ature m ak e s it e asie r to m ove and
store th e vacuum cle ane r.
Use th e nozzle s as follow s:
Carpe ts: Us e th e carpe t/h ardfloor nozzle w ith th e le ve r in
position (17). Re duce s uction pow e r for s m all carpe ts.
H ard floors: Use th e carpe t/h ardfloor nozzle w ith th e le ve r
in position (18).
W oode n floors: Us e th e parq ue t nozzle (ce rtain m ode ls
only, 6).
Spe cial com bine d nozzle : D e tach th e nozzle from th e
acce ss ory dock and us e it for book sh e lve s (w ith folding out
of th e „brush ” e nd) or cre vice s , corne rs (w ith th e „cre vice ”
e nd) (8.)
Using th e turbo nozzle
(ce rtain m ode ls only) (7a)
(19 .) Attach th e nozzle to th e tube .
Note : D o not use th e pow e r or turbo nozzle on fur rugs, rugs
w ith long fringe s or a pile de pth e xce e ding 15 m m . To avoid
dam aging th e carpe t, do not k e e p th e nozzle stationary
w h ilst th e brush is rotating. D o not pass th e nozzle across
e le ctric cable s, and be sure to sw itch off th e vacuum cle ane r
im m e diate ly afte r use .
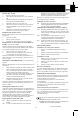
Re placing th e dust bag/cle aning th e filte r
Ch anging th e dust bag
Th e dus t bag m us t be re place d late s t w h e n th e indicator
w indow is com ple te ly re d. Re ad w ith th e nozzle lifte d up
(20.).
1. O pe n th e lid.
2. Pus h th e dus t bag h olde r back w ard (21.) and clos e
th e bag by sliding tab (22.).
3. Lift out th e dus t bag (23.).
Be w are : Lift out th e bag care fully if it’s com ple te ly full.
4. Ins e rt th e ne w dus t bag from ups ide by pus h ing th e
h olde r back w ard again.
5. Be fore closing th e lid m ak e sure th e h olde r is in th e
forw ard position and th e dus t bag cardboard is
ove r th e pipe -s tub .
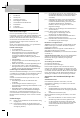
Acce ssorie s
1 D ust bag
2* Te le scopic tube
3* Exte ns ion tube (2)
4 H os e h andle + h ose
5 Carpe t/h ardfloor nozzle
6* Parq ue t nozzle
7* Turbo nozzle
8 Com bination nozzle
1
English
29
36
37