
User manual


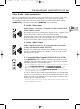


Basic connections
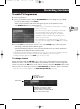
Consult the Quick Set-up Guide (A) supplied
with this handbook.
There are several ways you can incorporate your DVD player into its audio-video surroundings.
The simplest of these is described in detail in the Quick Set-up Guide supplied with this handbook.
This uses Scart-Peritel cables that combine Audio analogue connections for sound, and Video for
the RGB image.This connection ensures the optimum image quality (like Y, U,V). If you cannot use
Scart-Peritel sockets, the explanations on this and the followings pages should enable to you to
choose the method of connection best suited to the sockets and appliances you have. Sound and
image quality depend to a large extent on the types of connections used.
2
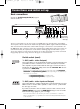
Connections and initial set up
Peritel socket (scart)
1 - AV1 (audio - video Outputs)
This socket allows you to transfer Audio and Video (sound and images) from
your DVD recorder to a television set or other device (flat screen, audio-
video amplifier, etc.) that is fitted with the same type of socket. In order to
benefit from the best image quality, ensure that the
OUTPUT SEL selector
is positioned on
RGB (AV1).
Note: if you use Y, Pb/Cb Pr/Pb sockets also known as YUV), select the Component
Interlaced or Component Progressive position depending on the possibilities of
the television set or monitor:
• Component Interlaced for interlaced scan,
• Component Progressive for progressive scan.
2 - AV2 (audio - video Input and Output)
This socket allows the sending of Audio Video (sound and images) from your
DVD recorder to another device (satellite or cable receiver, …) fitted with
the same type of socket.
If you have connected a cable or satellite receiver to this connector, in the
system Options menu select the RGB (AV1) setting in order to benefit
from the best image quality for your recordings.
Note: the Péritel socket is also known by the name of Péritélévision or Scart.The
latter is an abbreviation of « Syndicat des Constructeurs d’Appareils Radioélectriques
et de Télévision ».
28 3 4 5 6 7
1
Consult the
Quick Set-up
Guide (B).
A
B
02_DTH8560_en.qxd 23/09/05 14:45 Page 2